Definition
A team member is a participant linked to a partner through the partner workspace.
This participant is part of the partner's team and each participant can have a different role, managed in the partner workspace.
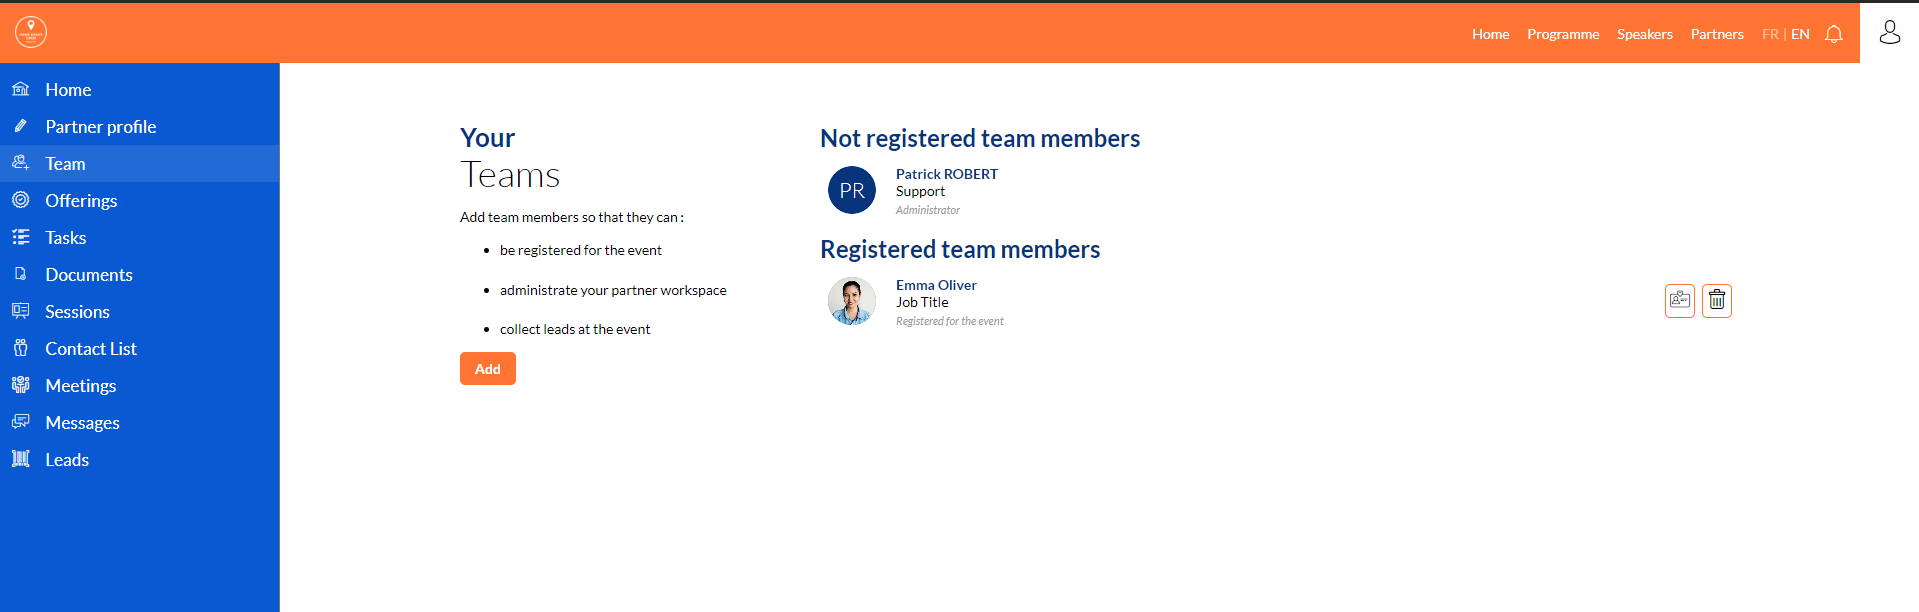
Partner will have all its team members on the menu Team of its workspace.
Add a team member
Through the back office
From the menu Partners / All partners :
- On the line of the partner, click on
 then on Team members
 - On the grid that appears, click on the button ➕ on the top left
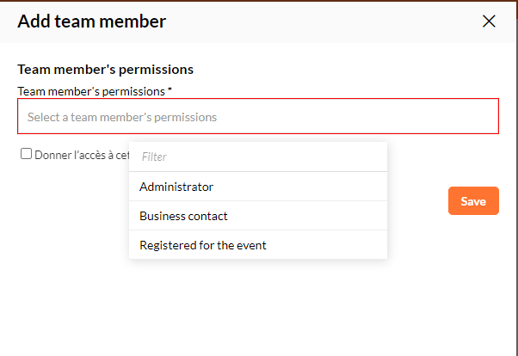
- Enter participant's information to add:
- Participant: click on Update, select a participant or create a new one by clicking on the button NEW.
- Role: read the section Team member roles to select the right role
- Click on SAVE to create this team member
When you open your partner workspace, it is necessary to:
- Create all partners
- Give an initial access to at least one person on the partner's team
- This initial access is added from inwink back office.
- You need to select at least the role Admin to this person.
Through the partner workspace
Once the first access is sent to the admin, he will be able to add his team.
To do so, from his partner workspace:
- He will go on the menu Team
- He will click on the button Add
- He will enter the email, the role(s) and the information of the person
Once added, the person can log in on the website to access the workspace.
This person will be added to the participants list avec the category Exhibitor.
Adding form personalisation
You can personalise questions asked when a partner add a new person to his team on the partner workspace.
To do so, from the CMS:
- Log in an access your test partner workspace
- Go on the menu Team
- Click on the button
 that appears when you pass over team members
 - Click on the button EDIT FORM
- Update your form and save modifications
Team member roles
There are three roles that can be combined to a team member:
- Administrator: this person can access the all workspace and all menus
- Business contact: this person is added on the partner page online, in order to facilitate the networking with this contact. On the other hand, it will have the possibility, in its participant space, to manage its own business meetings (if you give access). You can find more information about this role on this online help
- Registered for the event: this person will have a badge to access the event
Role is added when a team member is added through the back office or through the partner workspace.
When a team member is added, the registration status is different depending on the role: only participants with the Registered of the event access role will have the registration status as Registered (and a badge).
If a person doesn't have a badge, she will be added with a registration status as Refused.
If your badges are A4 paper badges, you can allow partners to download and print their badge before the event, form their workspace.
To do so, go on the CMS, log in and access the menu Team:
- Click on the button
 when you passe over team members
 - Activate the option Display badges by passing it on ON
- Partners will have a icon
 to download their badge
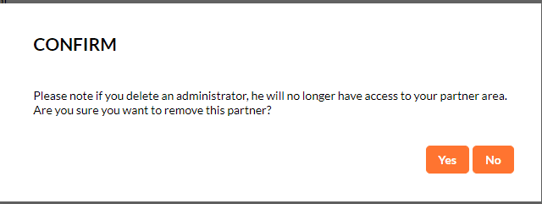
Delete a team member
Through the back office
From the menu Partner/ All partrners:
- On the line of the partner, click on
 then on Team members
 - Select the member to delete and click on the button
 on the top left
Through the partner workspace
To delete a team member, partner must:
- Go on its workspace
- Go on the menu Team
- Click on the icon
 on the line of the person to delete
Team member only delete link between the partner and the person.
The participant will still be on the participants list, depending on his registration status.
Dynamize the content of the partner area
You can give access to certain tabs of the partner area menu, depending on the roles of each person in your team. To do so:
- Edit the member permission form (from CMS > team tab > edit content header)
- Add a new field of type "yes/no" and fill in its title
- Validate your choice and save your changes
-gif.gif)
- Then edit your burger menu > edit the desired tab
- In the tab "Display conditions" > display content if > select the field you have just created and select the option TRUE ➡️ so that the tab is only accessible if the filled field is = TRUE
- Validate your choice
➡️ You will find this option in the permission form when adding a partner team member.
If you check "YES", the tab will be visible and accessible for this new member.