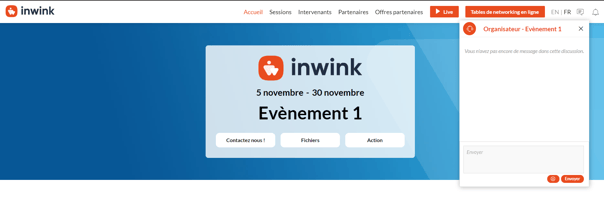
On your site, behind a button, you can add various links.
- No link: the button will be displayed on your site, but won't be clickable and won't lead anywhere.
- inwink page: links to an inwink page already created
- URL: add a direct URL behind this button
- Email address: by adding an email address behind this button, the person browsing the site who clicks on it will then arrive in his or her inbox, in order to write an email to the person behind the button (if you fill in a subject, this will automatically be included in the email).

- File: once a file has been hosted within your event, [website tab > site content > file (more information in this online help)], you can add the desired file behind this button. When the user clicks on this button, they'll be taken to a new tab where they can view the new file.
- Action: by selecting this option, you'll be presented with a panel of proposals enabling you to create an action behind a button
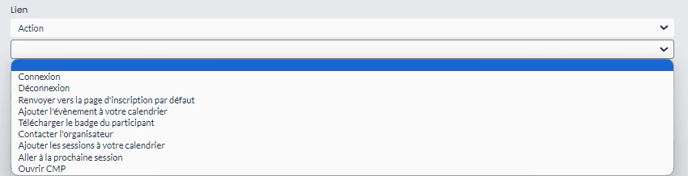
- Login: this action takes you to the authentication page for logging on to the site.
- Logout: this action allows you to log out of the site, if you are already logged in.
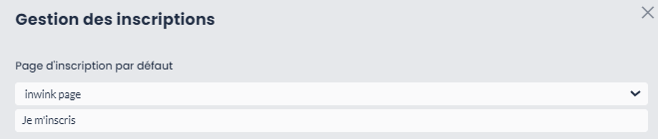
- Send to default registration page: this action takes a user to the default registration page (configured in the event back-office > configuration > module > registration management).
- Add the event to your calendar: an ics (or iCalendar) link will be uploaded so that it can be added to one of the suggested applications.
- Download the participant's badge: if the user is logged in, they can download their badge for the event with a single click.
- Contact the organizer: a pop-up window will open, enabling the user to contact the event organizer directly.
- Add sessions to your calendar: the sessions you have bookmarked will be downloadable and you can add them directly to one of the suggested applications.
- Go to next session: this action takes you to the next session scheduled in your back office (if you've added a room and times).
- Open CMP: click on this button to open the consement management platform pop-up to accept or reject them.
- Anchor: links to a specific block on the same page.
- Share on social networks: this action lets you select one of the 3 social networks (Facebook, Twitter and LinkedIn) to share the event with a single click.
How do I condition the display of a button?
Go to the "Display conditions" tab when editing your button: 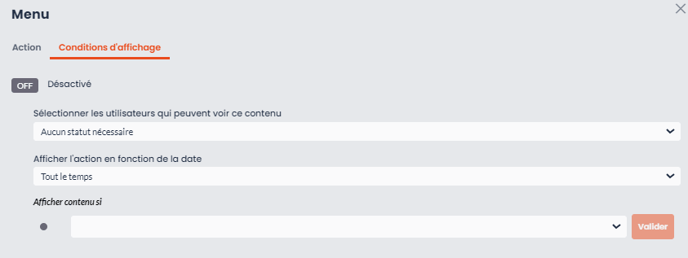
Here you can :
- Disable the button: by checking this option, the button will disappear (but not be deleted).
- Select the users who can see this button (from 6 options)
- Display the action according to the date of the event (the date conditioned in your event's general information):
- Date before event
- Date during event
- All dates
- Custom dates
⚠️ As event administrator, if you add a date-dependent display condition, the button will still be visible on the CMS and site preview. The button will be grayed out, but visible and clickable.
➡️ Go to the published version to see if the button behaves as configured.
- Show content if: here you can select another option for configuring the button's display.