Translation
View, edit, export and import all text fields of a site, event or community, and their translations
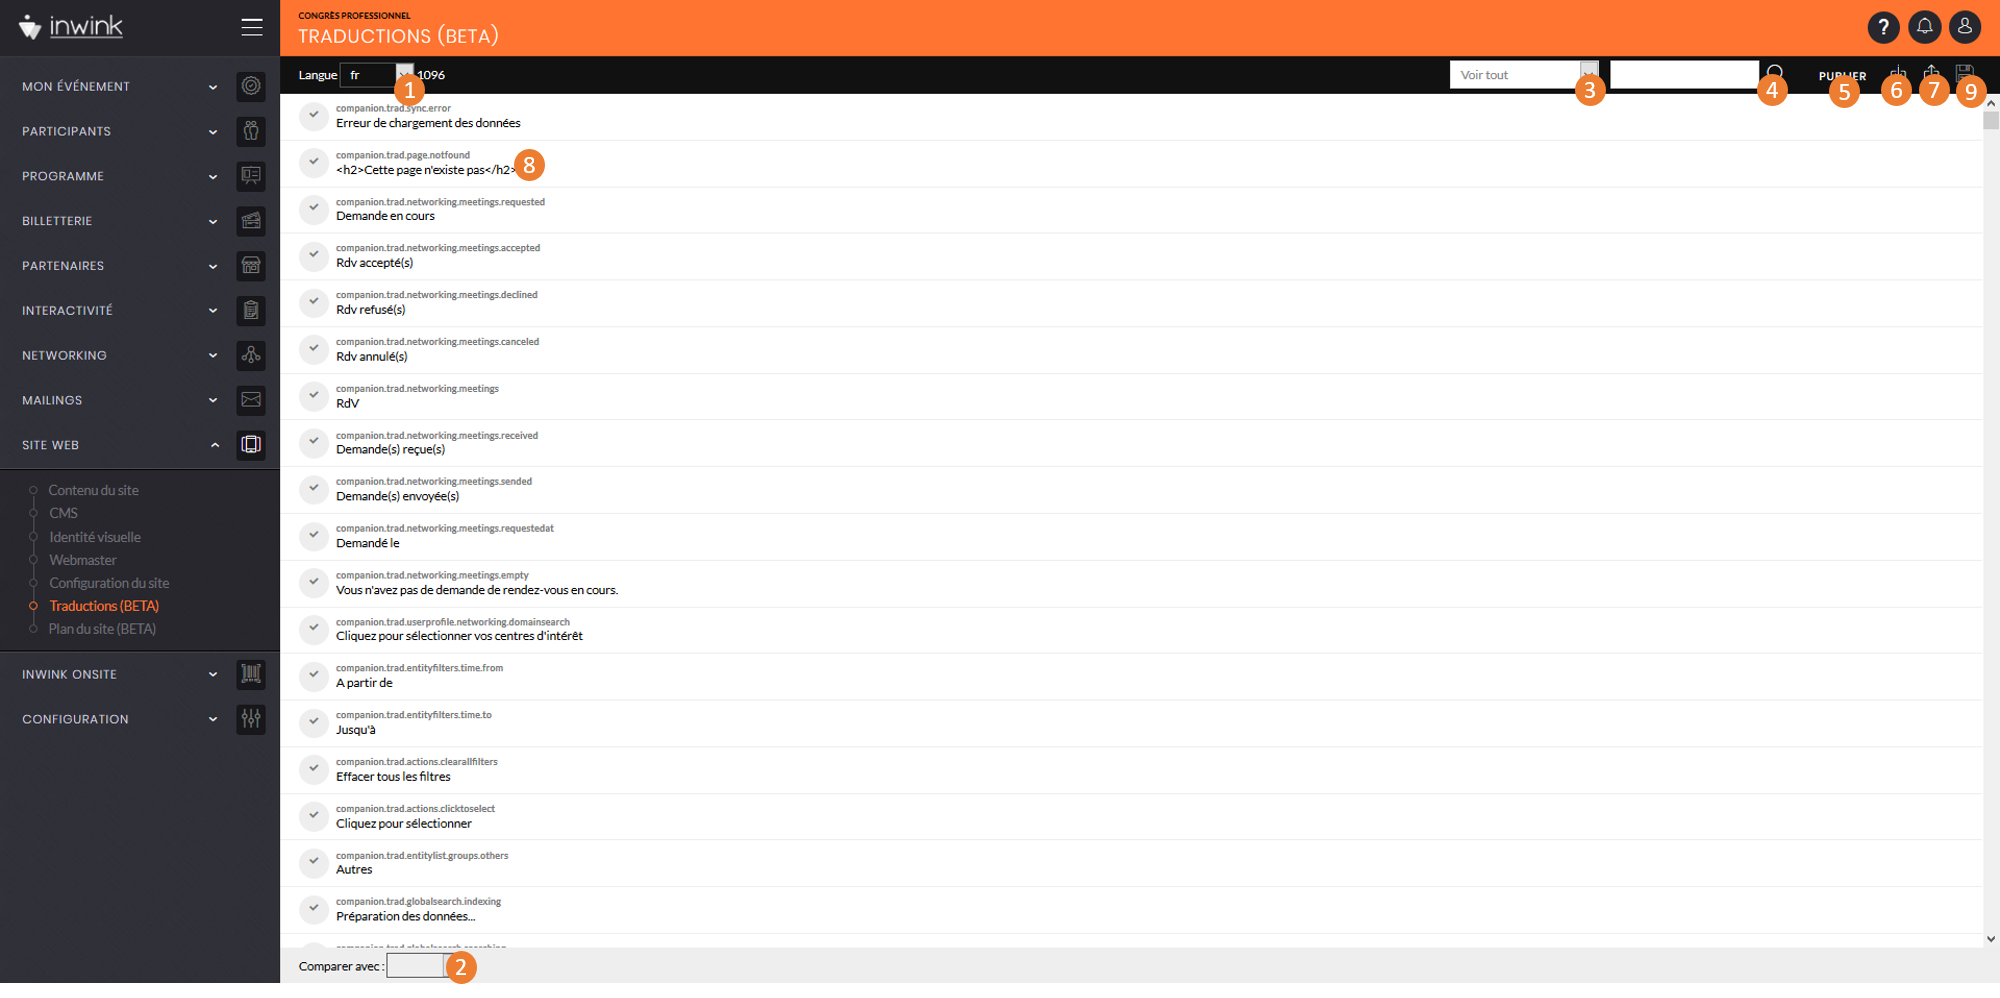
Translations grid
Click on WEBSITE > Translations (BETA) in the Back-Office of the event.
 Translations grid in the Back-Office of the event
1. Language: select the language to use in order to see the textual content of the website.
2. Main: select the language to use in order to see the website’s translations.
3. Text: select the textual fields to display in the grid:
- See all: all the fields
- See translations with a warning: all textual fields inwink warned about
- See not specified translations: all the fields where no translation is filled in
4. Text search: look for a textual field and its translation by filling in its content of technical code, then by clicking on the magnifying glass once.
5. Import translations: here, import translations that were gathered in an Excel file.
The Excel file must contain the technical codes of the fields to import in the first column. To export the list of these technical codes, refer to point 6.
6. Publish: publish saved translations (button 8)
7. Export translations: export all the fields of the login screen with their technical codes and translations already available in the event’s Back-Office.
8. Save: remember to save once the translations are modified (manually or through an import).
9. Manual modification: click on the line where the translation to modify is located to modify it manually.
It is advised to choose the import of translations in order to keep a trace of the modifications.
Go to preview to notice the loading of the translations once they are loaded and saved.
