Sign an attendee from the list
From the subscribers’ grid, it is possible to sign an attendee from the subscribers’ grid by clicking on the checkbox on the right of the line of the attendee on the screen.
When the ![]() box is checked, the attendee is shown as “came” to the event on the inwink Back-Office.
box is checked, the attendee is shown as “came” to the event on the inwink Back-Office.
Print an attendee badge
It is possible to print an attendee badge from the attendance list by clicking on the ![]() button.
button.
Once the badge is printed, the attendee status is shown as “came”.
Beware:
- The badge printing requires the device (PC or Surface Pro tablet computer only) to be connected and set up to a printer.
- A script will then appear at the time of the first printing, it should not be closed (you can however reduce it).
Sign an attendee from a scan
If the attendees pre-printed their badge and show it at the event reception desk, it is possible to proceed to a sign in thanks to a scan.
Click on the ![]() icon and take a picture of the participant badge with the tablet computer’s or smartphone’s camera.
icon and take a picture of the participant badge with the tablet computer’s or smartphone’s camera.
The attendee status will automatically be shown as “came” to the event and the ![]() box will be checked.
box will be checked.
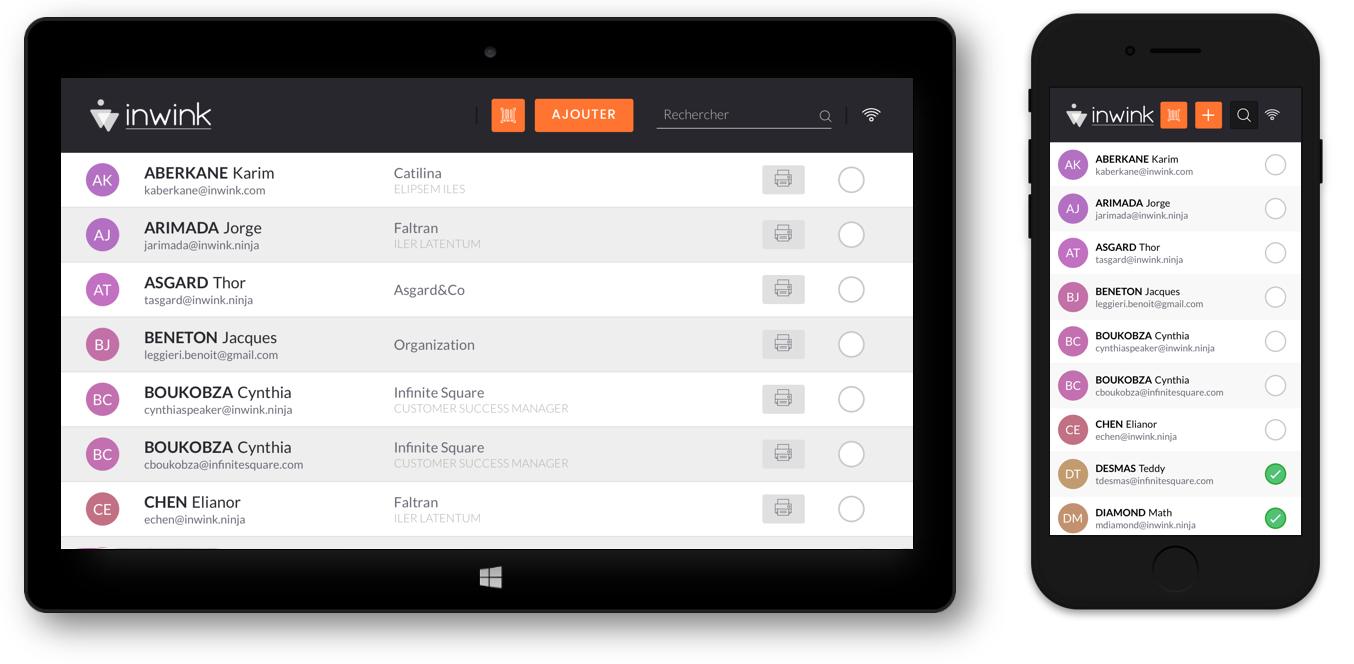
Look for an attendee on the list
It is possible to look for an attendee on the inwink onsite search bar.
Search criteria are applied on: first name, last name, company and email of the attendee.
Add a non-registered attendee
An attendee is not on the list?
It is possible to add an attendee thanks to the ADD button.
Thus it is possible to:
- Fill in their information
- Print their badge
- Validate their attendance
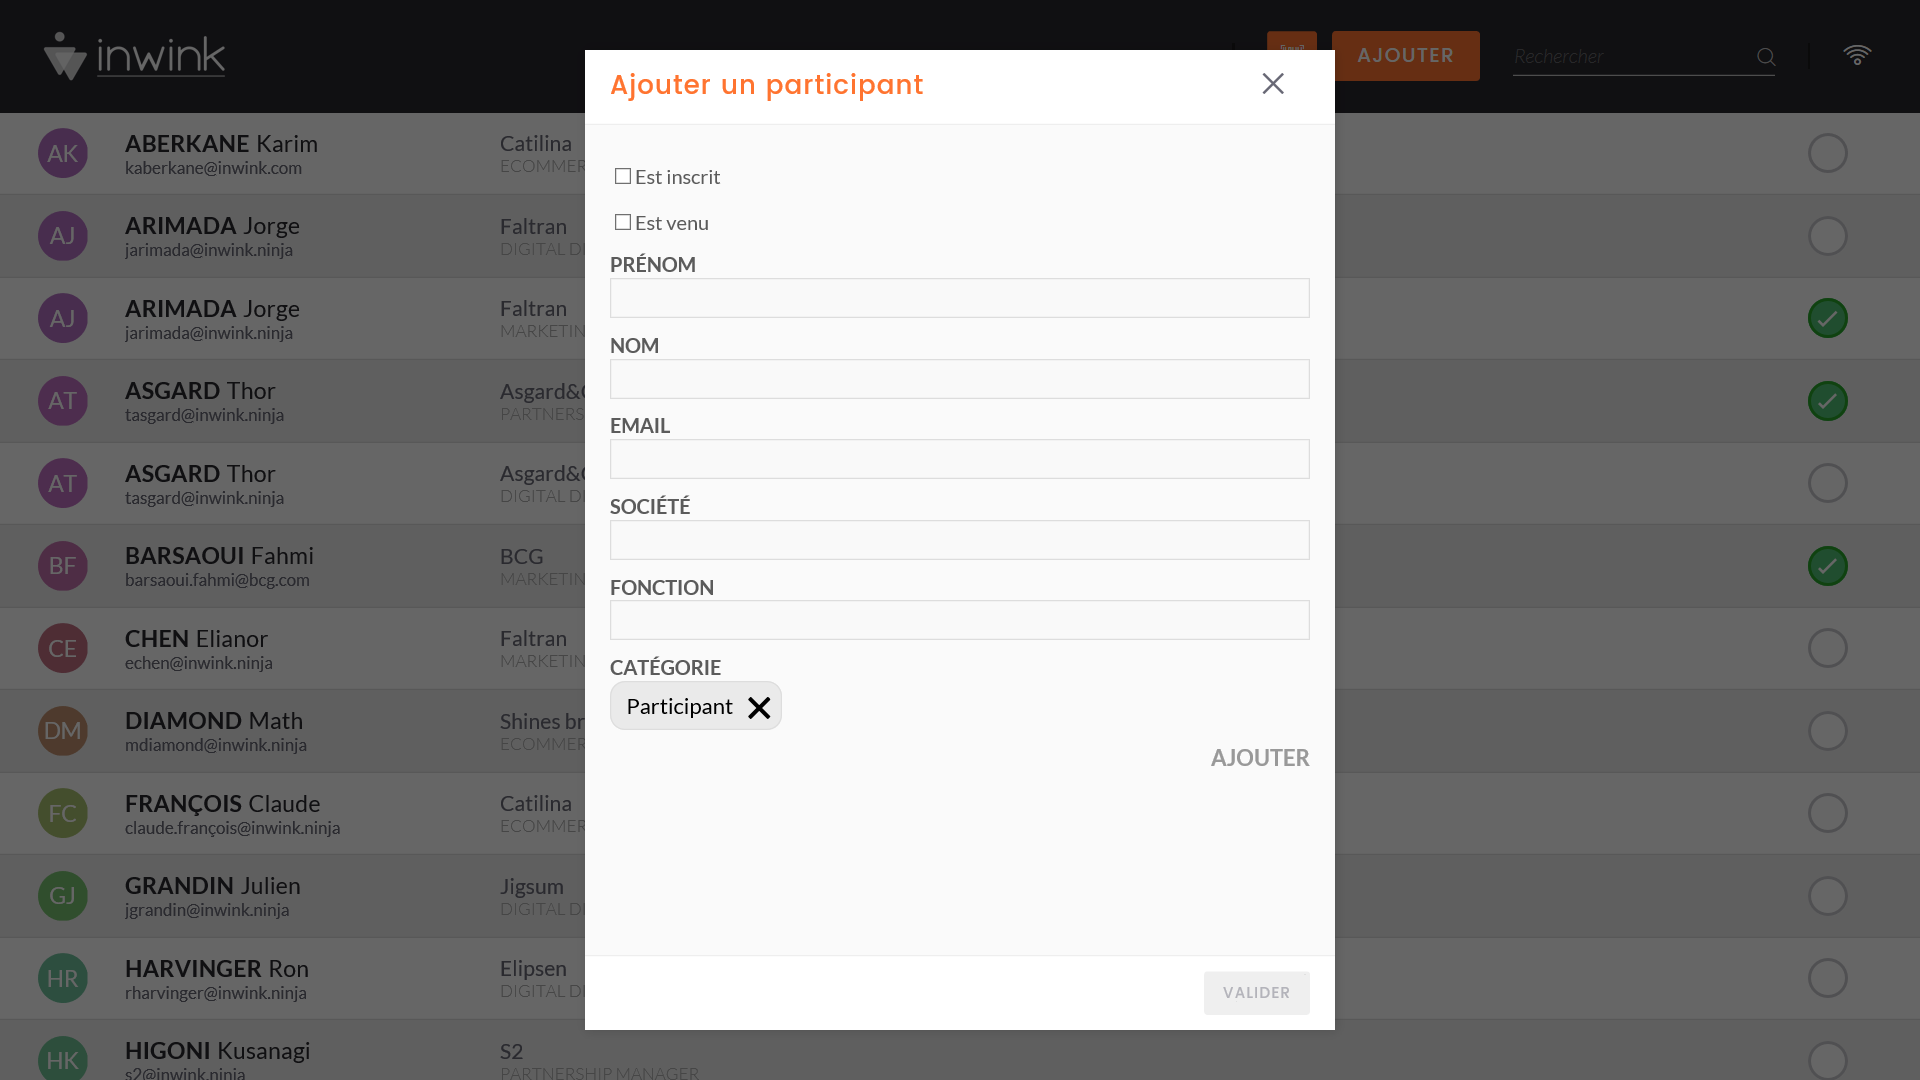
Once the form is completed, click on the CONFIRM button to add the attendee.
Modify an attendee
To edit the information on an attendee, please click on the corresponding line on the grid.
Then go to private information and modify the fields.

Once the form is edited, click on the CONFIRM button to update the attendee’s information.
Personalize the app information fields
To personalize the inwink onsite app forms and information fields, please go to the Back-Office > inwink onsite > Set up.
Click on the “Set Up” button on the “Signature” thumbnail.
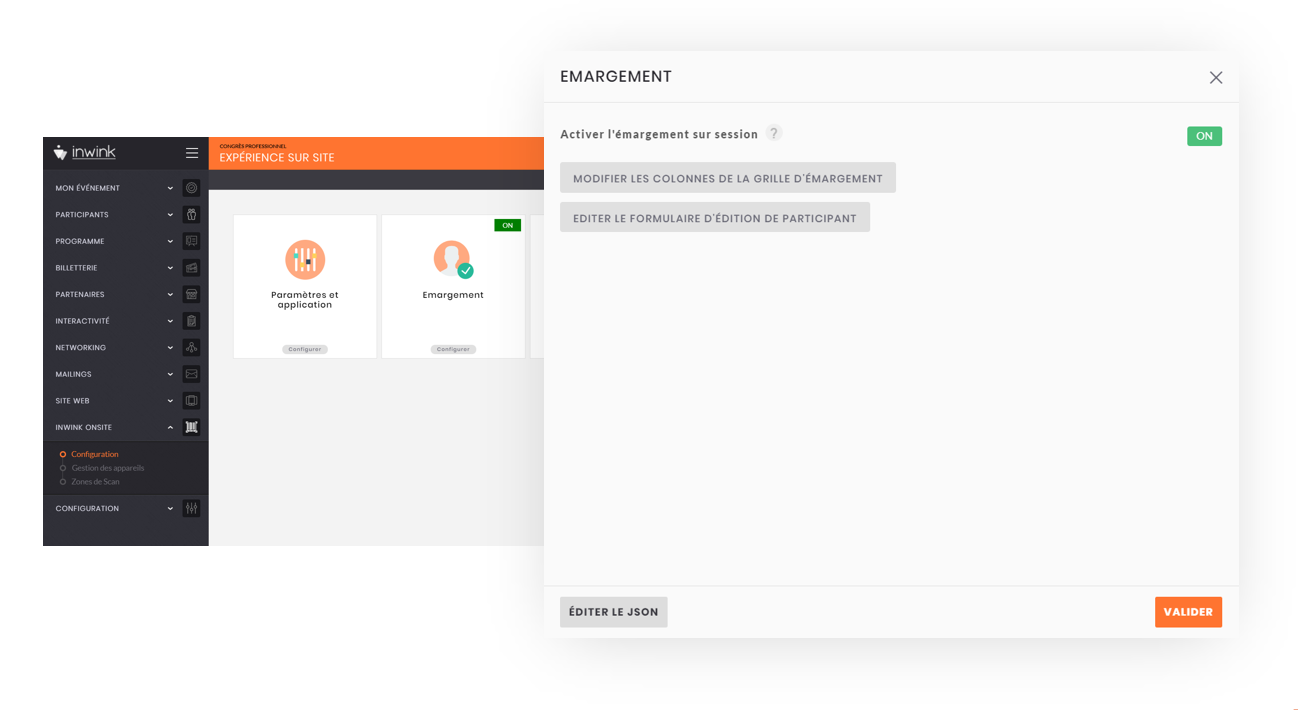
1. Modify the columns on the signature grid
The columns on the signature grid of the inwink onsite app are customizable.
It is possible to add, modify, cancel and change the order of the columns.
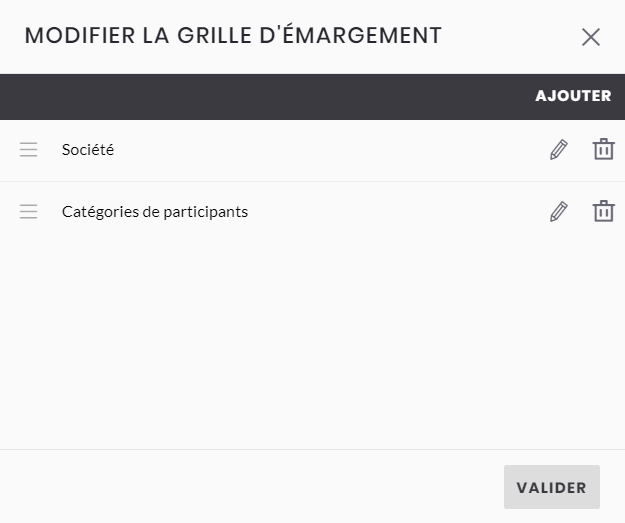
For every column, it is possible to fill in a “main information” and a “secondary information”. For example, let’s add a column with the attendee’s “Company” and “Position” information.
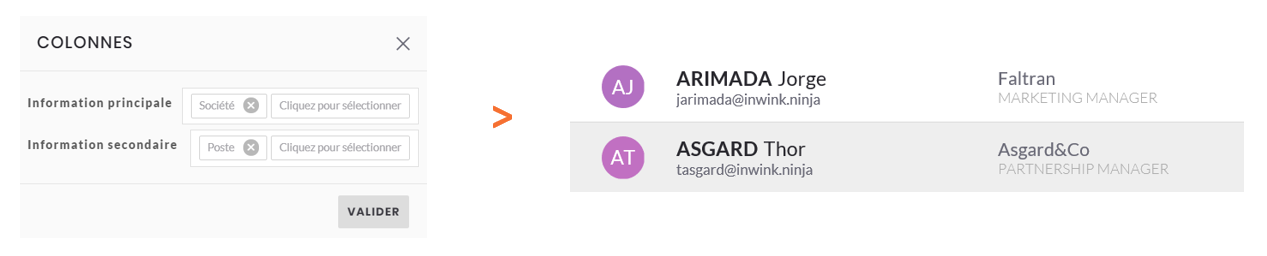 Modification of the columns information from the Back-Office > Display on the inwink onsite app
Once this configuration is validated, and in order to activate the display of the information on the app, it is necessary to update the inwink onsite app configuration.
Additions of these new columns will not be visible on phone due to screen size. You will only be able to see these additions on your computer screen.
2. Edit the input and modification form of the attendee
The fields of the attendee’s input and modification form on inwink onsite also are customizable. Still in the Back-Office, it is possible to add, modify, cancel and change the position of the fields of the form.
For example, let’s add here a field “color of the lanyard” at the end of the form which is visible on the inwink onsite application.
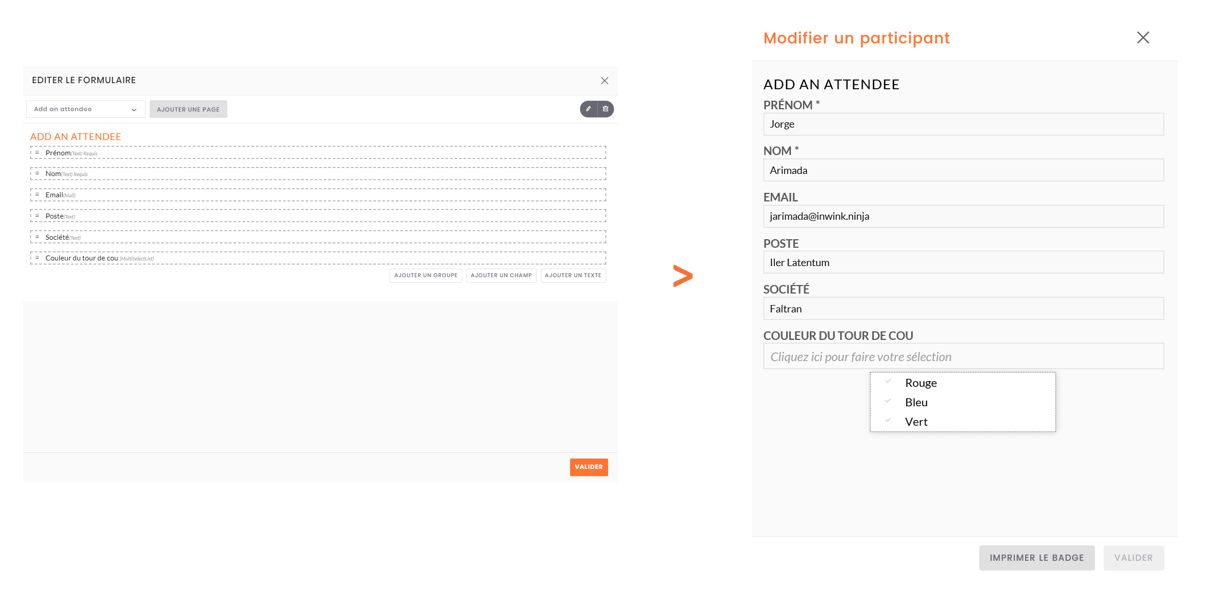 Edition of the attendee form from the Back-Office > Insight of the attendee form on the inwink onsite app
Once this configuration is validated, and in order to activate the display of the information in the app, it is necessary to update the inwink onsite app configuration.
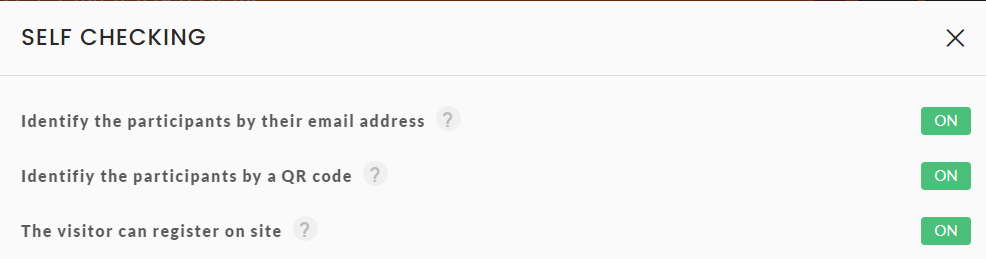
Self Check-in for a participant
This means that a participant can sign in on his or her own from one of your devices.
For example from your tablet or computer (does not work on smartphones) you can from inwink Onsite choose the self check-in option
To add Self checking to your event, you need to activate the "Self checking" module in the Back-Office (inwink onsite > Configuration)
-
You then have the possibility to define specific configurations (these configurations can be activated separately or all together)
-
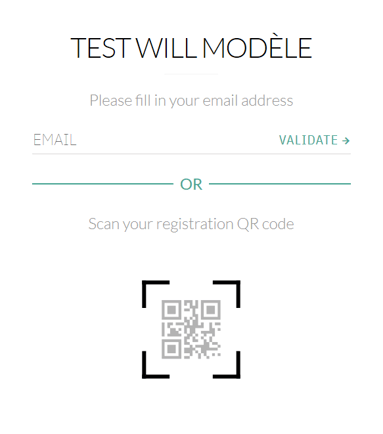
Visitors can identify themselves with their registration email address: if their address is recognised, then they can print their badge
-
Visitors can identify themselves with their Qr Code (sent before the event by email): if the QrCode is recognised, then they can print their badge
-
The visitor can register on site: if this configuration is activated, then the visitor who is not registered for the event will be able to fill in a form to register to print his badge (form that you will have to create in the back office). If this configuration is not activated, then an unrecognised visitor will not be able to register and will be invited to approach someone from the organisation
-
- Then from your tablet or computer (as a reminder this does not work on smartphones) you can from inwink Onsite choose the auto-upload option

The participant will then be able to register himself by entering his email address or QR code