1. Activate interactivities on a session
The first step if you want to use interactivities on a session is to activate the feature for this specific session.
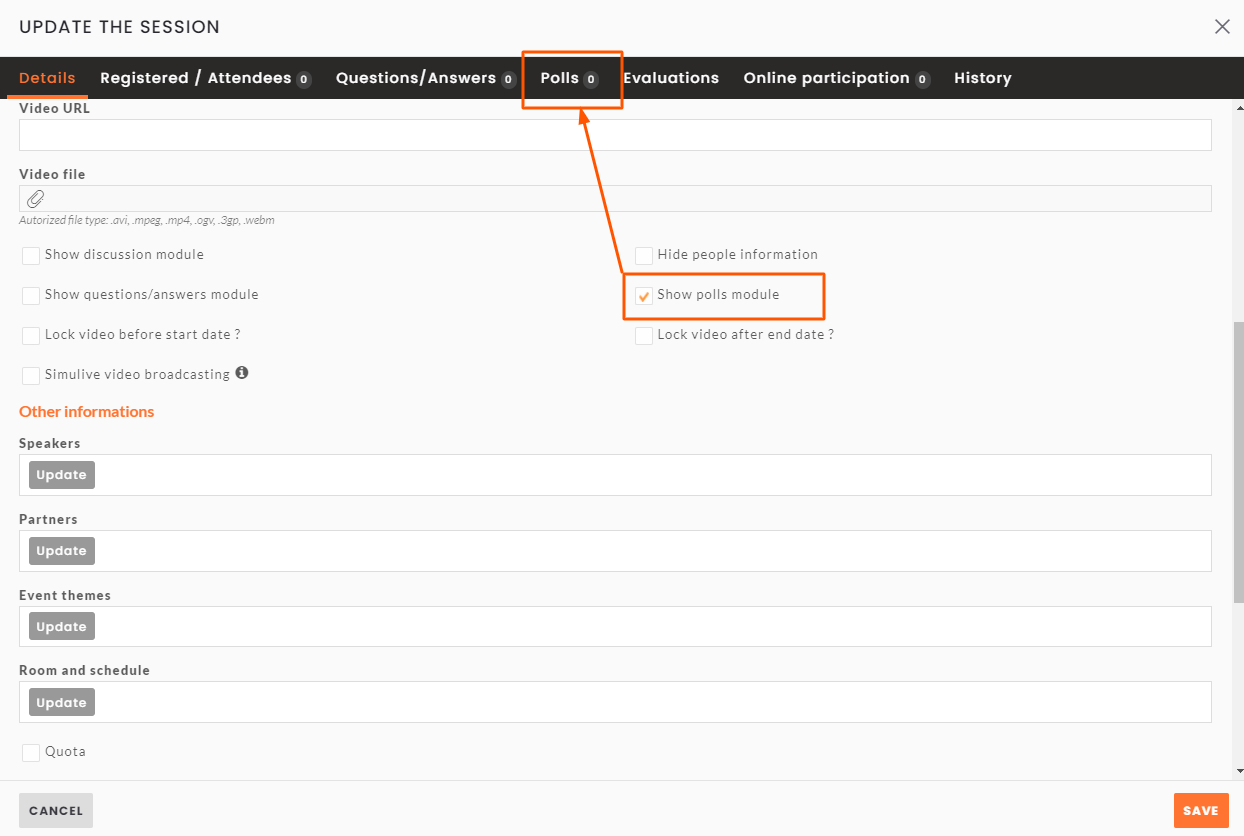
When you edit a session, first make sure the Session type is Online session, for interactivities are only available on online sessions.
Then, in the options of the session, tick the Show the interactivity tab checkbox. A new Interactivity tab appears in the session edition window.
 Activate Interactivities
Create interactivities
A. Polls
1. Create polls
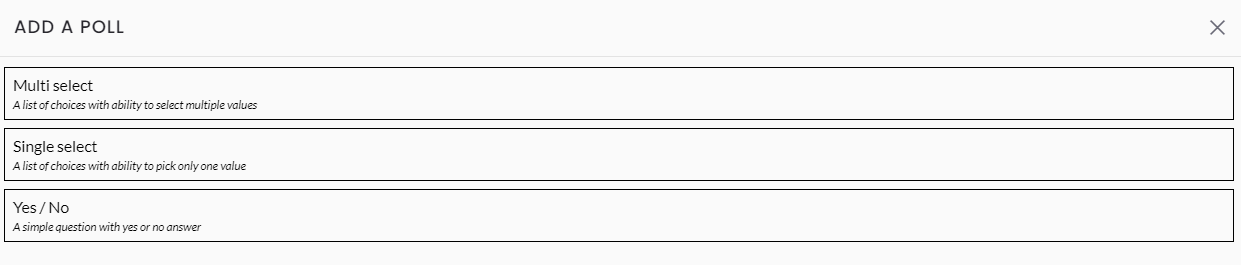
In the back-office, go to the All sessions menu, and edit the session for which you want to create polls.
Go to the Interactivity tab.
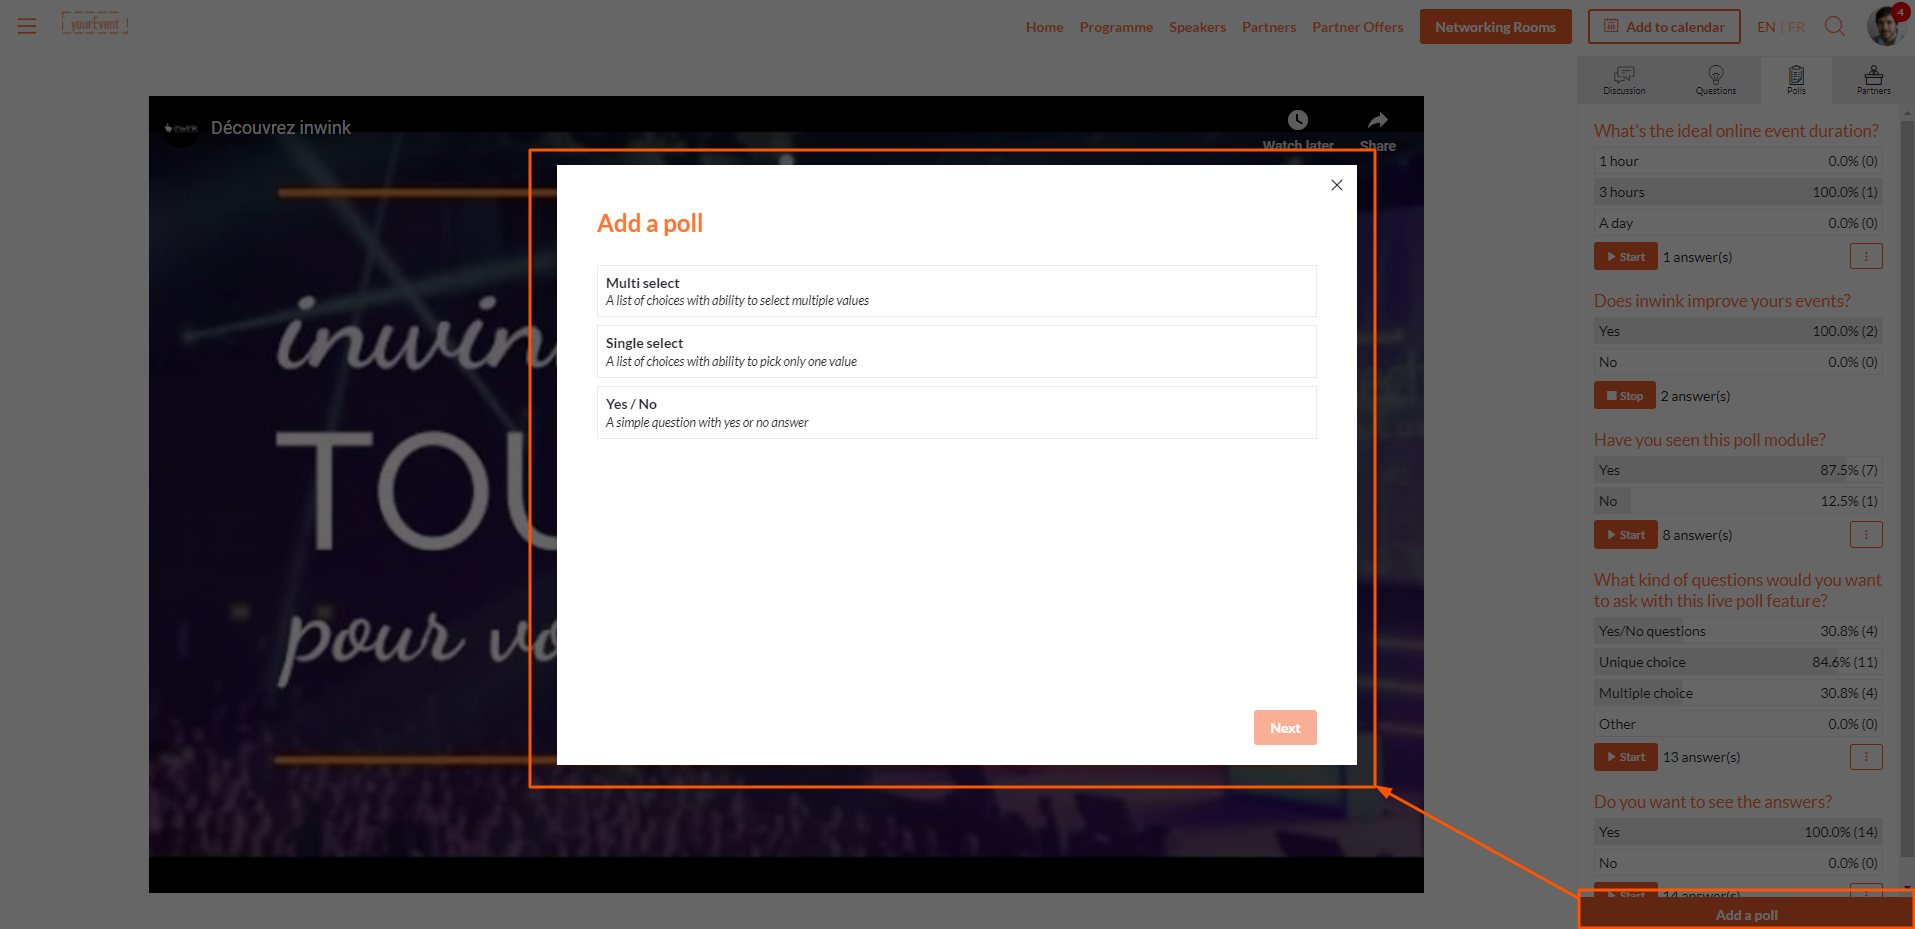
Click on the + button at the top left corner of the window, and select the kind of poll you want to add:
 Types of polls
- Multi select : the participants will have to choose one or more answers in a list of options
- Single select: the participants will have to choose one unique answer in a list of options
- Yes / No: the participants will have to answer to a Yes / No question (you can edit the Yes / No labels)
A. MULTI SELECT POLLS
 Multi select polls edition
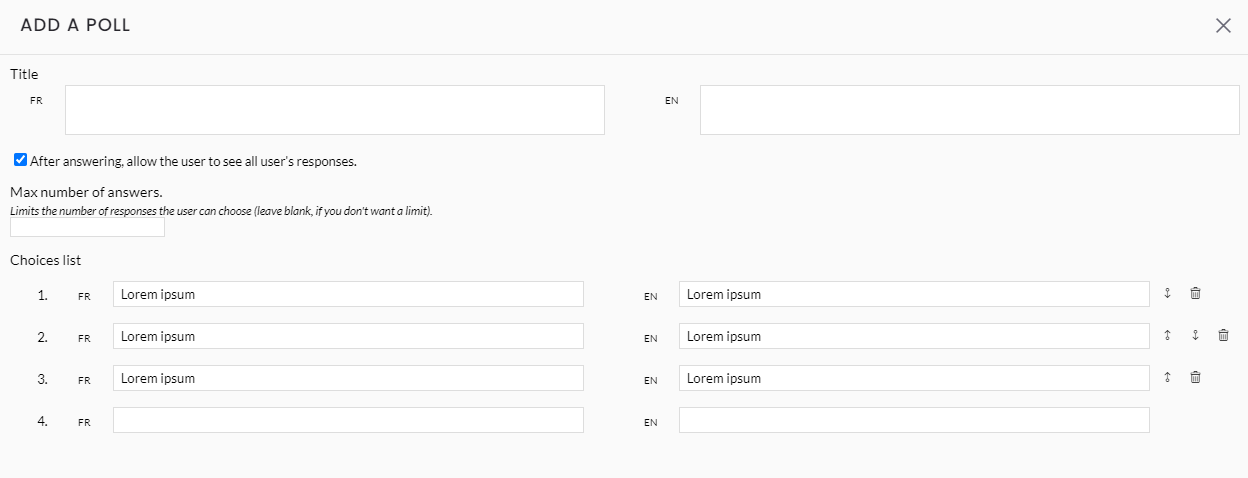
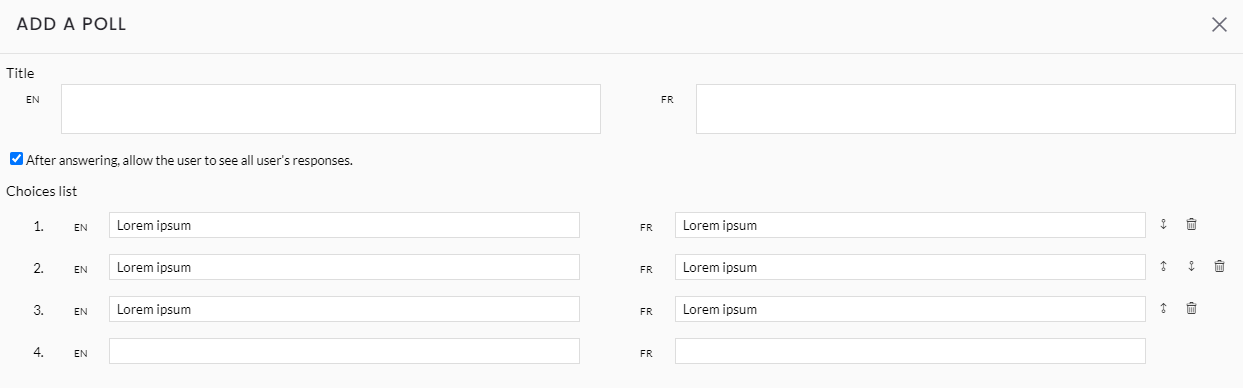
- Title: Edit the title of your question here
- After answering, allow te user to see all users' responses : if the checkbox is ticked, the participant who gives an answer will the live results of the poll immediately after submitting his answer
- Max number of answers: the maximum number of options a participant can select in his answer
- Choices list: add the options that can be selected here, reorganize them and delete them if need be
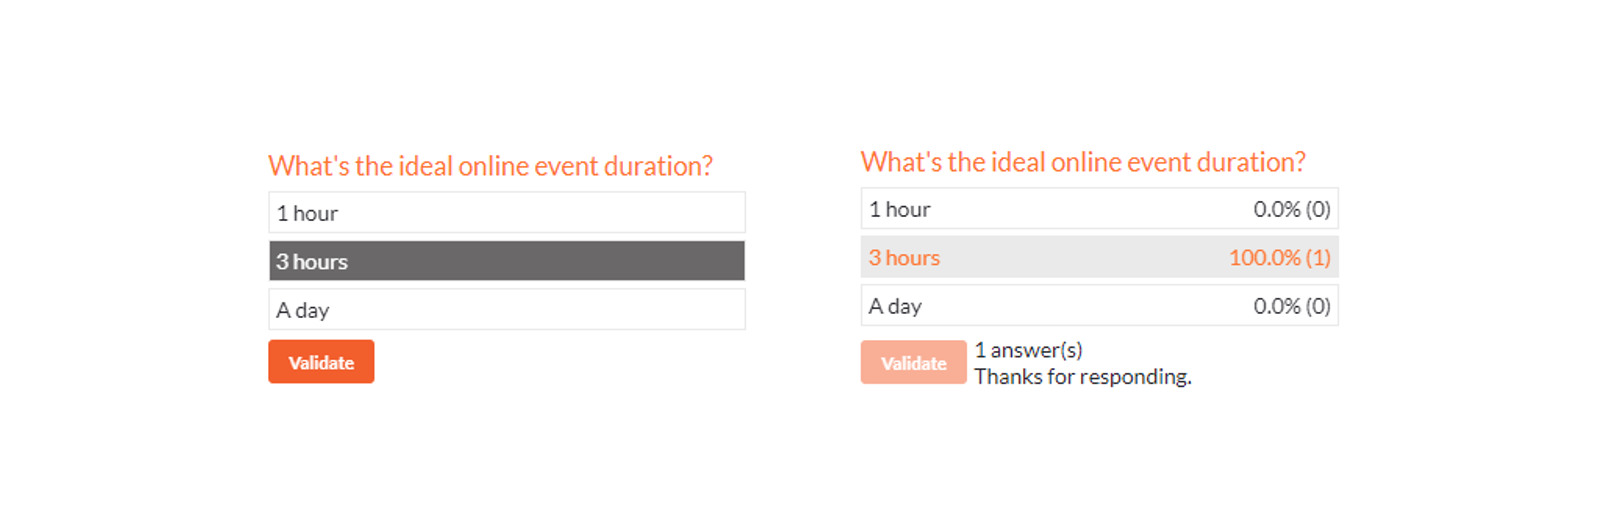
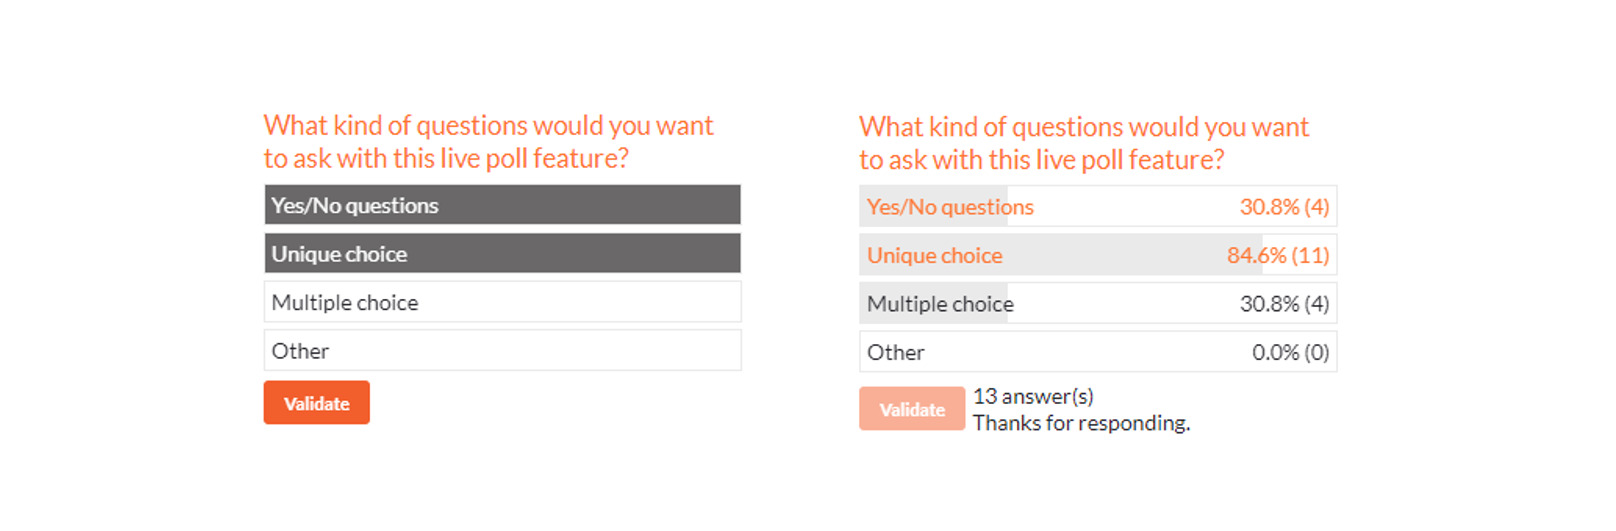 Multi select polls before and after the answer
B. SINGLE SELECT POLLS
 Single select polls edition
- Title: Edit the title of your question here
- After answering, allow te user to see all users' responses : if the checkbox is ticked, the participant who gives an answer will the live results of the poll immediately after submitting his answer
- Choices list: add the options that can be selected here, reorganize them and delete them if need be
 Single select polls before and after the answer
C. YES / NO
 Yes / No polls edition
- Title: Edit the title of your question here
- After answering, allow te user to see all users' responses : if the checkbox is ticked, the participant who gives an answer will the live results of the poll immediately after submitting his answer
- Choices list: Reorganize and edit the label of the two possible answers
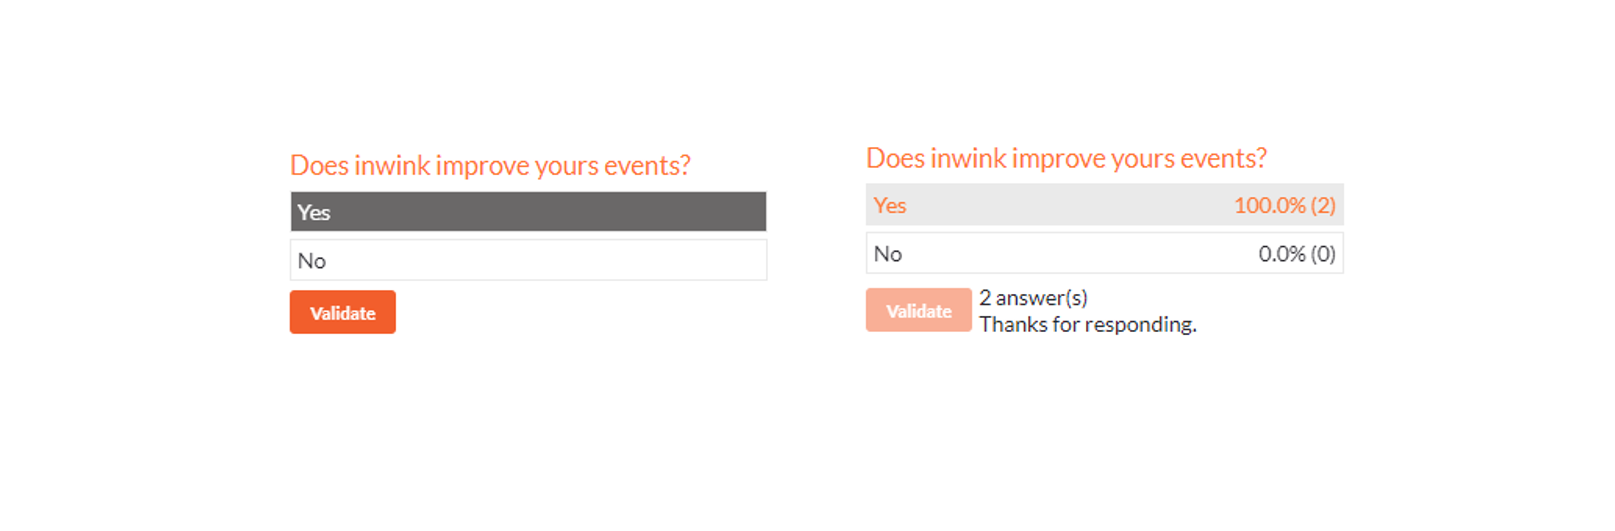 Yes / No polls before and after the answer
2. Create polls in the event website
Speakers can create and manage polls directly on the website:
 Add polls as a speaker on the website
In order to be able to do so, the speaker needs to be:
- added as a speaker of a session in the session edition page
- logged in with the email address used in his/her profile in the back-office
- in the virtual room of the session
3. Start and stop polls
Once a poll is created, in the back-office or in the session virtual room on the website, click on :
- the Start button to start the poll
- the Stop button to stop the poll
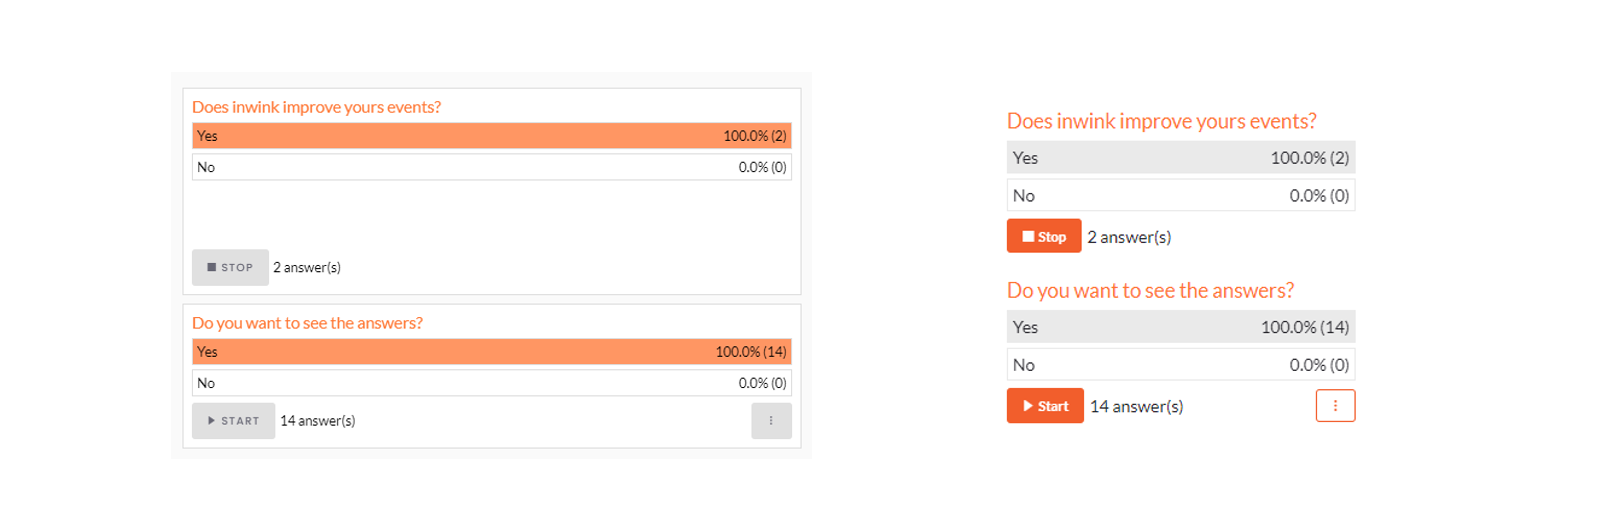 Start and Stop a poll from the Back-Office / the event website
4 Edit, delete and export answers
In the Back-Office of the event, you can edit, delete and export the answers of polls by clicking on the button  .
.
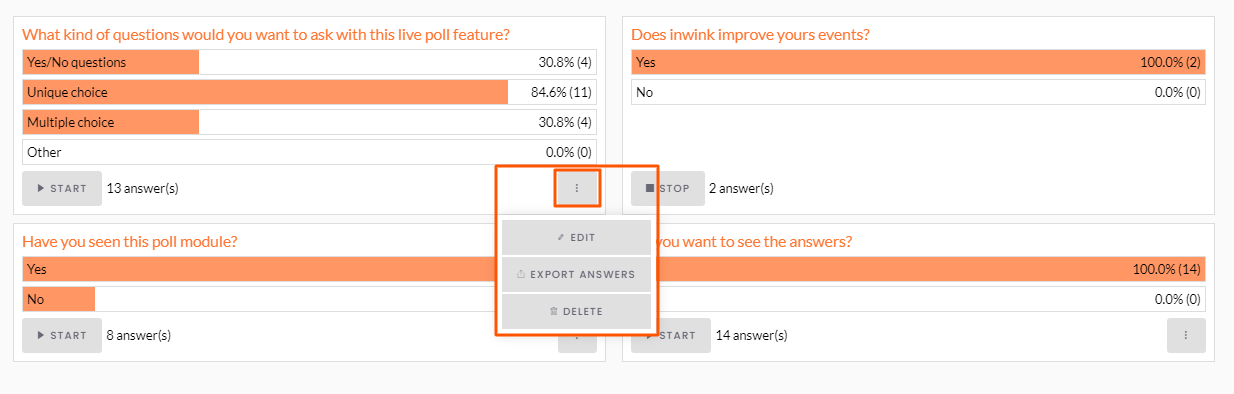 Edit, export answers, delete options
B. Actions
1. Create actions
Actions can be created both in the back-office of your event and in the your event website, provided the person creating them has a Speaker / Administrator role for the session. However, on the website, speakers / moderators can only create actions that link to a published page of the website, or an external URL, while in the back-office, more possibilities are proposed.
In the back-office, go to the All sessions menu, and edit the session for which you want to create polls.
Go to the Interactivity tab.
Click on the + button at the top left corner of the window, and select the Action item, then click on Next at the bottom right corner of the window:
 Actions
On the next screen, fill in the following fields :
- Title (optional): give a title to your action, it will appear as a title above the call-to-action button (80 characters max, so be concise)
- Description (optional): give a description of what the button is going to do (165 characters max)
- Action button label (mandatory): enter the label of the button you are creating (60 characters max, though you should keep the label as short as possible)
- Action button link (mandatory) : select what the button will do (go to a page of the event, download a file, send an email and so on)
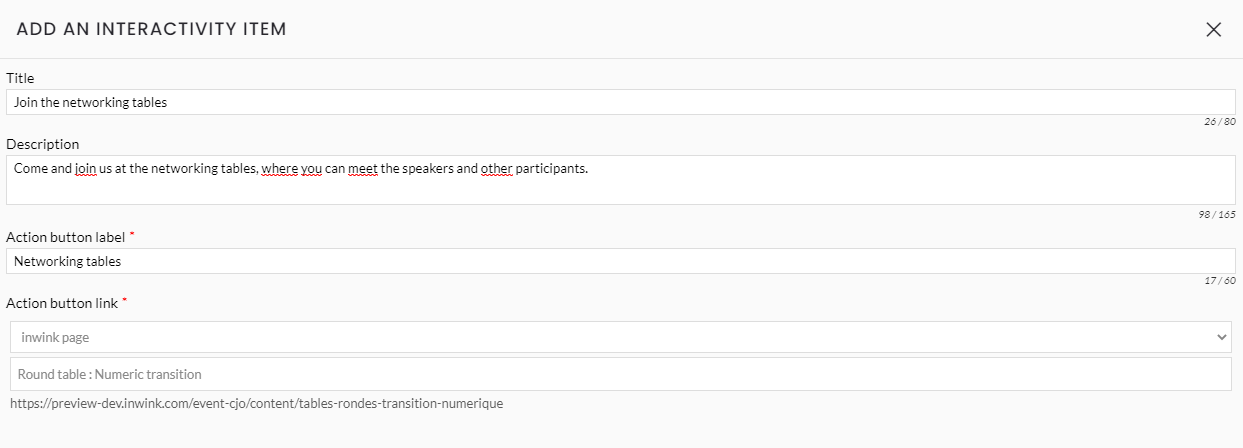 Action item edition
Click on Validate at the bottom right corner of the window to save the action item.
2. Show / hide action items during the session
Once the action item is created, it should appear in the back-office of your event in the Interactivity tab of your session, and in the event website, in the interactivity tab of the session if you are logged in as a speaker / moderator of the session :
 On the left, an action item in the Back-Office, on the right, an action item on the event website
To display the button to participants, click on SHOW. Once this is done, the action item will automatically be displayed to all participants in the interactivity tab of the session on the event website.
You can then decide to hide the action item by clicking on HIDE.
The action items will be displayed in chronological order according to their publication date. They will always be displayed above the polls you might also launch during the session.