Prerequisites:
Having a Salesforce account and being administrator.
Configuration of the connector
Step 1
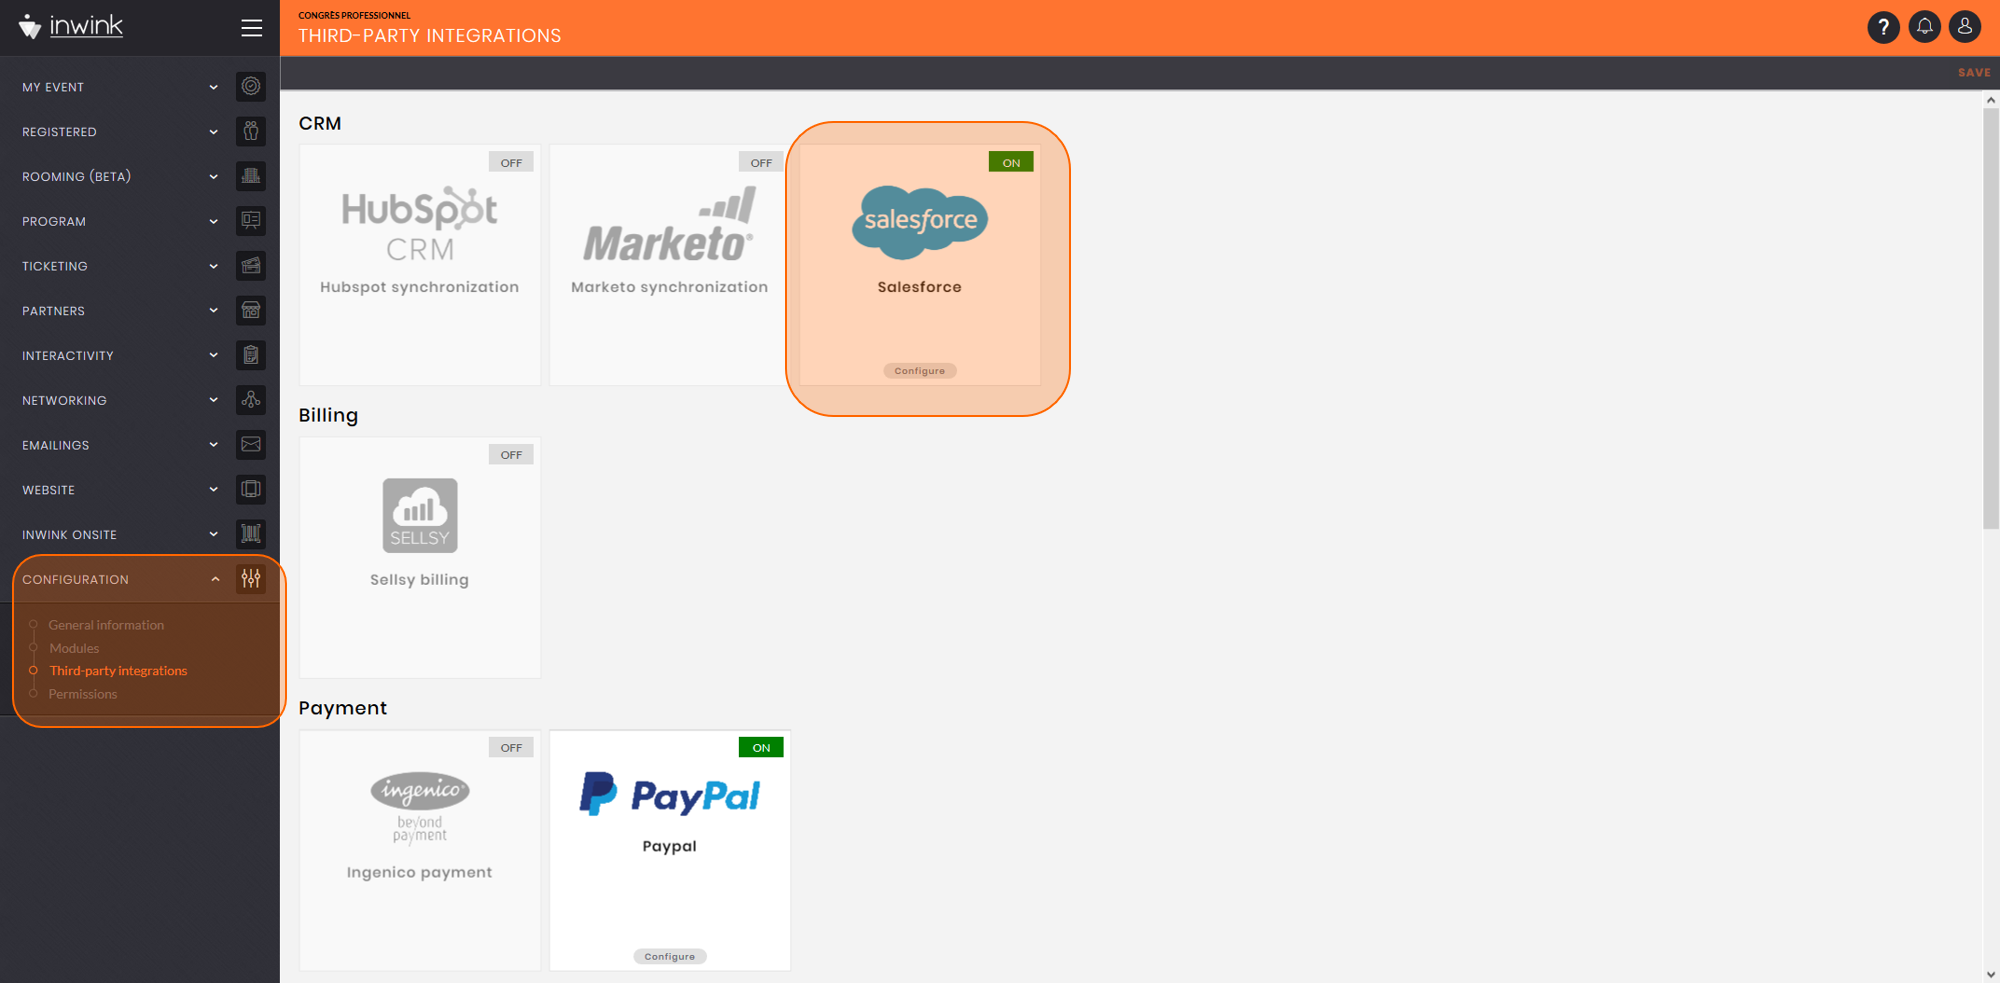
Go to Configuration > Third-Party tools integration in the inwink Back-Office of the event and activate the Salesforce tile.
 Configuration > Third-Party tools integration
Step 2
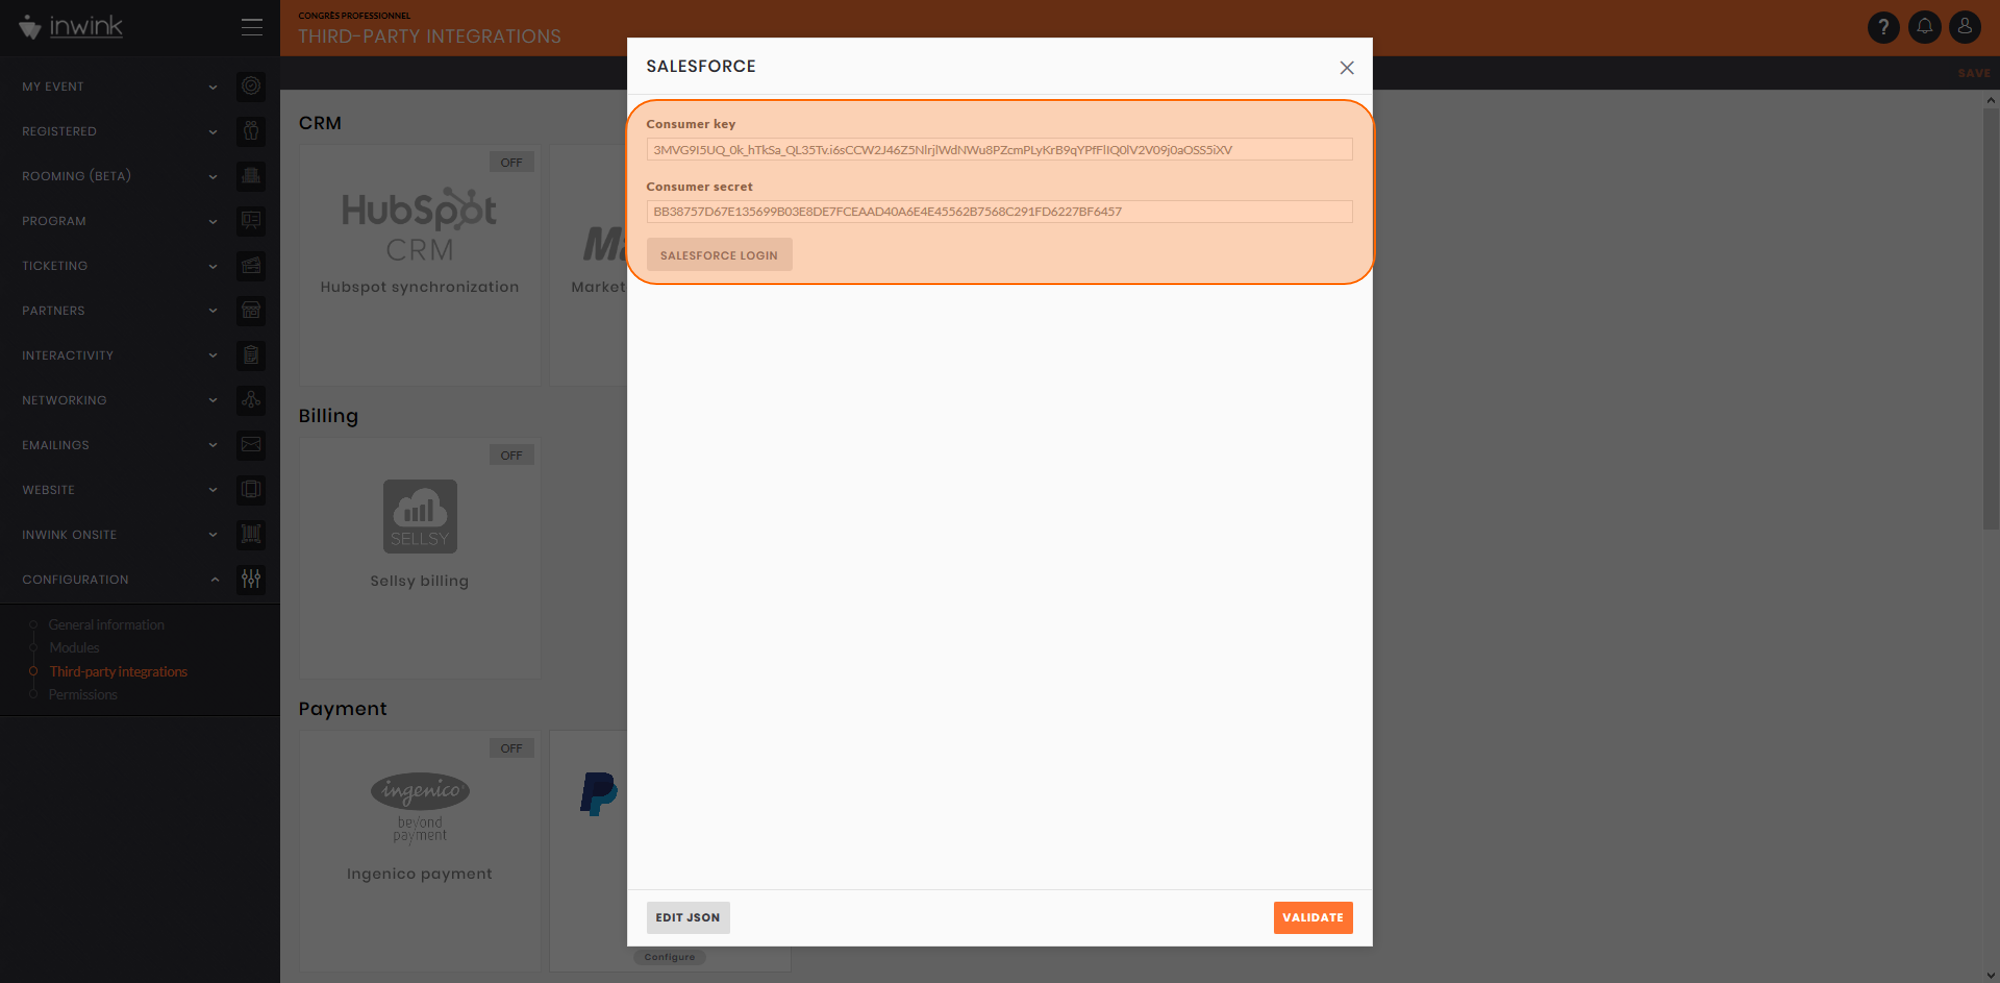 Fill in the Consumer Key and Consumer Secret of the inwink app created in Salesforce. Then click on SALESFORCE LOGIN
A pop-up opens. Log in with a System Administrator account on Salesforce.
Step 3
The connector can be setup once the connection to Salesforce is done.
 Setup screen on the connector
Basic setup
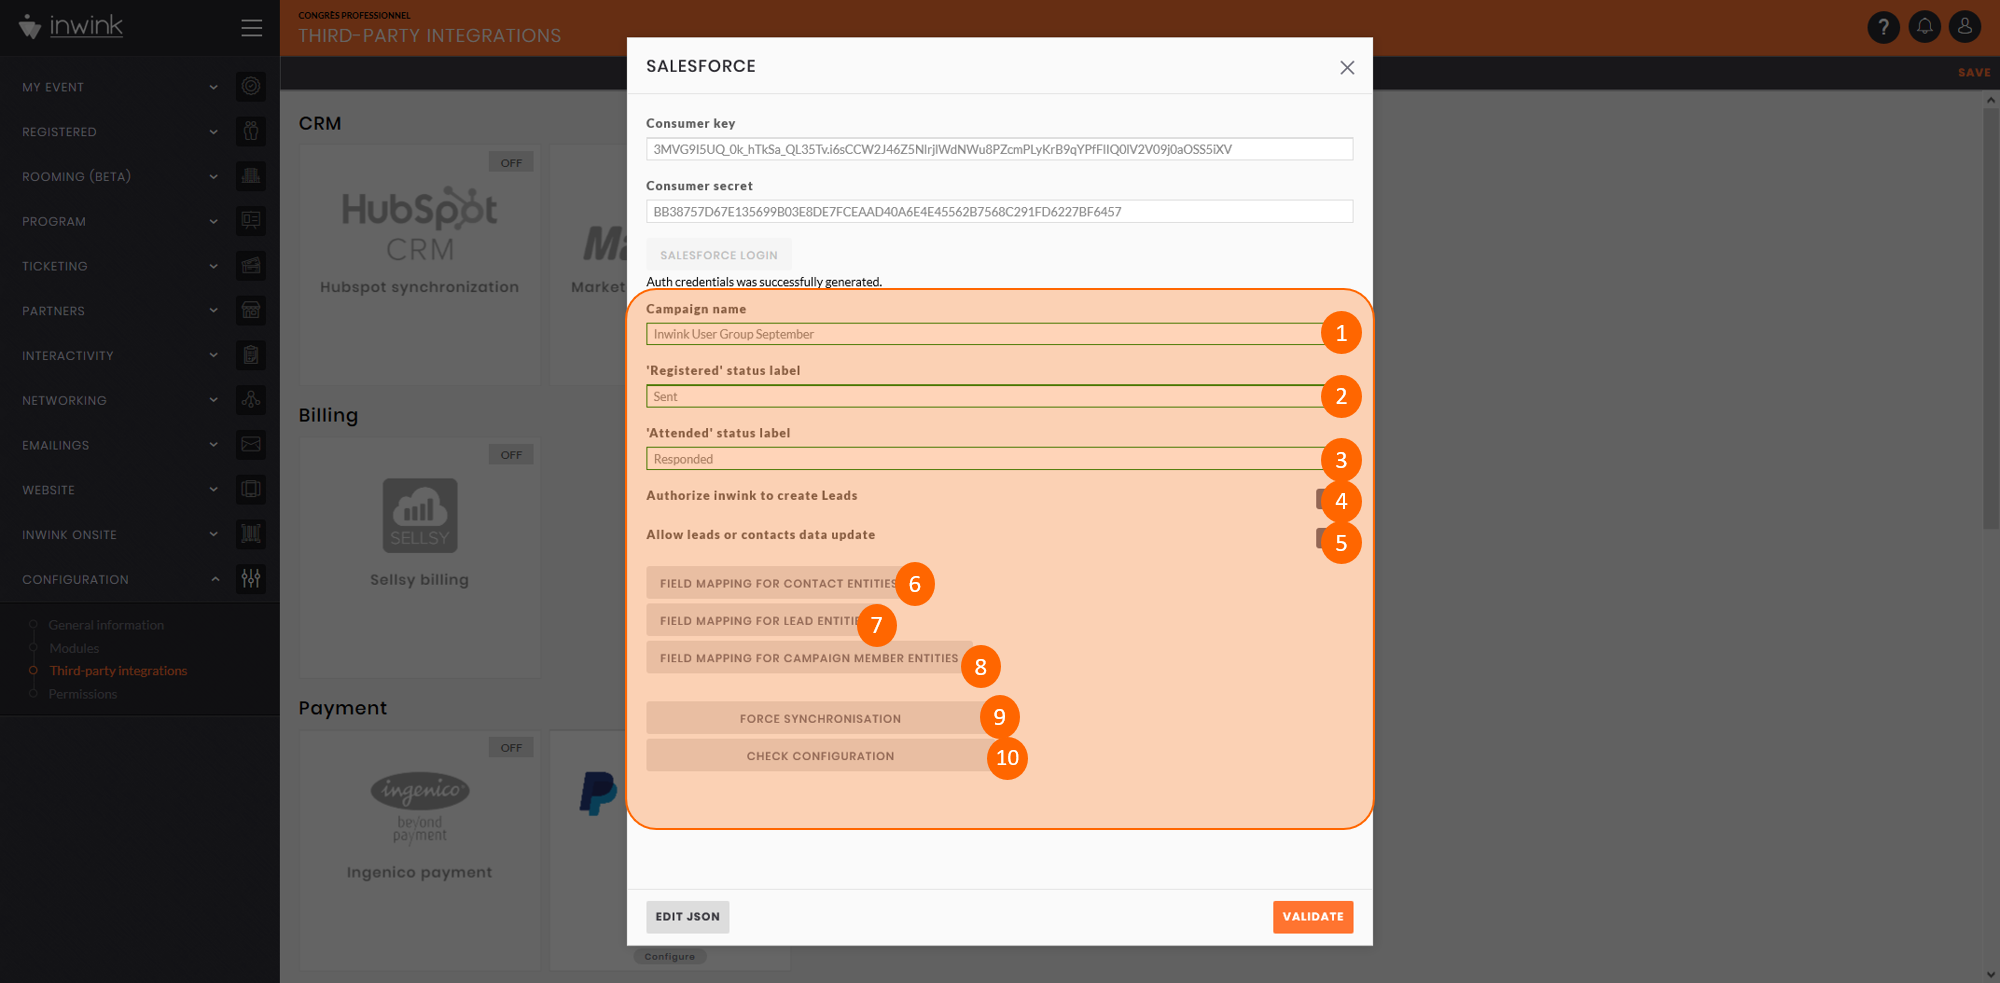
1. Fill in the name of the Salesforce campaign related to the inwink’s event.
If inwink can’t find a related campaign in Salesforce, the input field will be surrounded by a red trim. Please check that there are no spelling mistakes or an extra space in the written name of the campaign.
2. Fill in the status corresponding to Registered = True in the Salesforce campaign. If people are designated as Registered = True in inwink, they will also be designated this way in the Salesforce campaign.
3. Fill in the status corresponding to Came = True in the Salesforce campaign. If people are designated as Came = True in inwink, they will also be designated this way in the Salesforce campaign.
4. To allow inwink to create leads if a participant is not in the Salesforce leads base (checked with the email of the participant), activate the Allow inwink to create Leads option.
If the option is deactivated, inwink will only create contacts.
5. To allow inwink to update both contacts and leads information with participants information collected in inwink, activate the Allow contacts or leads data update.
Fields tracing setup
By default, inwink traces the First name, Last name, Email, Company and Status fields. However, it is possible to add specific mappings to trace other fields from inwink for every Salesforce object (Lead, Contact, Campaign Member). Click here for more information on exportable fields.
6. The FIELDS MAPPING FOR CONTACTS button allows mapping setup between inwink’s and Salesforce’s contact fields.
7. The FIELDS MAPPING FOR LEADS button allows mapping setup between inwink’s and Salesforce’s leads fields.
8. The FIELDS MAPPING FOR CAMPAIGN MEMBERS button allows mapping setup between inwink’s and Salesforce’s leads fields.
9. The FORCE SYNCHRONIZATION allows a forced synchronization of the event’s participants from inwink towards Salesforce if there is a chance not all the participants were synchronized.
10. Use the FIELDS MAPPING FOR CAMPAIGN MEMBERS button to check if the connector is setup. In case there are mistakes, they will be written in red under the button.
Mappings setup
By default, here are the following information are traced:
- First name
- Last name
- Status
- Company (if Lead in Salesforce)
Other additional fields can be traced live from inwink towards Salesforce. Here are the types of fields that can be synchronized from inwink towqrds Salesforce, as well as the corresponding fields in Salesforce.
Find underneath a recap of the compatibility between some inwink fields and some Salesforce fields:
| inwink | Salesforce |
|---|---|
| Text | Text |
| Number | Number |
| SelectList | Text |
| MultiselectList | Text |
| Date | Date / Datetime |
| Boolean | Checkbox |
Syntax
When clicking on one of the MAPPING buttons in inwink, use the following syntax to indicate the matching between the fields in inwink and the fields in Salesforce:
{
	"myfieldinwink": "API_Code_Salesforce",
	"myfieldinwink2": "API_Code2_Salesforce"
}
Important
- A Salesforce Text field is limited to 255 characters. Please be careful not to synchronize fields that might exceed 255 characters from inwink towards Salesforce.
- The inwink’s MultilineText, Boolean nullable (is Registered, Allows Networking), file, picture, document fields cannot be synchronized from inwink towards Salesforce.
Advices:
1. The consumption of the inwink connector is of 3 calls per synchronized person on the easy mode (no custom field to synchronize) => be sure to have a subscription that can absorb enough API requests on the Salesforce side (multiply by 3 the number of subscribers in inwink in order to have an idea of the minimum bandwidth needed)
2. In order not to needlessly use API requests in Salesforce, we recommend to synchronize only the essential from inwink, and to import directly further data from an Excel file exported from inwink after the event. Moreover, it will allow to check the integrity of the data imported in Salesforce.