Partners invitations operation
The purpose of this functionnality is to allow the partners to invite people to the event, even though it's free, tracing registered participants in the back office, following the partners invitations.In his workspace the parter is going to fill in person's information he wants to invite, gets back a shared link or a mail to send to this person. Thereby the partner is able to deal with registered or not invitee.
For the organizer, registered people invited are located in the menu Partners/Invitations, with the name of the partner who is sending invitations, the statut of the invitation and the registered person linked to it.
 Partners invitations
Configuration of the quota
In order to limit the number of registered participants at the invitation, it's necessary to configure a quota.
Three quotas are available, in increasing order of priority :
- A global quota for all the partners
- This quota has to be added in the menu Configuration/Modules, by cliking on the button Configureof the module Partners/exhibitors. Then the global quota has to be indicated filling in the question Maximum number of invitations per partner.
- A quota in a product
- In order to activate this quota, follow the instructions on the online help Partners and Products
- A quota per partner
- If a partner needs a specific quota, go in the menu Partners/All partners, click on the button
 to edit the partner, check the box
  Number of assigned invitations for the event and complete the partner's quota.
- If a partner needs a specific quota, go in the menu Partners/All partners, click on the button
Example :
- Global quota : 10 invitations
- Partner's quota A : 20 invitations
Every partner will have 10 invitations, except if the partner A who's having 20.
Invitation with Validation
Configure the validation
If you want to check the identity of the partner's registered invitees, you can configure a validation.
In order to activate this option :
- Go on the menu Configuration/Modules
- Click on the button Configure of the module Partners/Exhibitors
- Activate the option Check partner invitations before
- Click on SAVE to validate your modifications
Now, every invitee added by a partner onto his workspace will be added in the back office as well, in the menu Partners/Invitations with a statut On hold.
 Registration
How to manage in the back office
Once the registration is configured, you have to validate the invited people :
- Click on the editing pencil
 on the invited person's line.
 - Change the statut on the bottom of the page
○ You can either accept or refuse an invitee - Click on SAVE
The partner will see in his workspace if the invited person has been accepted or refused by the organizer.
In the case, where the invitee is accepted, then the partner can contact him.
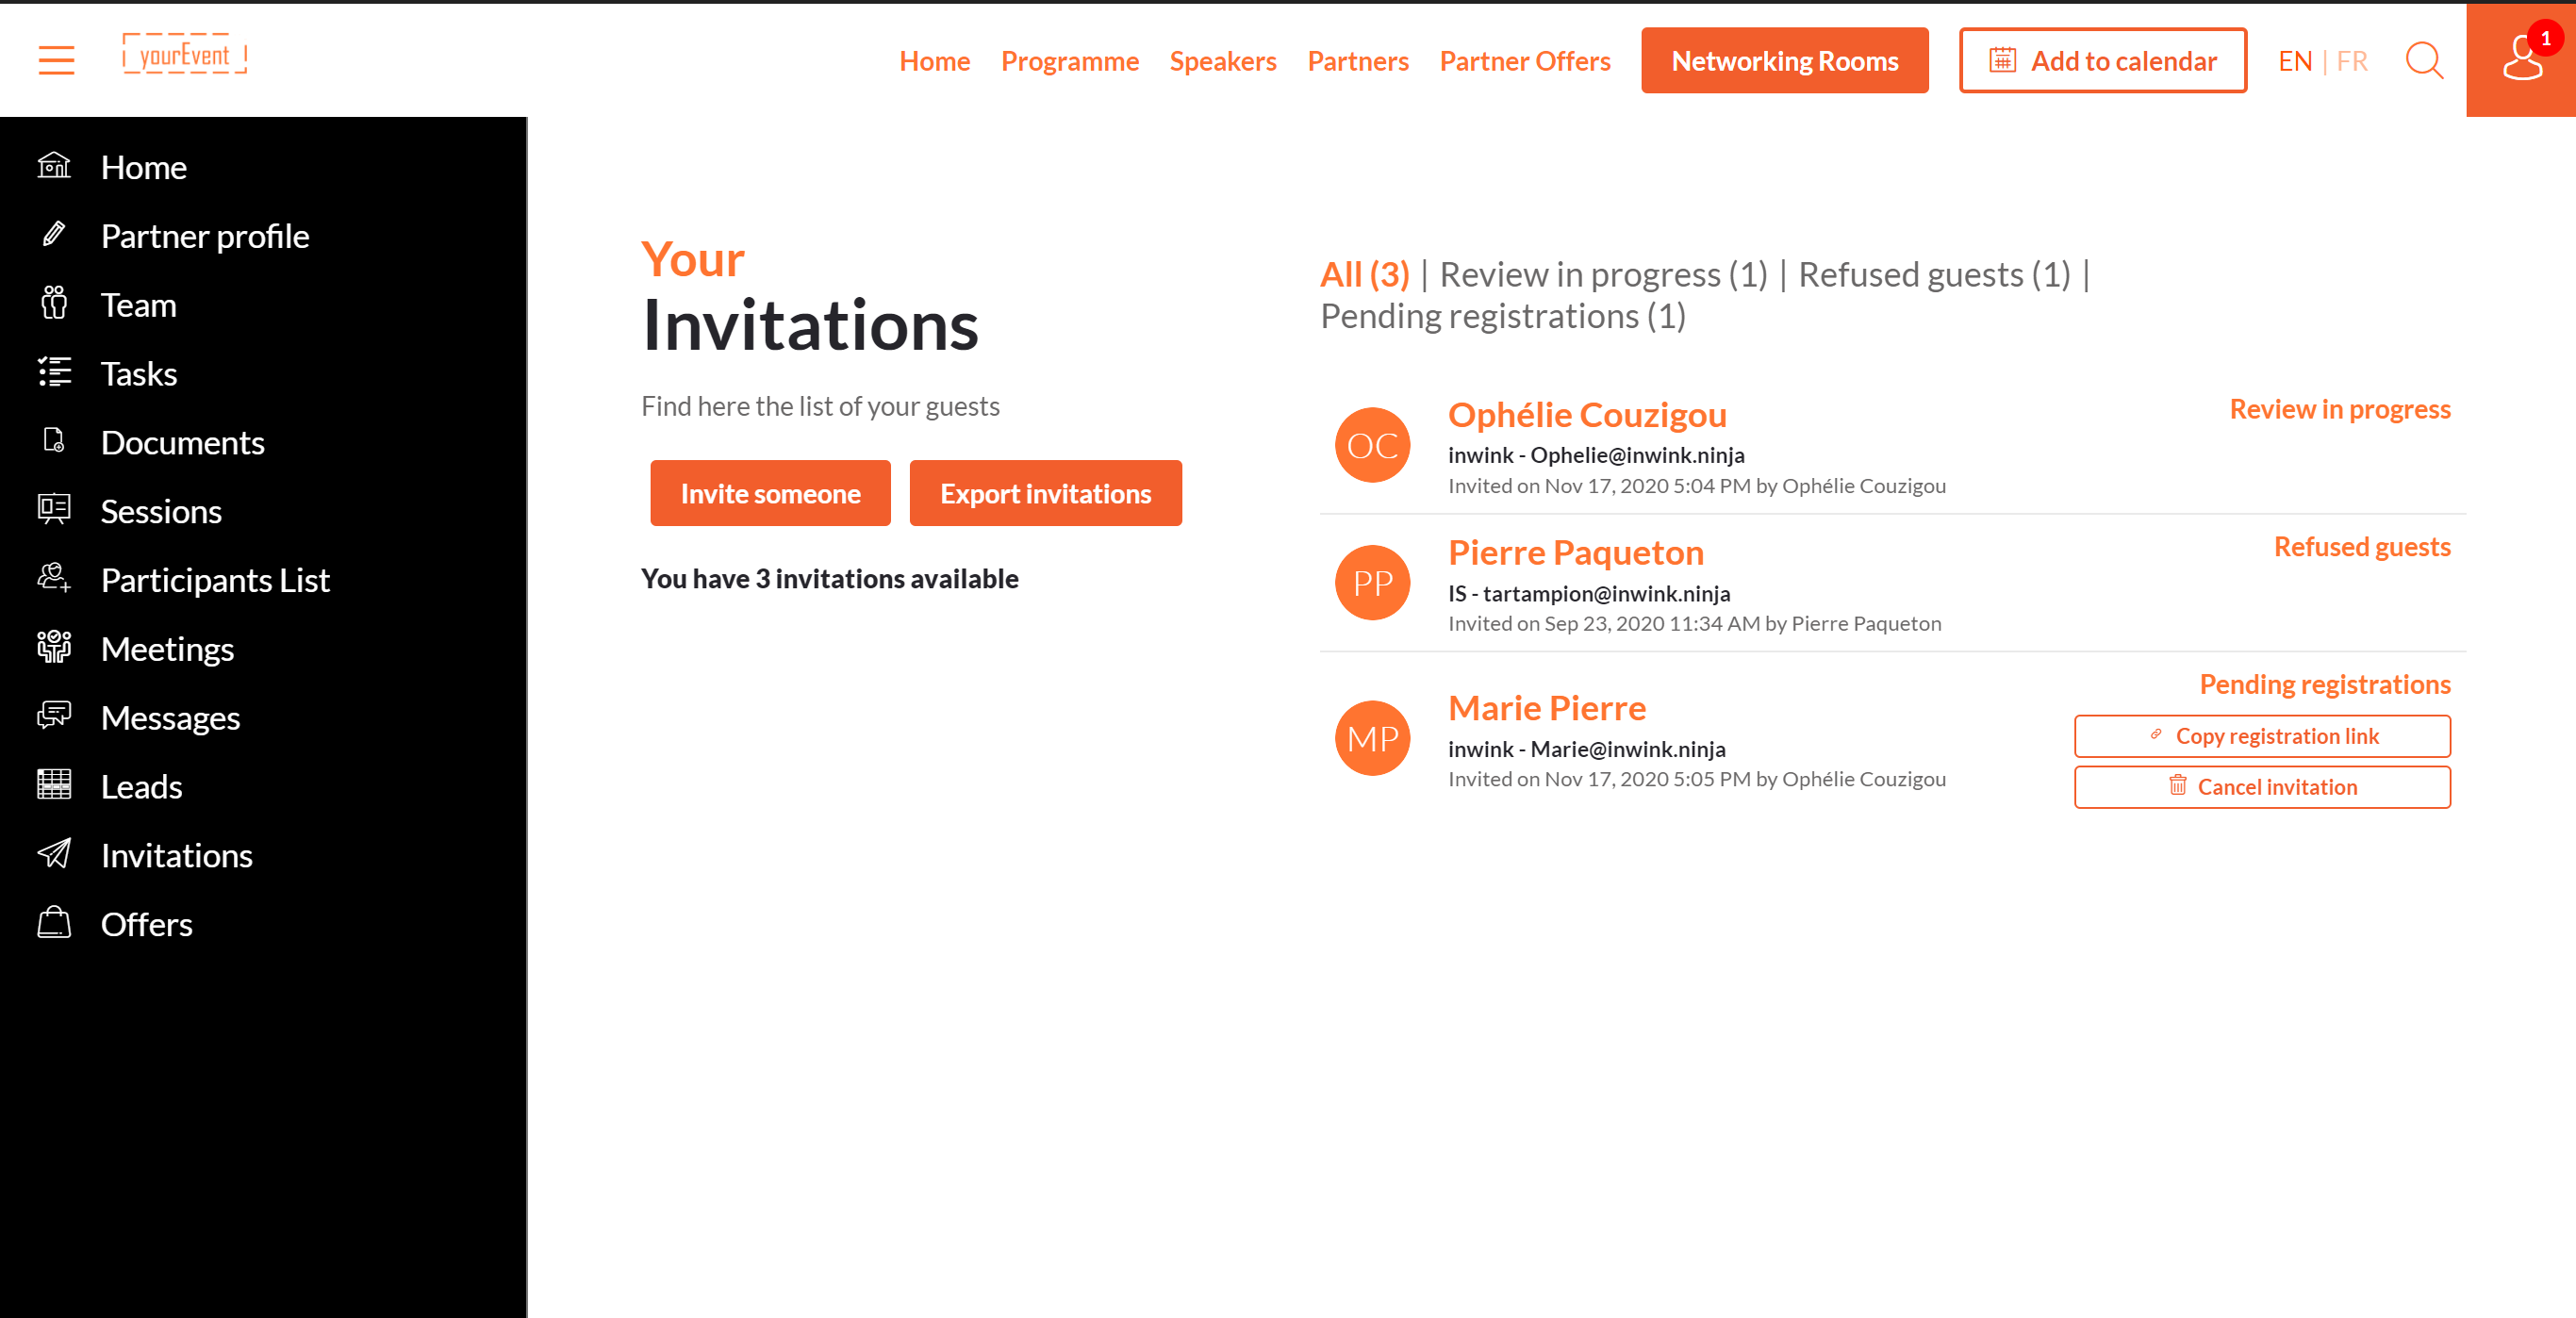
 Partners invitations grid
Invitations without mail
When a partner adds a invitee from his online workspace, he has to :
- Fill in the person's mail (inwink checks if the person already exists in the data base)
- Fill in the information requested by the organizer
In order not to add people's mail without their agreement in the back office, you can activate invitations without mail.
For the organizer you can collect invitee's information without their mail.
In order to activate this option, in the CMS :
- Go in the partner space, on the page Invitations
- Click on the edition button
 that appears when you pass over the invitation block
 - Activate the option Invitation with quota : allow invitations without mail.
If the option is activated, when the partner adds the invitee from his workspace, he only has to fill in the requested information by the organizer. He doesn't need to fill in any mail.
How to customize invitees' information
Registration to add invitee
In order to collect the required information while adding a invitee, you must set up the registration form.
In the CMS :
- Go in the partner space, on the page Invitations
- Click on the edition button
 that appears when you pass over the invitation block
 - Click on the button EDIT FORM
- Modify and save
Registration page
When the feature is set up, you have to select a registration page to which invitees are redirected in order to register.You are enable to redirect them onto a page where the fields are not editable but automatically pre-filled in with their information.
In order to choose this registration page :
- Go in the menu Configuration/Modules
- Click on the button Configure of the Partners/Exhibitors module
- Under the question Guest registration page, choose the desired one.
Click on SAVE to validate your modifications
Send invitation links
If a invitee wants to register, the partner has two options :
- Either he sends to him a saved link by clicking on the button COPY THE REGISTRATION LINK
- Or he sends to him a mail he aldready made up by clicking on the button DOWNLOAD THE MAIL
Please note: the email cannot be sent from inwink. The email must be uploaded to be sent from the partner's member email box.
If you invite anonymously, we invite you to use the "Partner" category email > "Generic partner invitation" :.png?width=688&name=Screenshot%20(22).png)
If you are sending out personalized invitations, please use the "Partner Invitations" > "Personalized Partner Invitation" email category: .png?width=688&name=Screenshot%20(23).png)