Presentation
While your online event is live, you need to make sure your participants know exactly what they're supposed to do and where they need to go at any moment.
The online timeline enables you to do so by creating:
- A banner at the top of your website (on all pages) which displays a message at a given time. The message can contain a link to a page of your event website, or to another website / document
- A new section in the notification center for your website users, where they can find what's going on and what's coming next
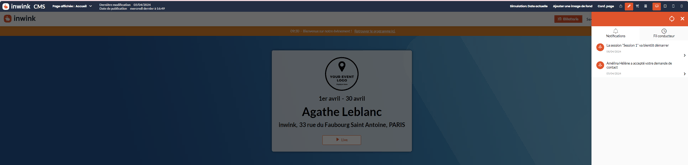
On tablets and smartphones (when the width of the screen is below 1024 px), the timeline banner disappears and only the timeline section in the notification center remains.
Set up the timeline
In order to add a timeline to your event, you first need to make sure the event type you specified for your event in your audience > Events using the "Template source" column:
The online timeline will also only appear between the start date and the end date of your event. In order to test it in the CMS, you'll need to set the CMS at the date and time of your event.
When you create a new event, the timeline is automatically created. On older events, though, you may need the assistance of your CSM in order to add it to your event.
Set up the timeline banner and the timeline section in the notification center
You can change the timeline banner appearance in the back-office of your event in Website & App tab > Website Content > Website pages :
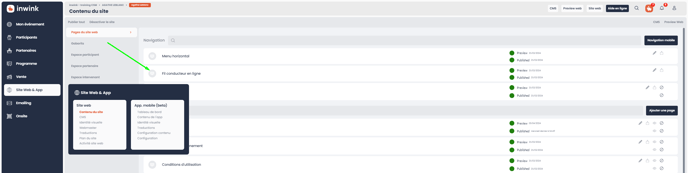
Click on the edit button in order to edit the background color and the font color of your banner :

As for the colors displayed in the timeline in the notification center of your event, they should be automatically set up but the theme you have associated with the notification center in Website & App tab > Visual Identity > App. Theme.
Add content to the timeline
To add content to your timeline, in the back-office of your event, go to the Program tab > Online timeline and add content: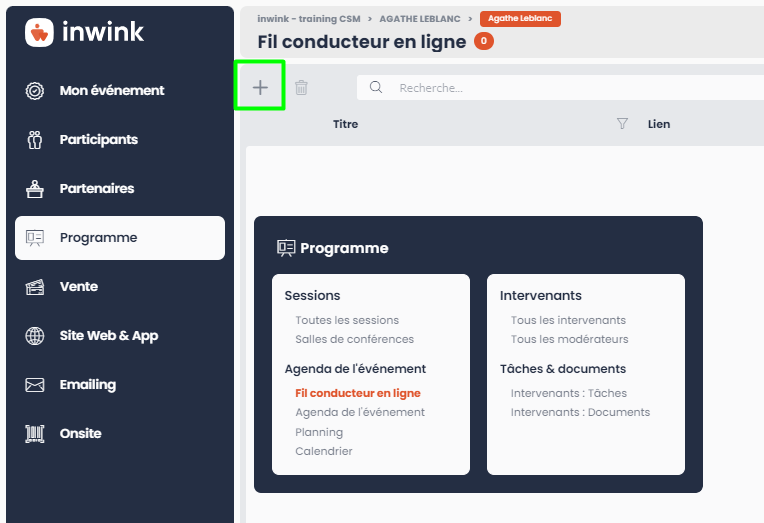
Here are the fields you need to edit:
- Start date: date and time when your message will appear (minus Start margin below). Make sure the Start date is between the Event Start Date and the Event End Date. Otherwise, your message won't appear. The Start date is displayed in the timeline.
- Tolerance before start date: the message will be displayed 0 minutes, 5 minutes or 10 minutes before the Start date you entered above.
- End date: date and time when the message will disappear
- Title: the message you want to display (80 characters max)
- Linke title: if your message includes a link, enter the Call To Action label you want to use for the link (50 characters max)
- Link: if you want to add a link to a page of your website or a specific URL outside of your event website, indicate it here
Reminders
- The timeline only appears between the Start date and the End date of your event. Any content that is set outside these dates won't be displayed.
- The timeline can't display content taking place on two days. Make sure the Start date and End date of the content you add to the timeline is set on the same day.
- The Start Date of the content you want to display in the timeline appears in the message, so make sure it's actually right, especially if it's a keynote or workshop announcement.
- The timeline can't display messages to specific participants. However, you can display a message to all participants which links to a page where the content is personnalized.