A video tutorial is available on the inwink training website.
Configure an automatic email sending once the participants created and filled in their profile and contacted other participants so that they go back on the website to network.
To activate this feature:
- Create an email template
- Configure the email automatic sending
Create an email template
To understand how to create an email, go to the Create an email and Edit an email helps.
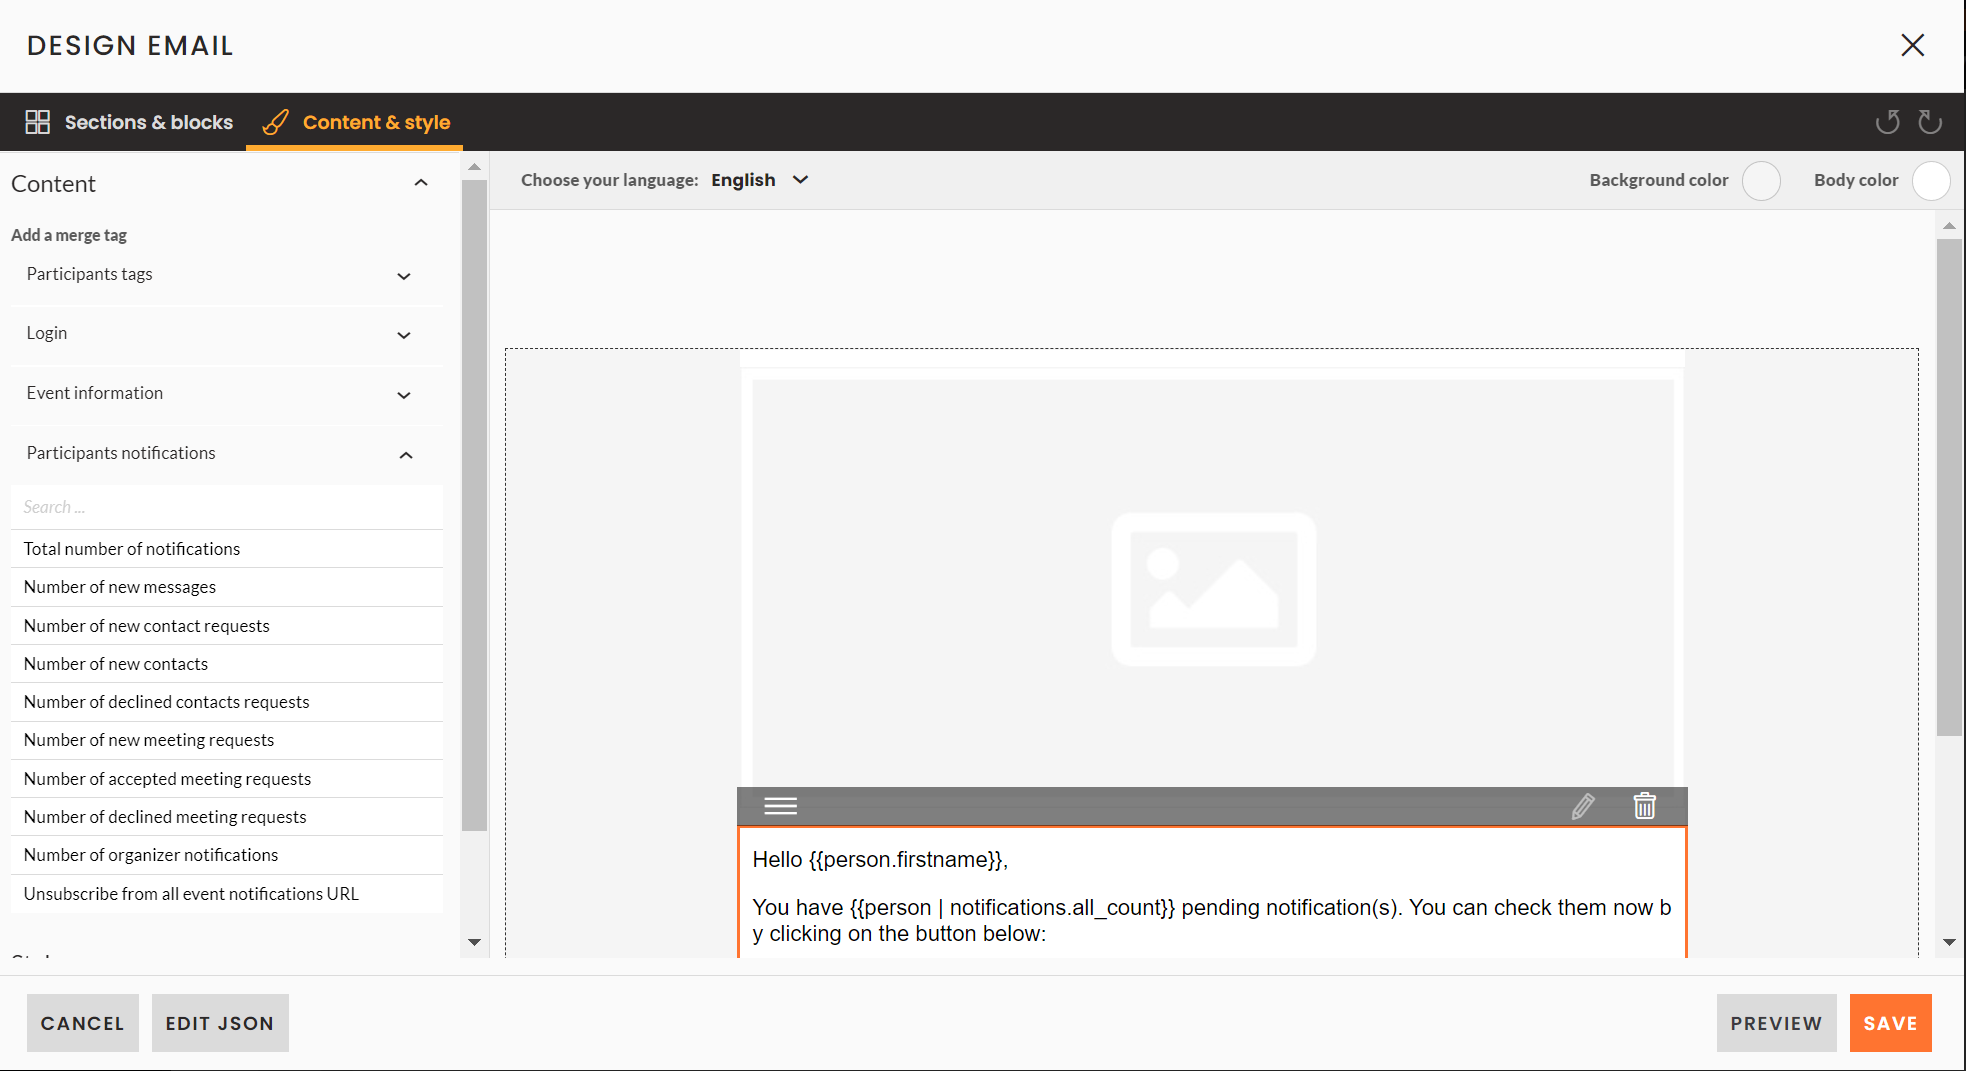
Once you have created your template, you can insert dynamic values, specific to the networking.
For example, to see the "total number of notifications", add :

The list of available fields can be found in the "Participant Notifications" category on the left of the window.
List of available fields:
These fields list the participant's unread notifications since their last connection to the website.
- Total number of notifications
- Number of new messages
- Number of pending contact requests
- Number of new contact
- Number of declined contact requests
- Number of new meeting requests
- Number of accepted meeting requests
- Number of declined meeting requests
- Number of organizer notifications
- Unsubscribe from all event notifications URL
To add a field:
Position your cursor at the desired location in the email editing window and click on the relevant field in the list.
The dynamic code should appear in the edit window, as in the screenshot below:
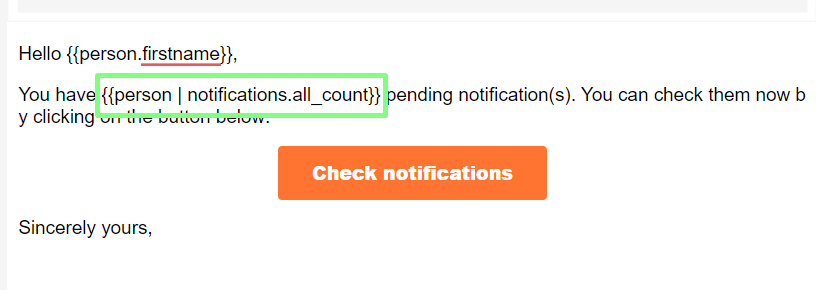
Note: Adding too many notifications makes them difficult to understand.
It may be better to limit them to one or two, and invite the participant to log in to view all of them.
Notifications appear as numbers, so for ease of reading, it is best to insert them with a bullet list as below:
You have 4 new notification(s).
- 3 new unread message(s)
- 1 pending appointment request(s)
Automatic email sending configuration
Go to Emailing > notification emails > Participants, click on edit and choose the email template you have just created.
Activate the sending frequencies before and/or during the event by switching to "ON".
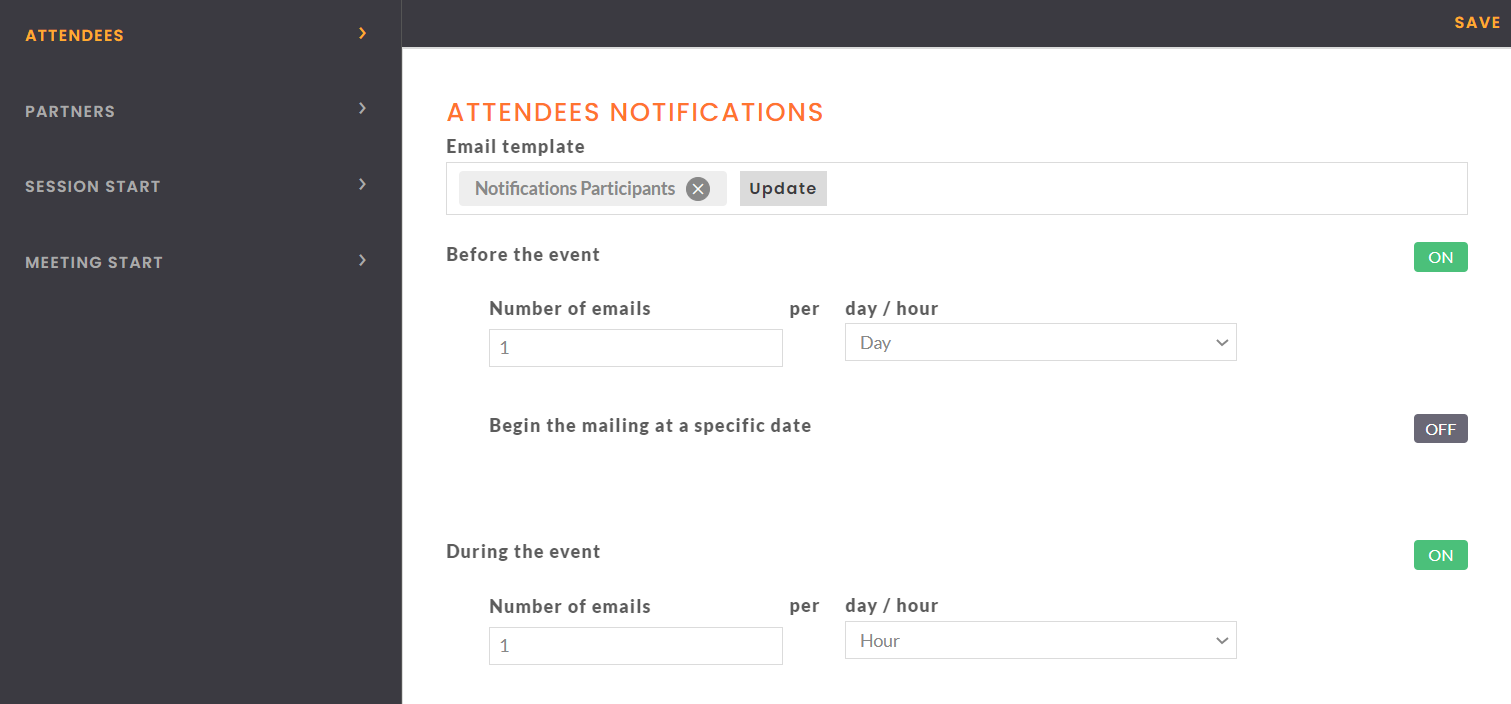
Then choose the number of emails sent per day/time.
Select the "Begin the mailing at a specific date" option if required.
The schedule will start as soon as you have saved your changes, by clicking on the SAVE button at the top right of the screen.
💡 We recommend sending:
- 1 email per day before the event
- 1 email per hour during the event