Once a session has been played on your event, you can import it into one of your communities.
➡️ This option is only available to users with administrator access rights to the customer back office.
⚠️ Once your session has been migrated, it will no longer be available on your event, ONLY on your community.
To migrate a session, go to your community > Content tab > Videos > click on the two import/export arrows > then on the "Migrate sessions" button: 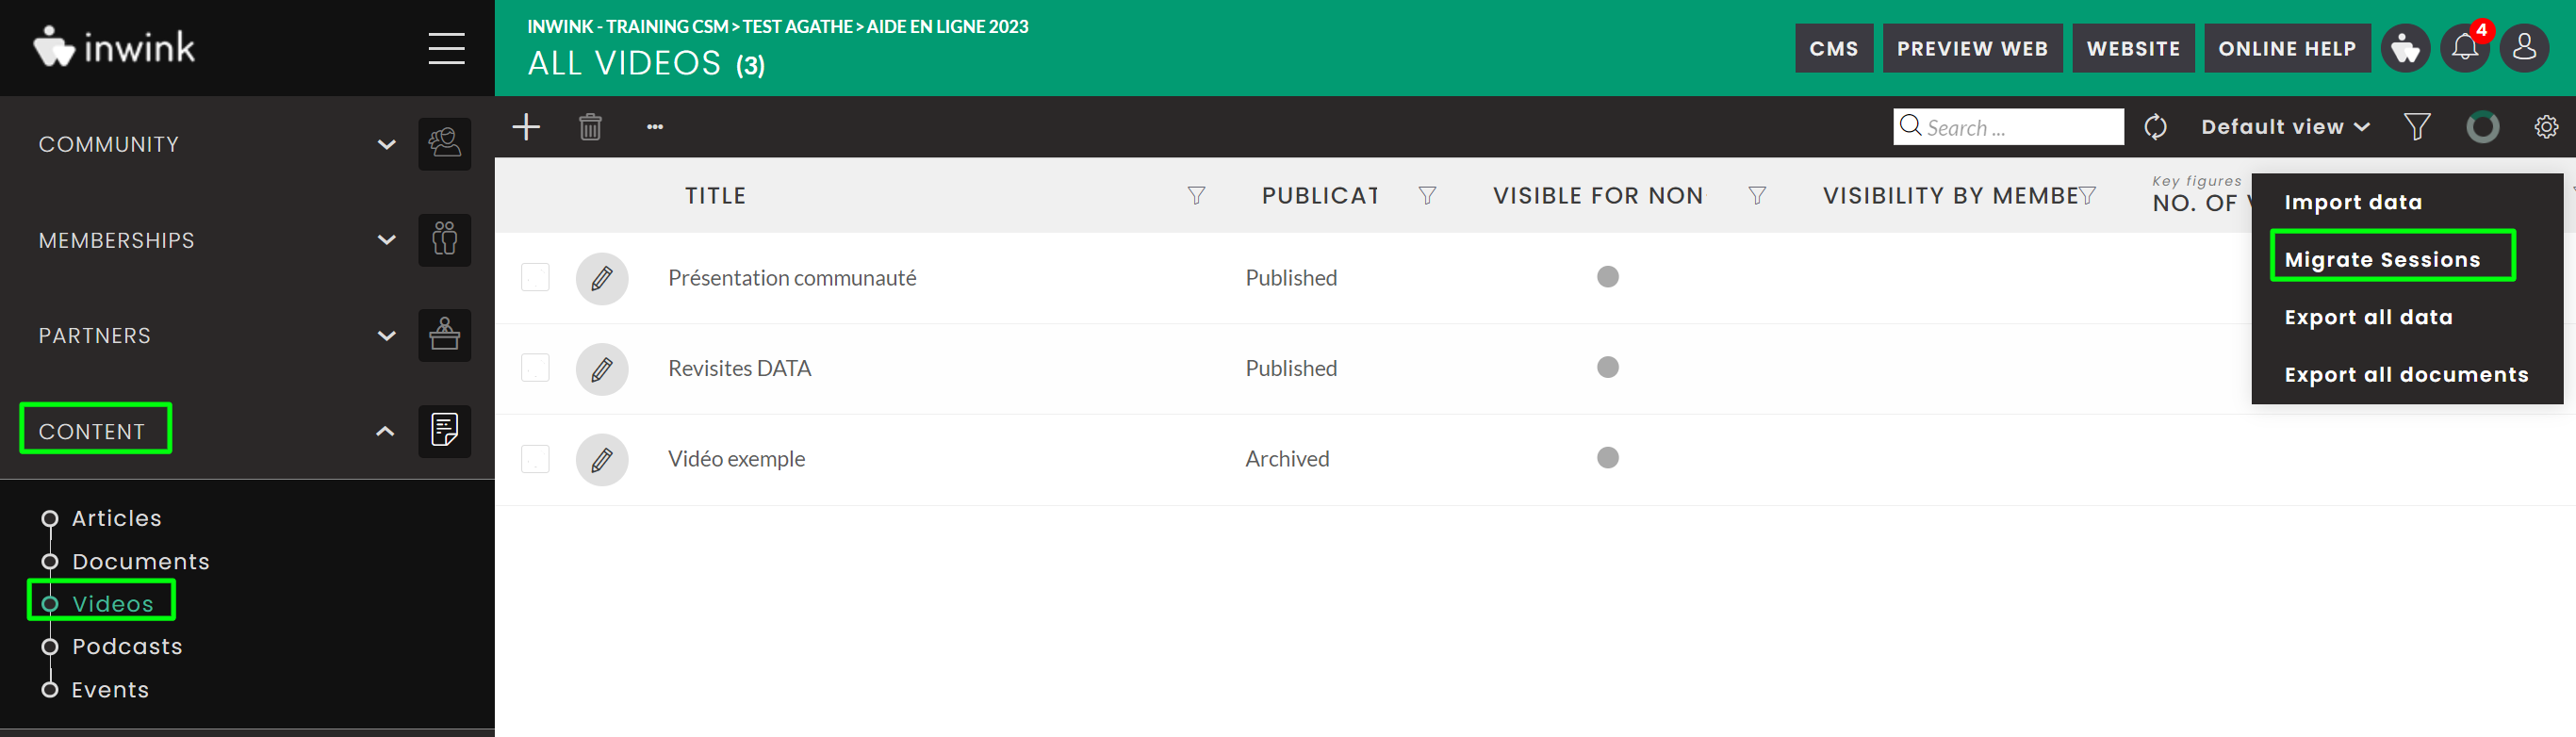
A pop-up window will open, allowing you to choose the event on which you wish to import your session, then select the desired session(s).
All sessions created in your customer back-office will be offered for import. In other words, all sessions, from all events, for all audiences, can be imported into the community.
Here are the elements present when importing a session into your community:
- Session title
- The summary
- Video file
- Thumbnail
- Source event name
- Session speakers
- Partners linked to this session
🚩🚩 Please note:
- Only "Online" sessions whose source is a video file or URL (iFrame) can be imported.
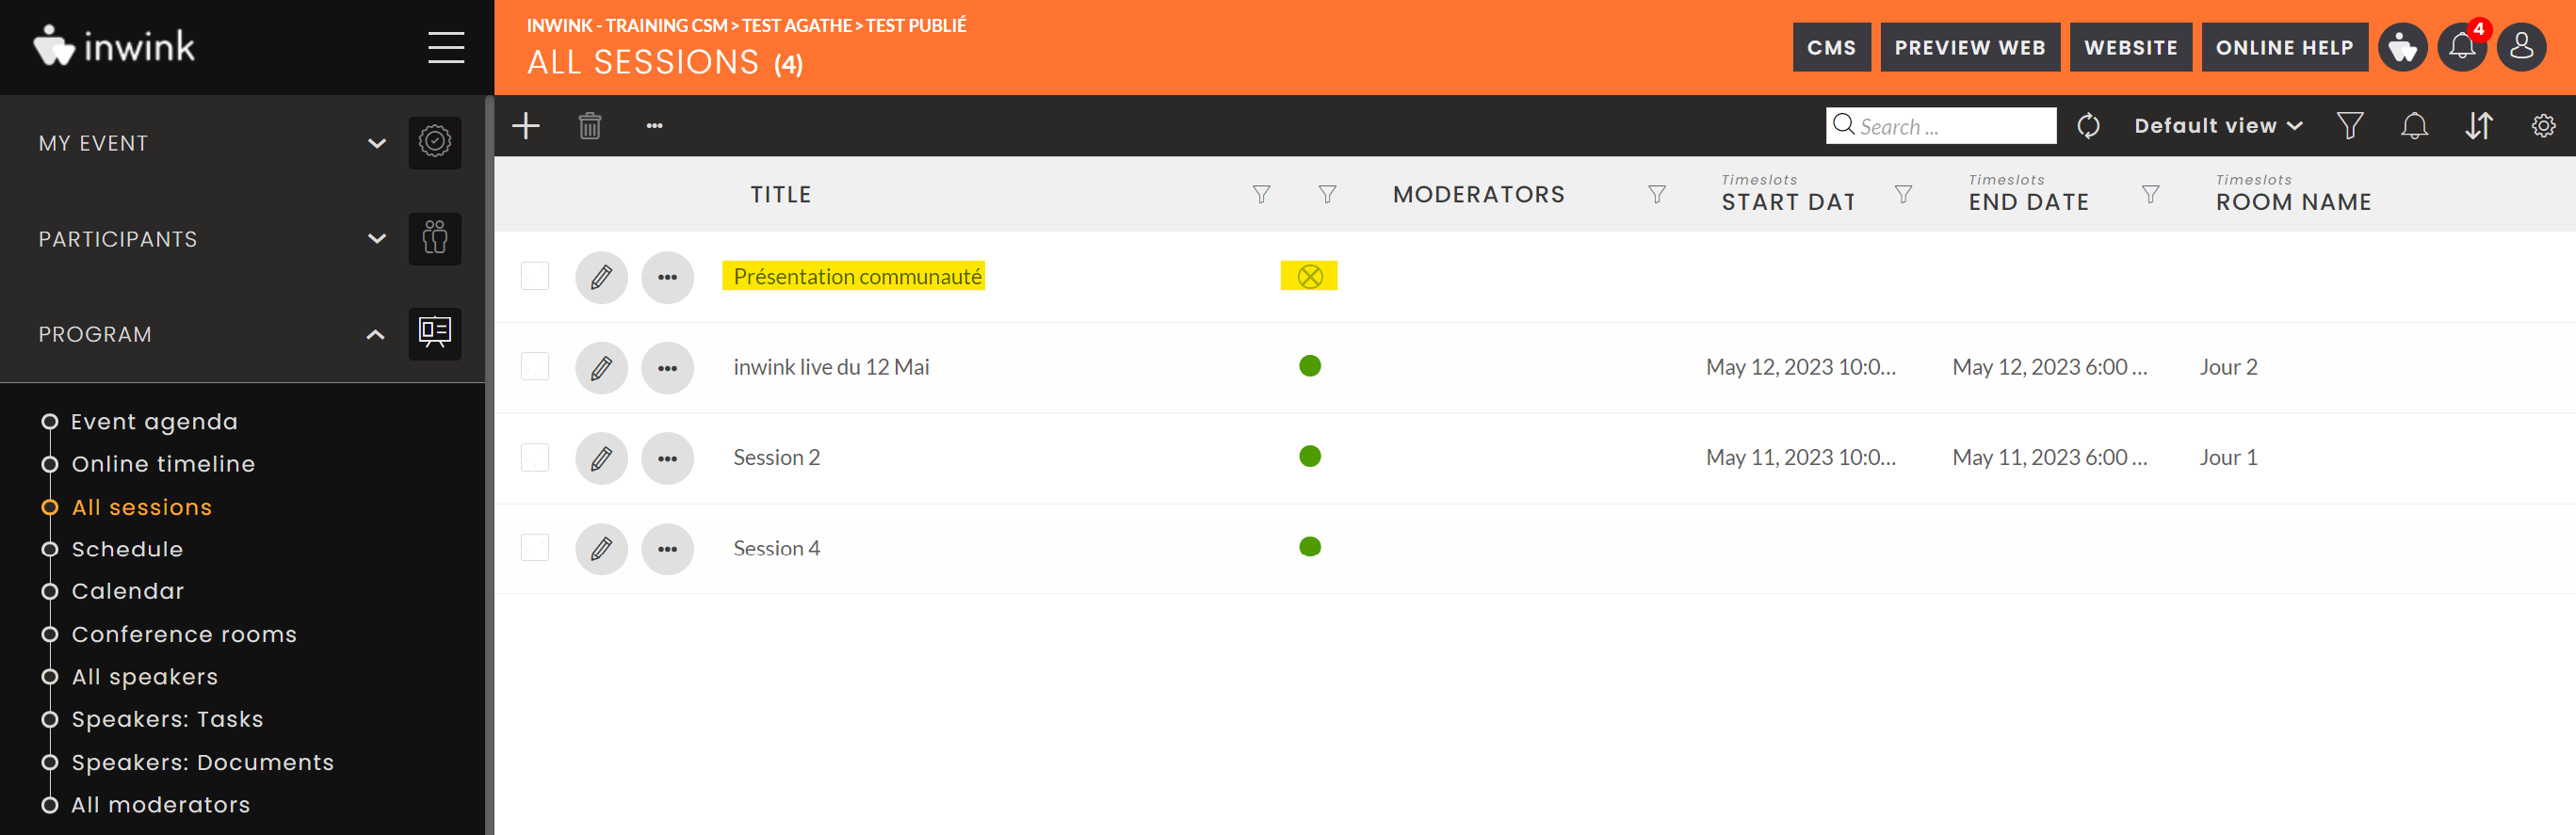
- Once imported into the community, the session is no longer available on the event, but only visible in the back office.
- On the community, the video is imported in "Draft" status.
- When editing the session, an indication is given that the session has been migrated to a community (with its title, the name of the user who performed the migration, and the date and time).
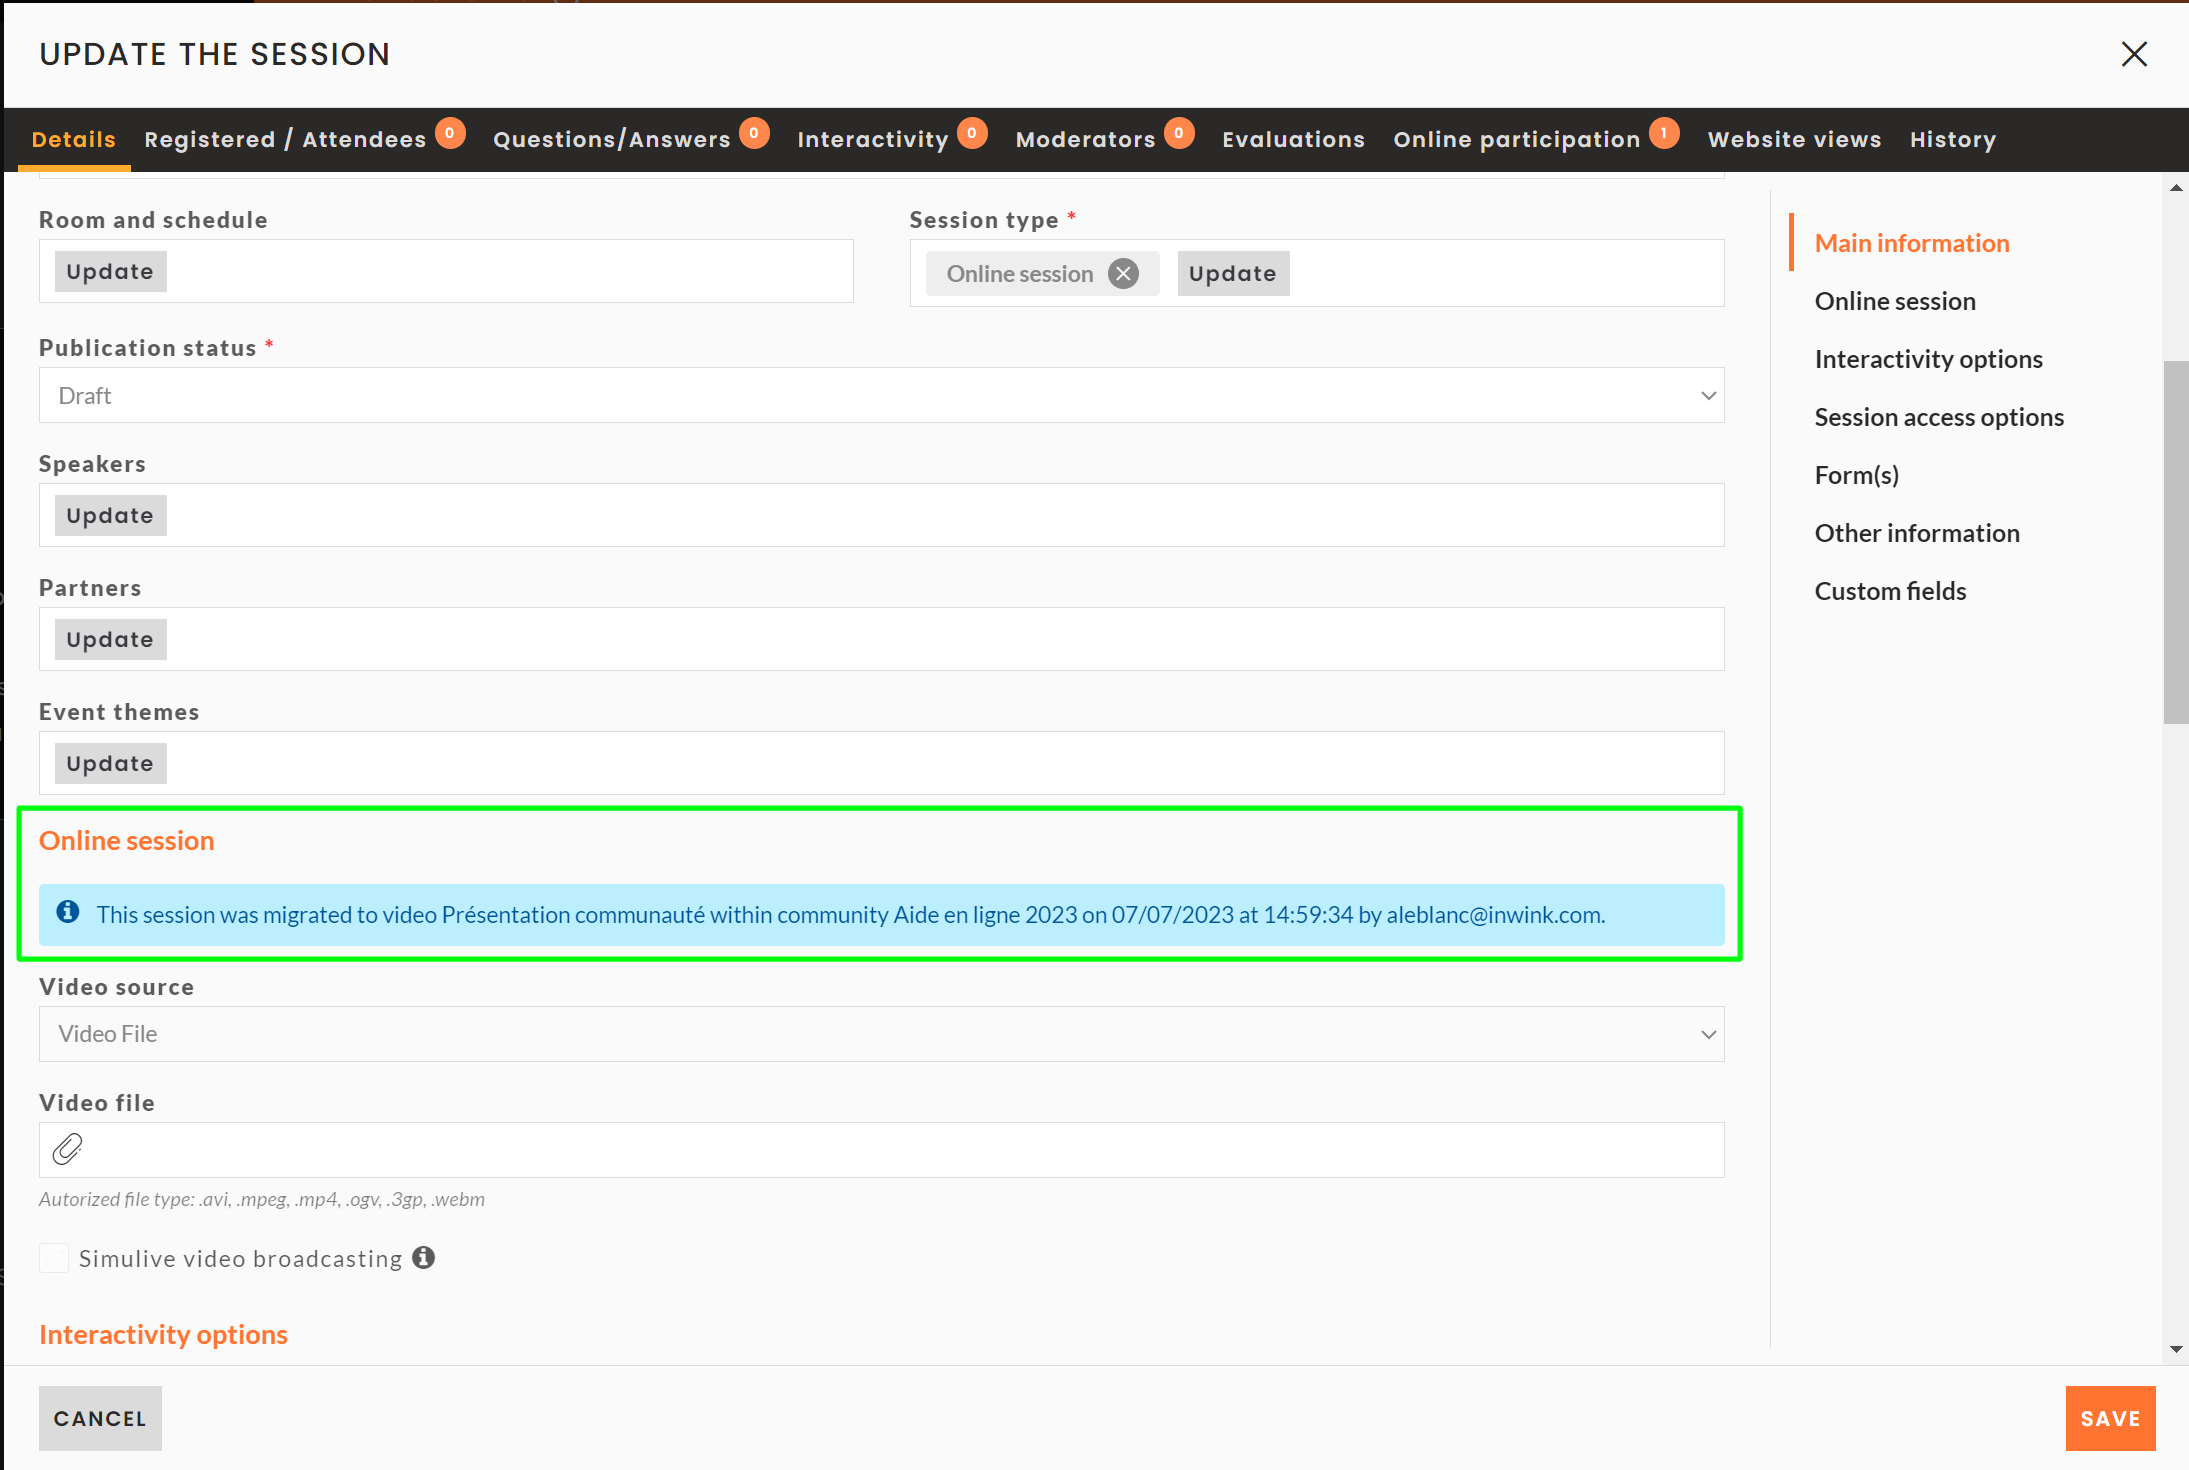
- On the community, the session is imported as "Draft".
➡️ Now it's up to you to edit it and change its status to "Published", so that it can be seen on your community.
- You won't be able to re-import the session to another community
- If you have imported a session to your community, but delete it from your original event, the session will still be available in your community.