The Marketo connector allows the synchronization of data such as sessions a participant attended to, general satisfaction forms, etc. in custom objects.
It is possible to create for every event a custom object instance for every lead registered once
1. Marketo Custom Object configuration in Marketo
In Marketo:
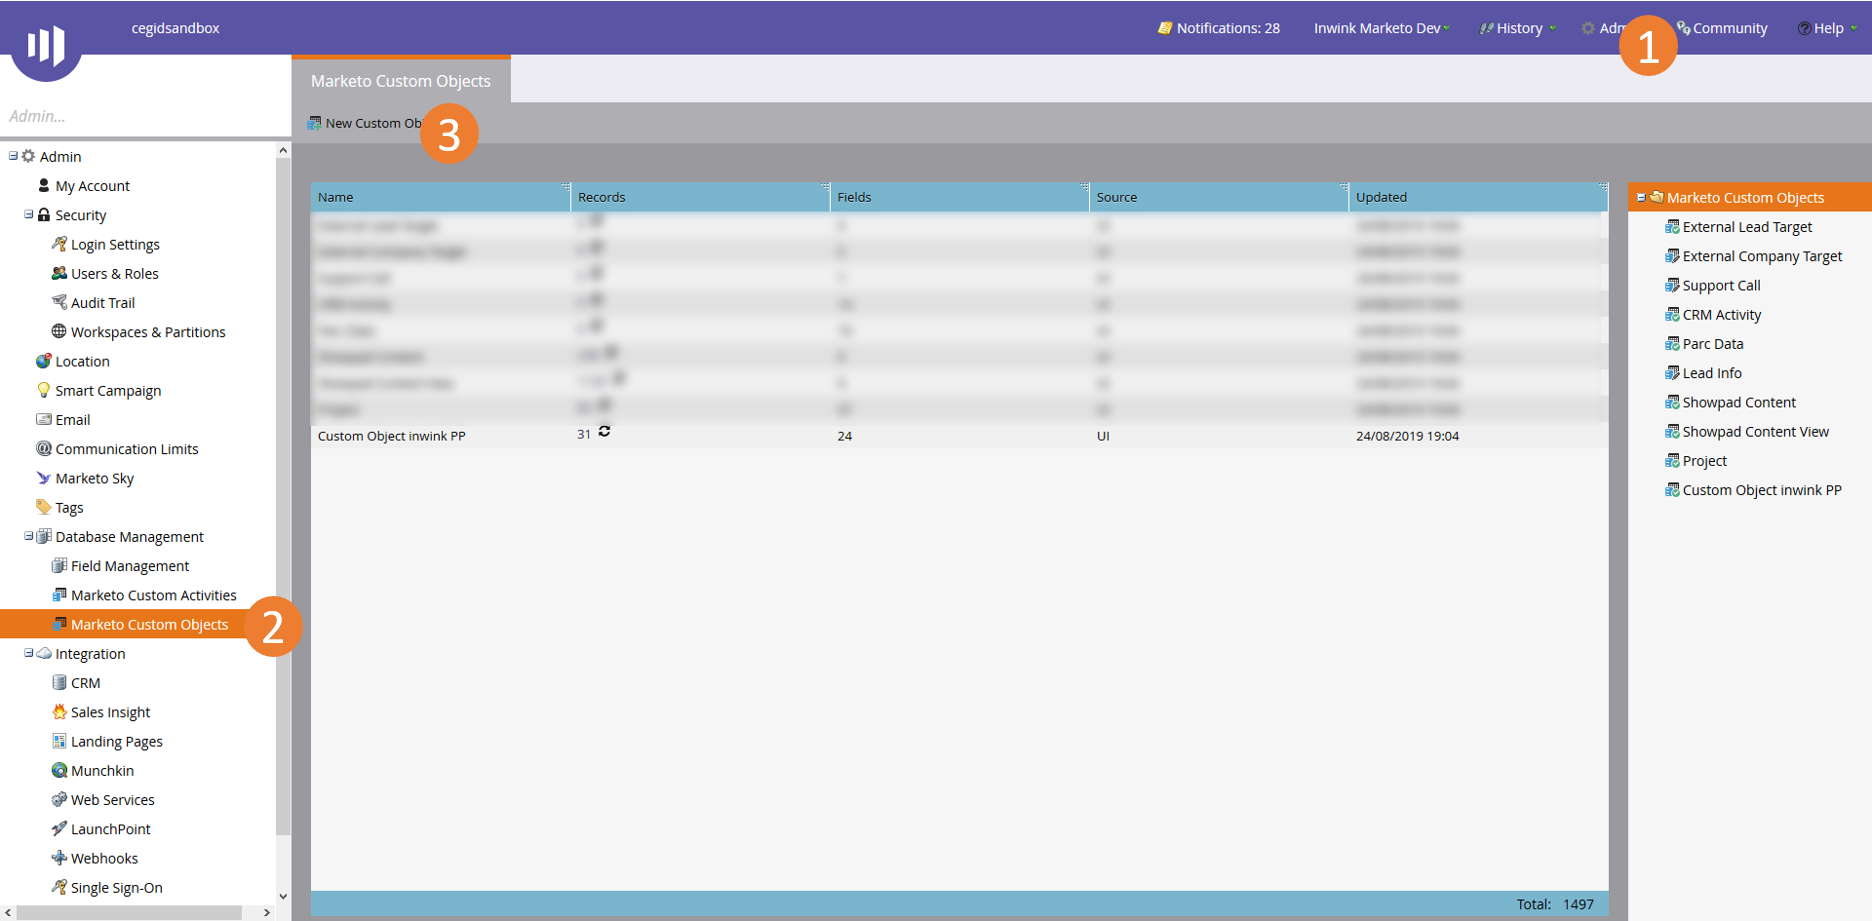
1. Click on Admin
2. Click on Marketo Custom Objects
3. Click on New Custom Object
 Create a new Custom Object
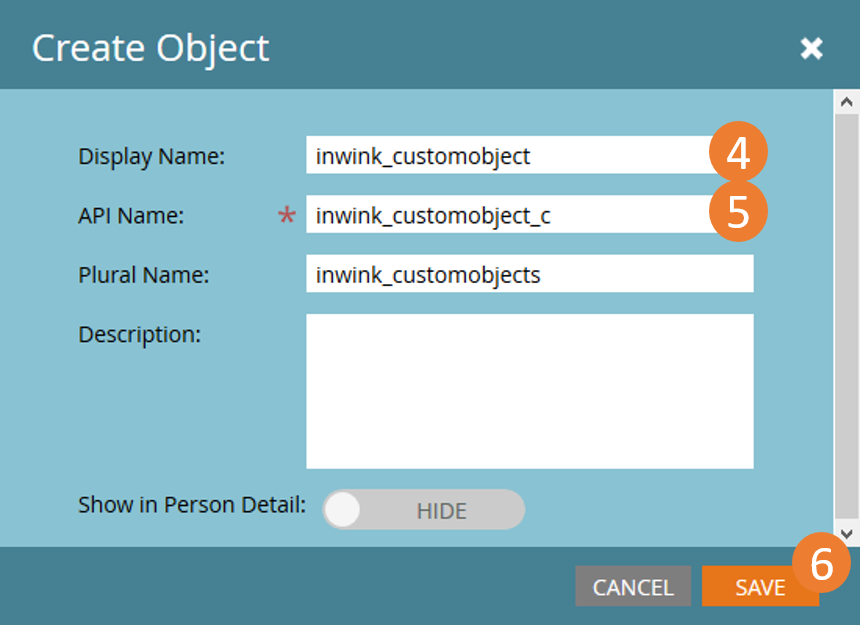
4. Give a Display Name
5. The API Name is automatically generated. Write it down. It is useful for the connector configuration in inwink.
6. Save
 Custom Object creation
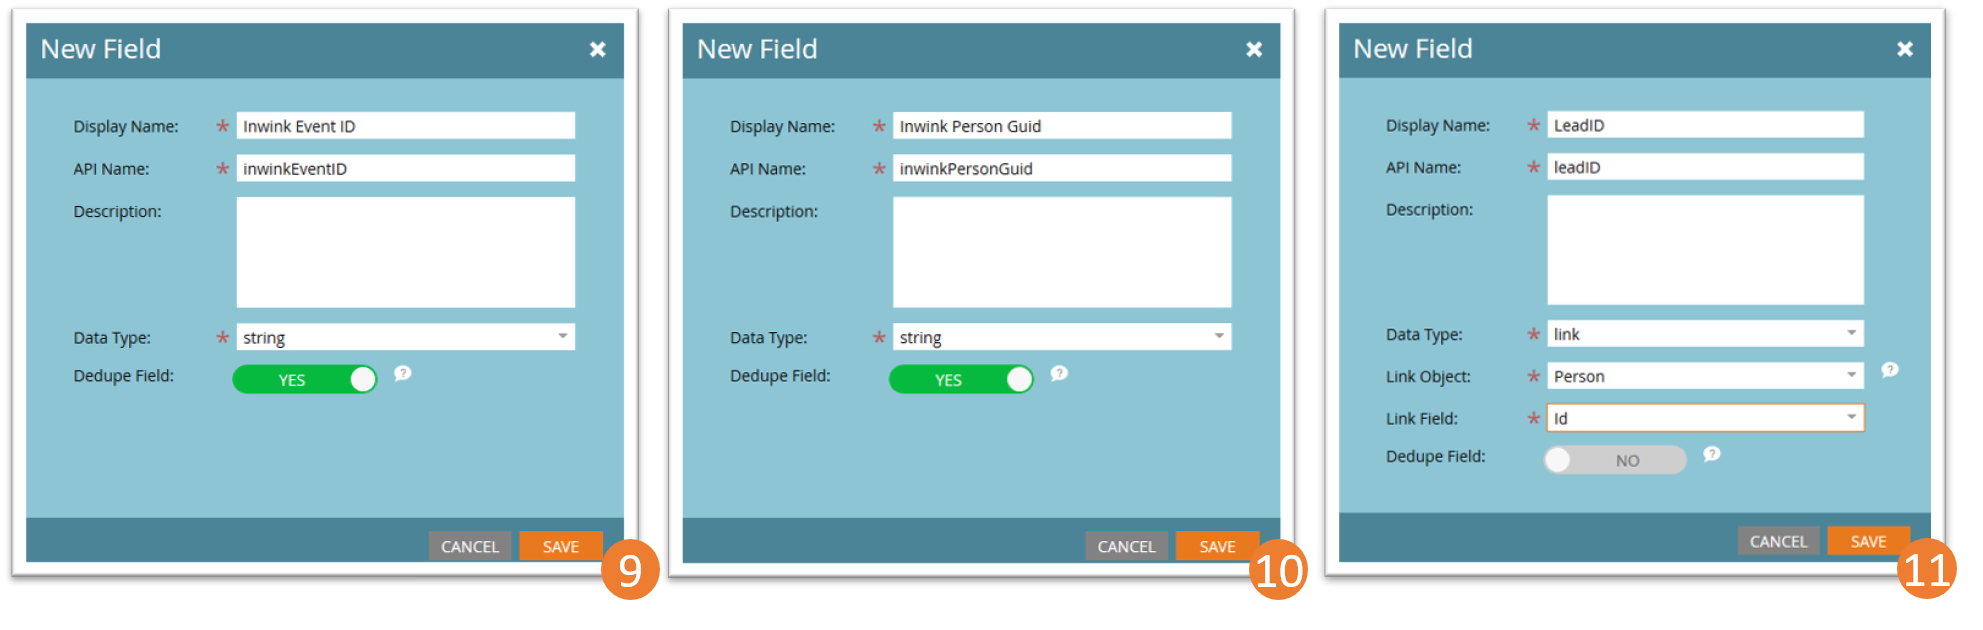
7. Click on Fields once the Custom Object is created
8. Click on New Field
 New field
9. Create the Inwink Event GUID field of a string type and configure it as a Dedupe field
10. Create the Inwink Person Guid field of a string type and configure it as a Dedupe field
11. Create the LeadID field of a link type. Then, specify the Person in Link Object and the Id in Link Field
 Inwink Event GUID, Inwink Person Guid, LeadID
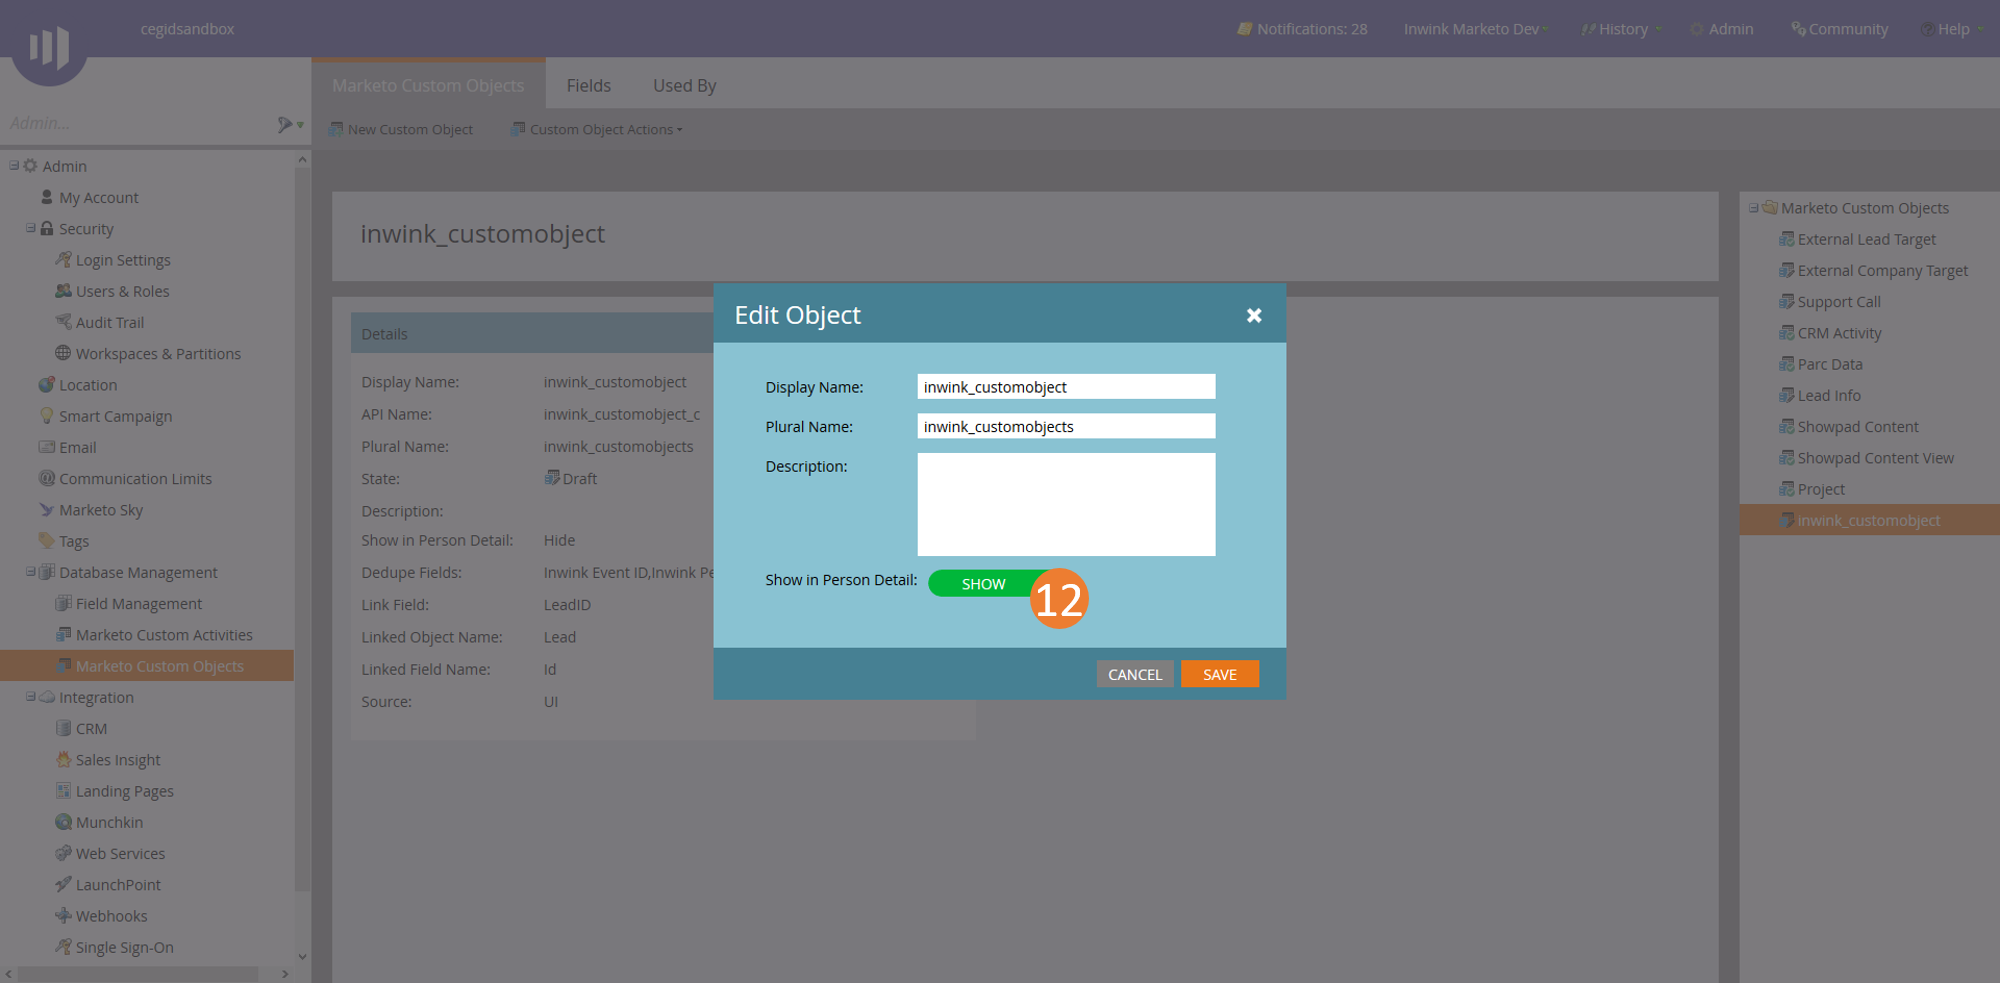
12. Click on Custom Object Actions, then on Edit Object and finally activate Show in Person Detail in the Marketo Custom Objects thumbnail. Save.
 Show in person Detail
13. Click on Custom Object Actions and then on Approve object in the Marketo Custom Objects thumbnail. The object is created and approved.
14. Add the following fields and their data types in the Fields thumbnail:
- EventTitle | string
- EventStartDate | datetime
- EventEndDate | datetime
- IsRegistered | bool
- RegistrationDate | Datetime
- HasAttended | bool
- AttendedDate | Datetime
- BadgePrintDate | Datetime
- PersonRegisteredSessionCount | Int
- PersonRegisteredSessionList | Text
- PersonAttendedSessionCount | Int
- PersonAttendedSessionList | Text
- PersonRegisteredAndNotAttendedSessionList | Text
- PersonGeneralSurveyAnswer | Text
- PersonNetworkingProfile | Text
- PersonScanedByExhibitorCount | Int
- PersonScanedByExhibitorList | Text
- PersonComputedData | Text
15. Click on Custom Object Actions and then on Approve object in the Marketo Custom Objects thumbnail. The object is approved and updated.
Important:
The following fields have data separated by “ ;\n”: PersonRegisteredSessionList, PersonAttendedSessionList, PersonScanedByExhibitorList
2. Configuration in inwink
Click on the Marketo card in the CONFIGURATION > Third-Party tools integration.
Fill in the API Name of the Custom Object created before in the Custom Object name (API Name) field.
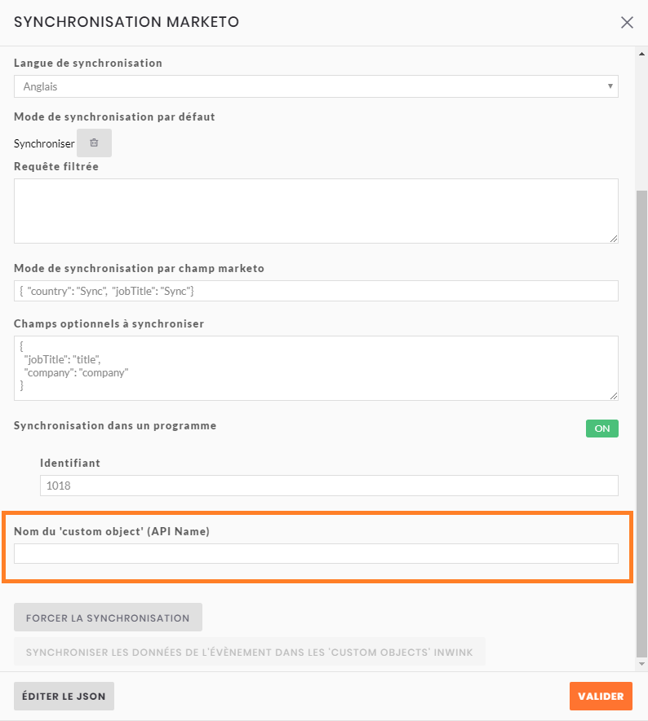
Filling in the Custom Object API Name
inwink will directly check that the Custom Object is configured in Marketo. A red cross x will appear on the right of the field if it is not the case. If everything is fine, a green check will appear on the right of the field.
Synchronization failure explained by three cases:
- The Custom Object doesn’t exist in Marketo
- The Custom Object is present in Marketo but not configured well
- Fields are missing
- Some fields don’t have the right type
- The Custom Object is in Marketo and well configured
Click on SYNCHRONIZE EVENT DATA IN INWINK’S “CUSTOM OBJECTS” once inwink validated the Custom Object configuration in Marketo.