Presentation
Scan functionality allows partners to scan participants QR codes on their badge the day of the event in order to get participants information back.
Scan is made from the inwink Lead Gen mobile application.
Only team members with at least the Badge access role can use this functionality.
If you are unable to access a new event (if you have already accessed the inwink Leadgen application at another time), we invite you to :
- Log out of the application
- Delete the previous event (on which you have just arrived, by clicking on the little trash can)
- Scan the badge of the new event again
Enable scan permission
In order to allow partners to scan participants you have to authorise it in your back office from the PARTNERS tab > CONFIGURATION > Set to "ON" Partners can scan attendees with inwink Leadgen app:
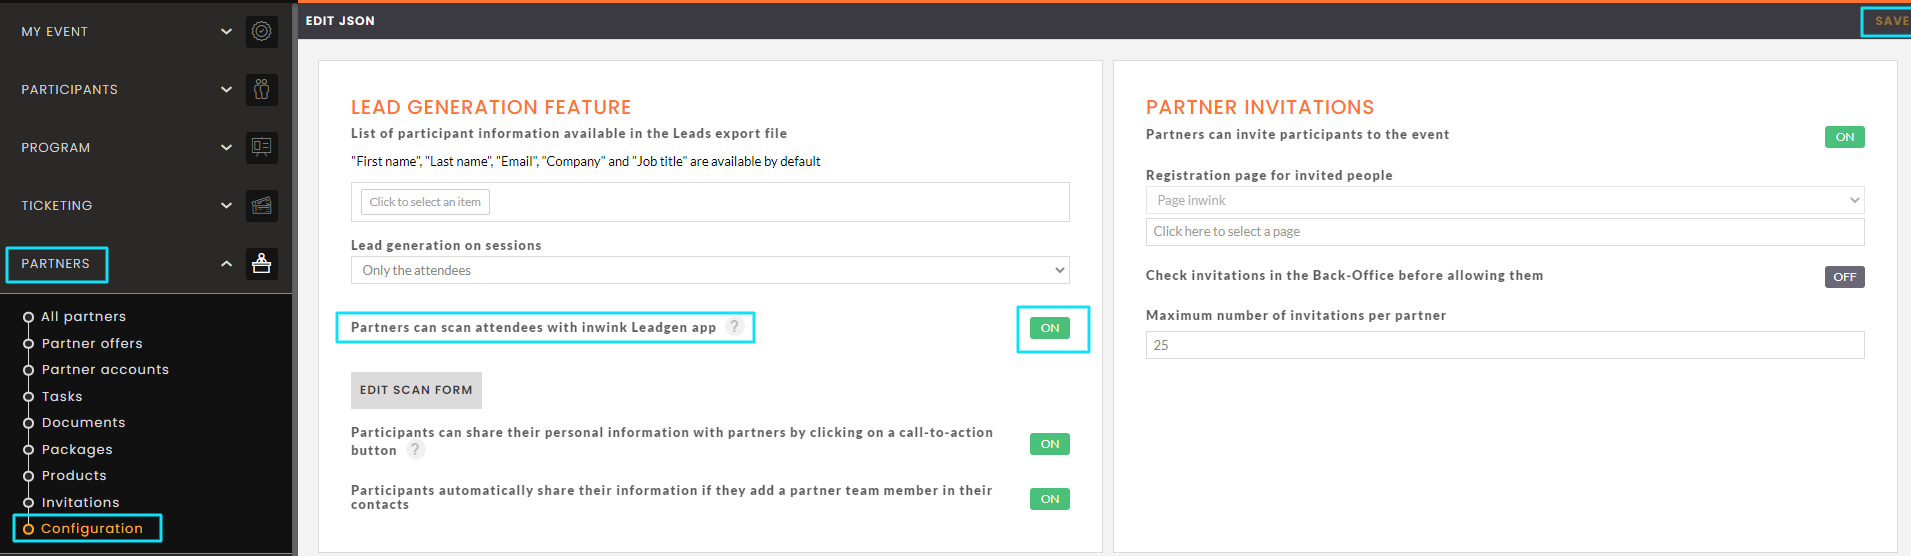
Then SAVE
You have access to a document that explain the functionality.
This document can be send to your partners.
⚠️ QR code to add
At the end of the document, you have a free space to add a real participant QR code, so your partners can test the all functionality.
It is necessary to add the QR code of a test participant or your personal QR code.
Functionality configuration
Questions asked after a scan
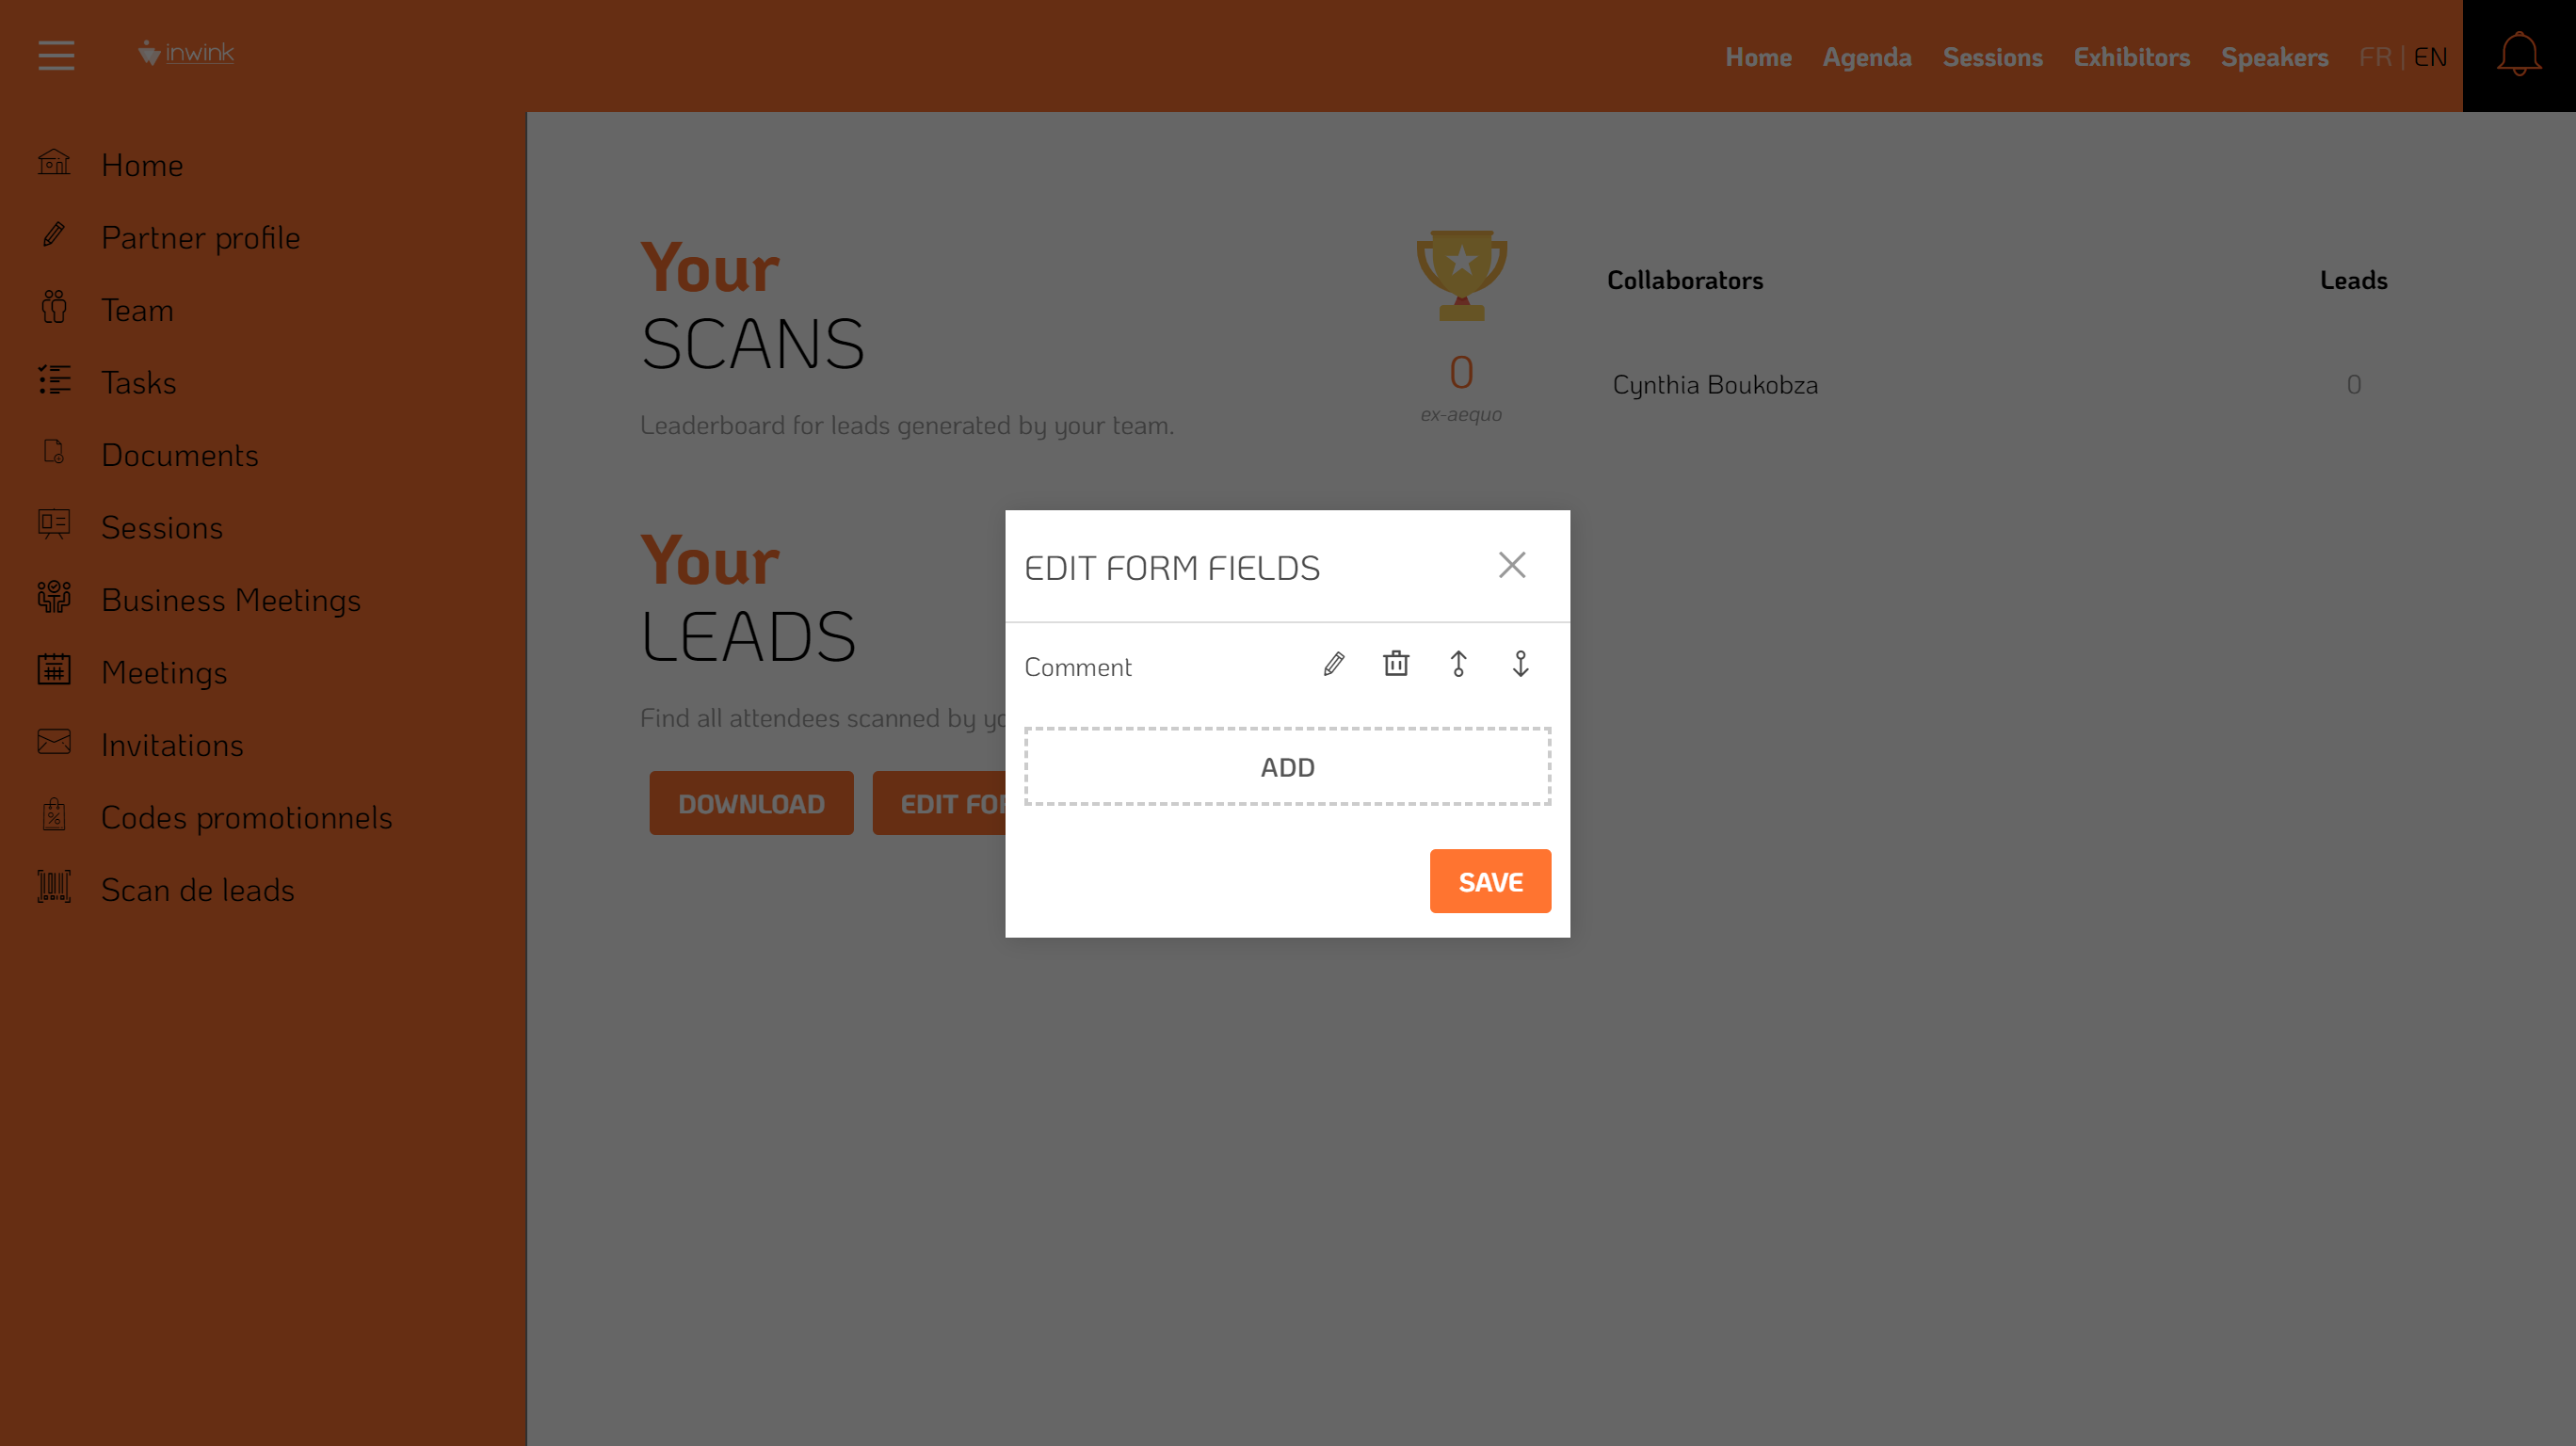
After a scan, by default, a field Comment appears.
This allows partner to add context to the scan in order to get in touch with the participant after the event.
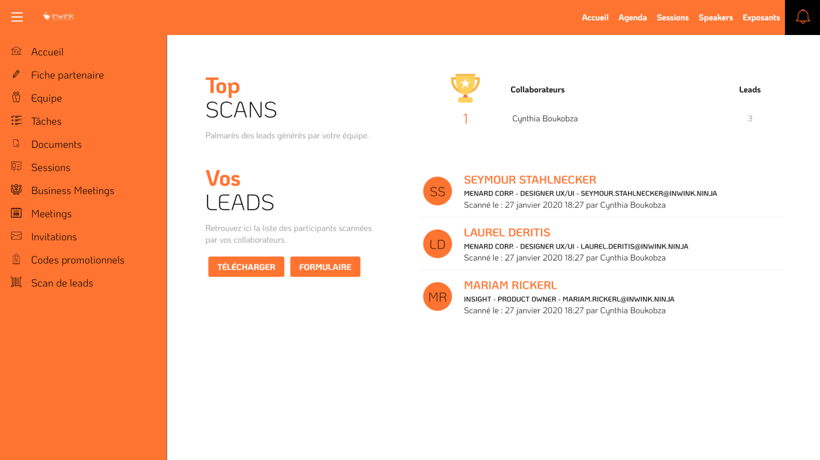
From his workspace, on the menu Leads scans, the partner has a button FORM that allows him to add new questions for his team.
This functionality is explained on the document to download above.
You can modify the form for all partners from the menu Configuration / Modules, by clicking on the button Configure of the Partners / Exhibitors module then on the button EDIT POST SCAN FORM
Fields available for export
By default, when a partner export the list of participants he scanned, he gets the following information: last name, first name, email, company, job title + added comments.
You can choose to give access to more participants informations.
To do so, from the menu Configuration / Modules:
- Click on the button Configure of the Partners / Exhibitors module
- Under the question List of all participants information available at the export.
- Click on the button Click to select an item
- Select participants fields that partners will be able to export
- Click on VALIDATE to save your modifications
Scans export
Through the back office
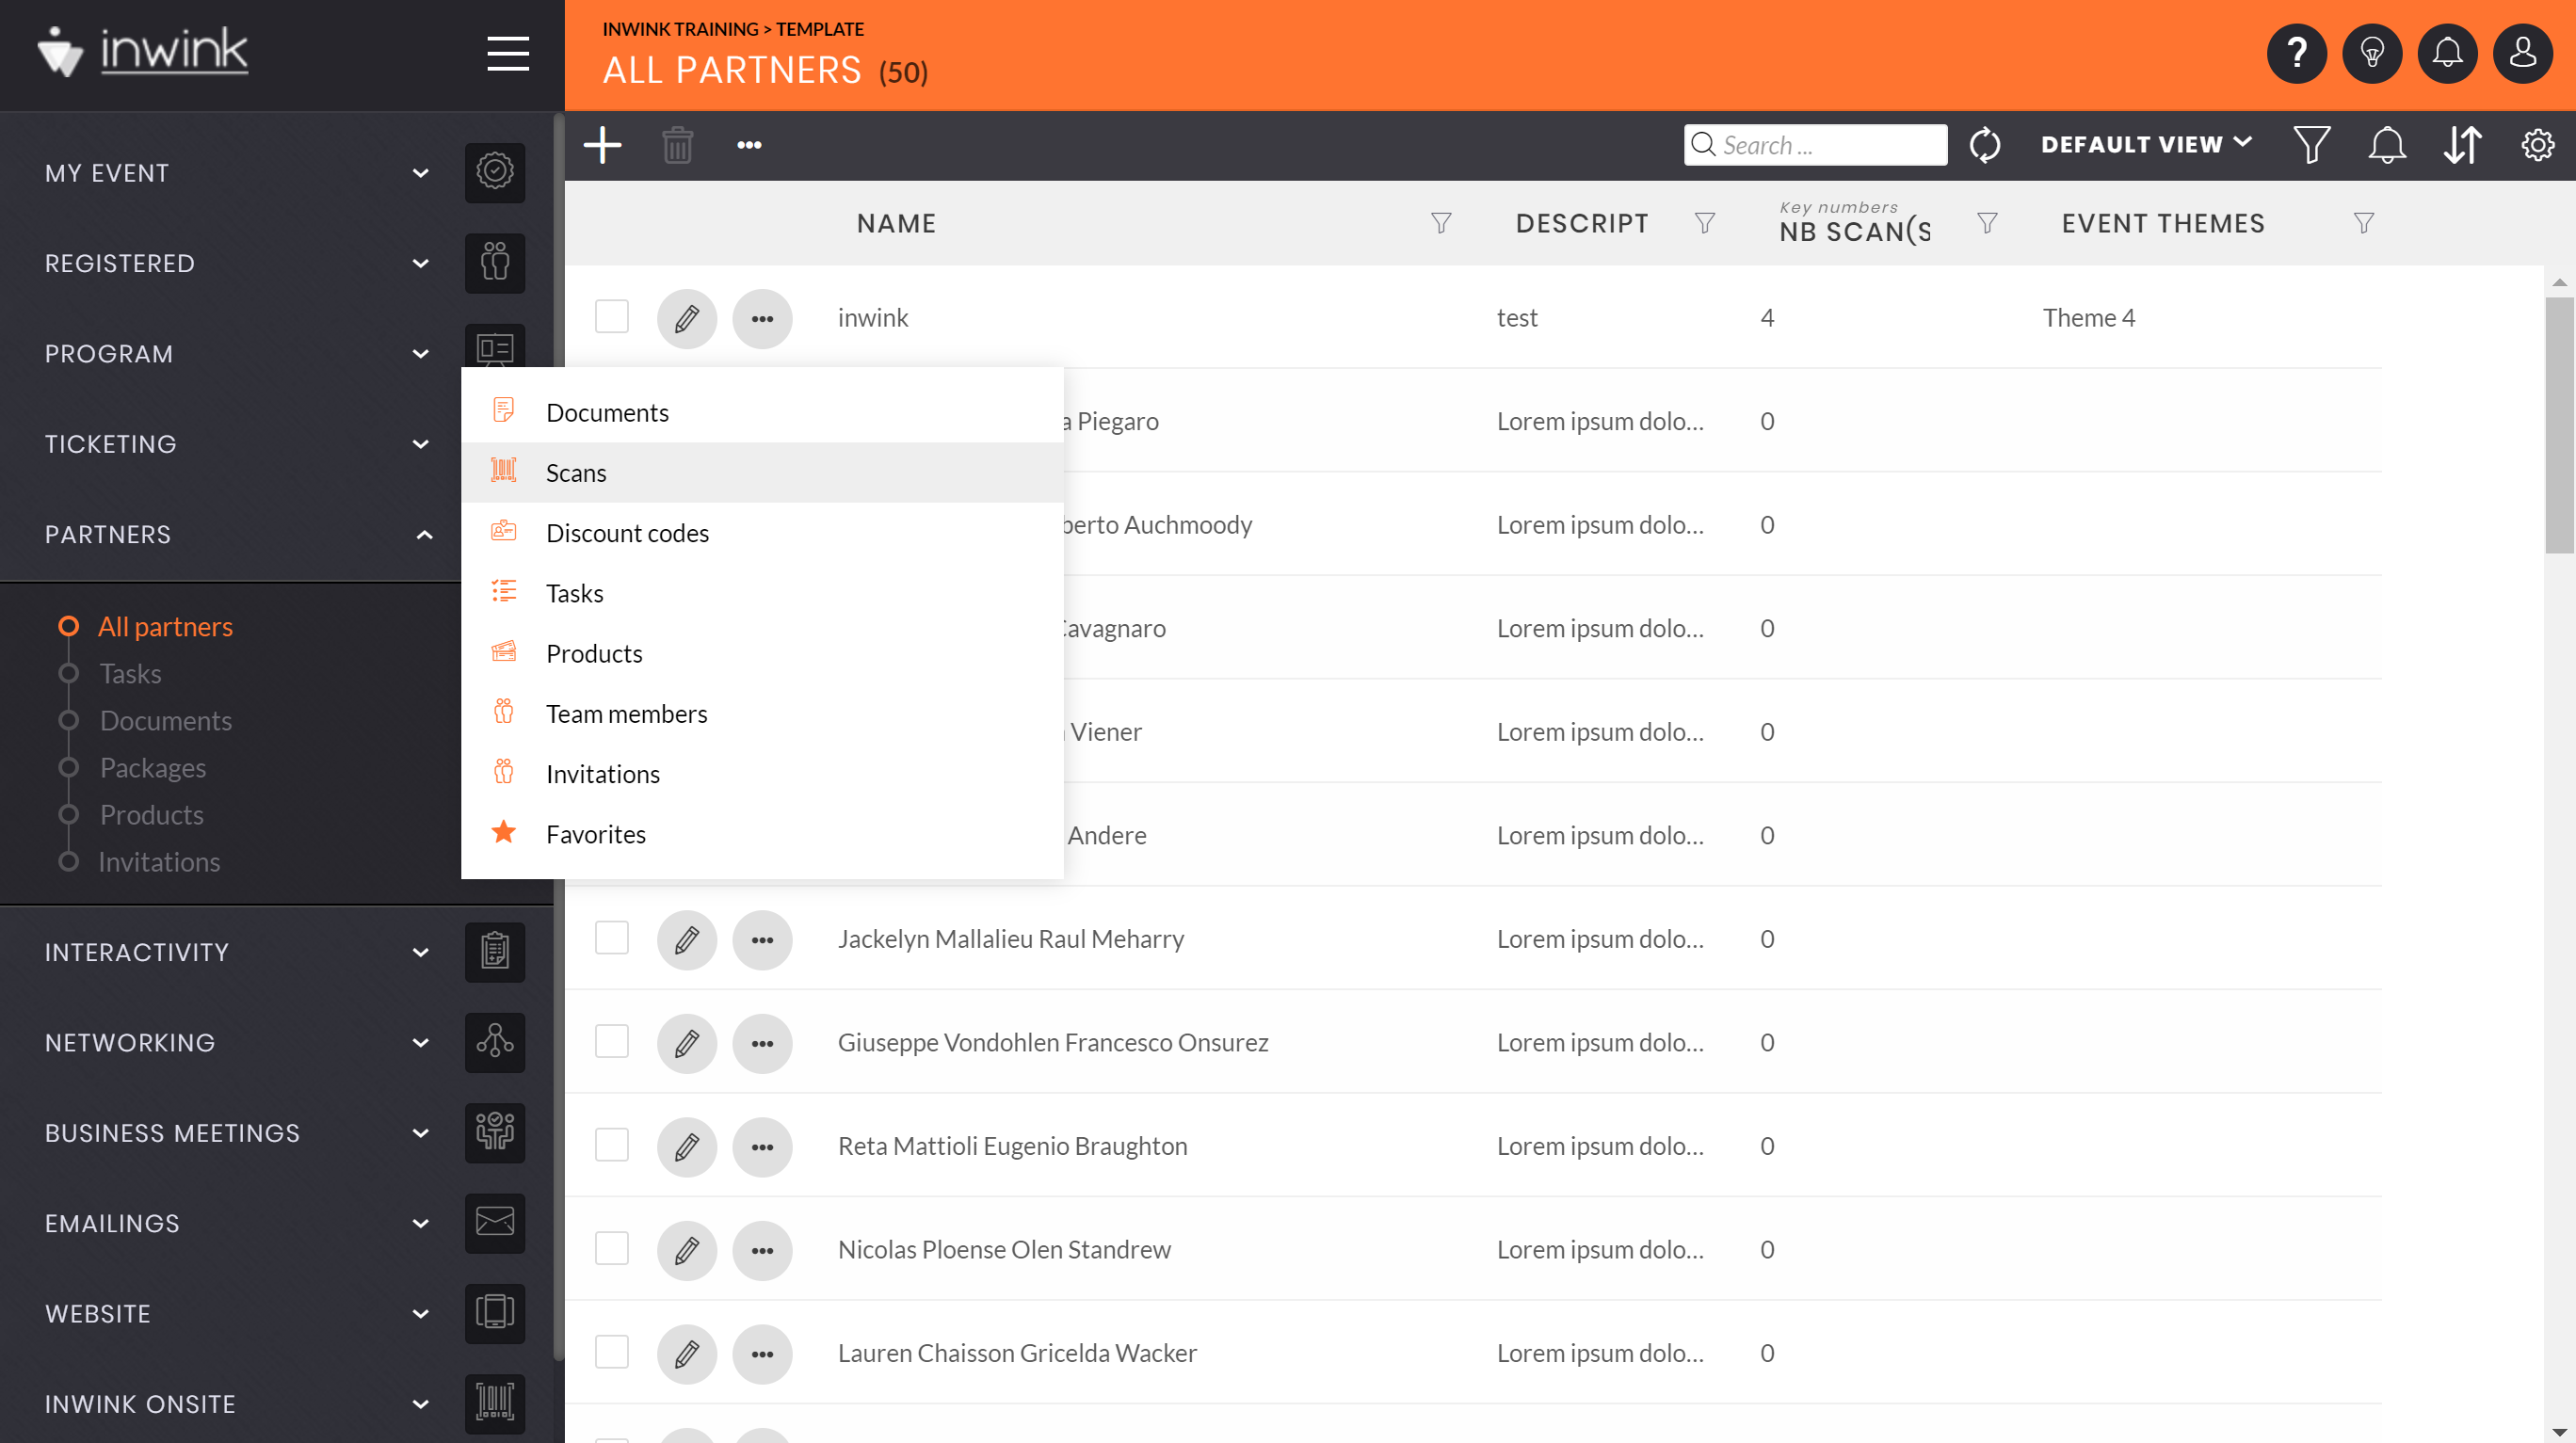
To export the list of all participants scanned by a partner, from the menu Partners / All partners:
- Click on the button
 then on Scans
 - Export the grid that appears
Through the partner workspace
In the partner area, the partner will find a Leads tab, in which he will have the complete list of people scanned during the event. He will also be able to export this list from this area.
❗Please note:
In the partner area, the leads menu dynamically creates as many tabs as there are lead sources.
For example
- Scans (performed via the Leadgen application)
- Share your informations / Messaging (retrieved during contact with the participant, if the latter has accepted the sharing of contact details)
- Networking Contacts (list of participants with whom the partner has had a meeting or been in contact)
- Meeting (Business meeting appointments)
- Sessions Here you'll find a list of participants who have attended a session of the partner in question.
In the case of Meetings, all appointment requests made by participants to the partner are listed, even if the partner has not validated the meetings.
All this information will also be present in the exported file, via tabs of the same name.