Scanning allows to collect participation and attendance data on the day of the event through the inwink onsite app. These data are real-time synchronized in the inwink Back-Office.
To use this feature, it is necessary to activate ON the "Scans & Badges" unit in the Back-Office: "inwink onsite" > "Scans & Badges" > "Save".

Session scanning
Back-Office configuration
Follow the steps below to scan your participants at the entrance of your sessions:
- Create sessions in the event program
- Assign session to rooms and time slots from the session planning
- Assign sessions to their respective rooms to form your overall schedule
Setting up the scan on the app:
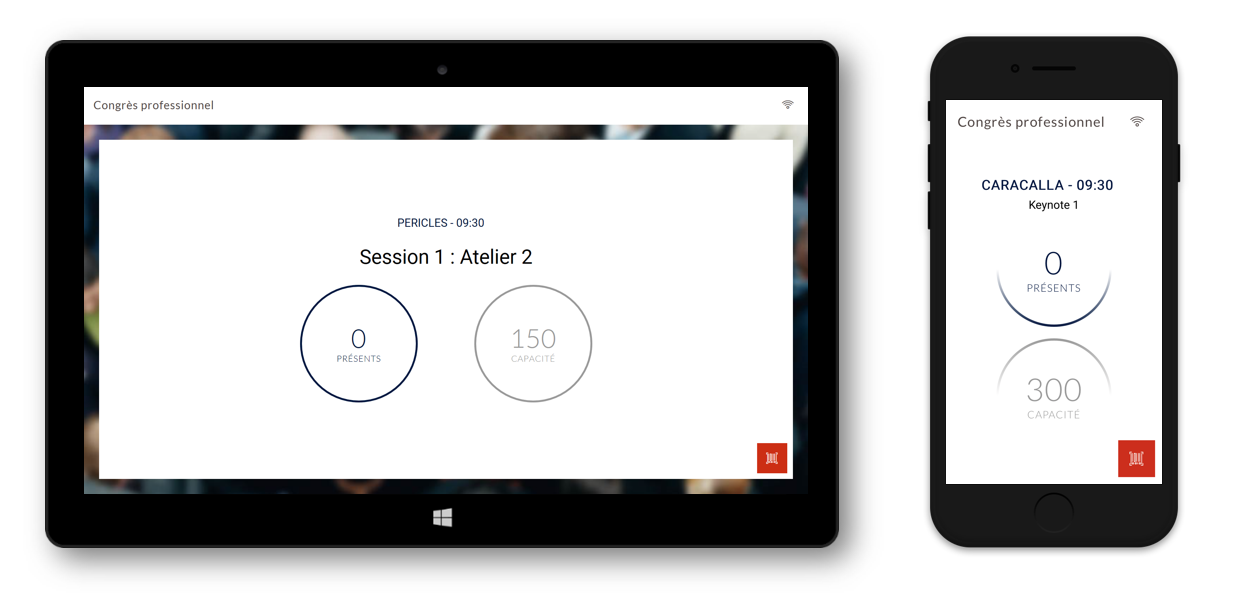
To enable scanning on the application, follow the steps below:- Open your inwink Onsite application on your scanning hardware
- Go to the Scan module
- Click on the Wifi button on the top right
- Choose your room and time slot
- Check that the session name matches the session you want
- Scan your participants at the entrance of the rooms
Access control scanning
Back-Office configuration:
Follow the steps below to be able to scan your participants in a specific area of your event (reception, stairs, etc.):- Create your scan zones from the inwink Onsite / Scanning checkpoints menu
Setting up the scan on the app::
To enable scanning on the application, follow the steps below:- Open your inwink Onsite application on your scanning hardware
- Go to the Scan module
- Click on the Wifi button on the top right
- Choose your scan area and time slot
- Check that the zone name corresponds to the zone you want to scan
- Scan your participants as they pass through the zones
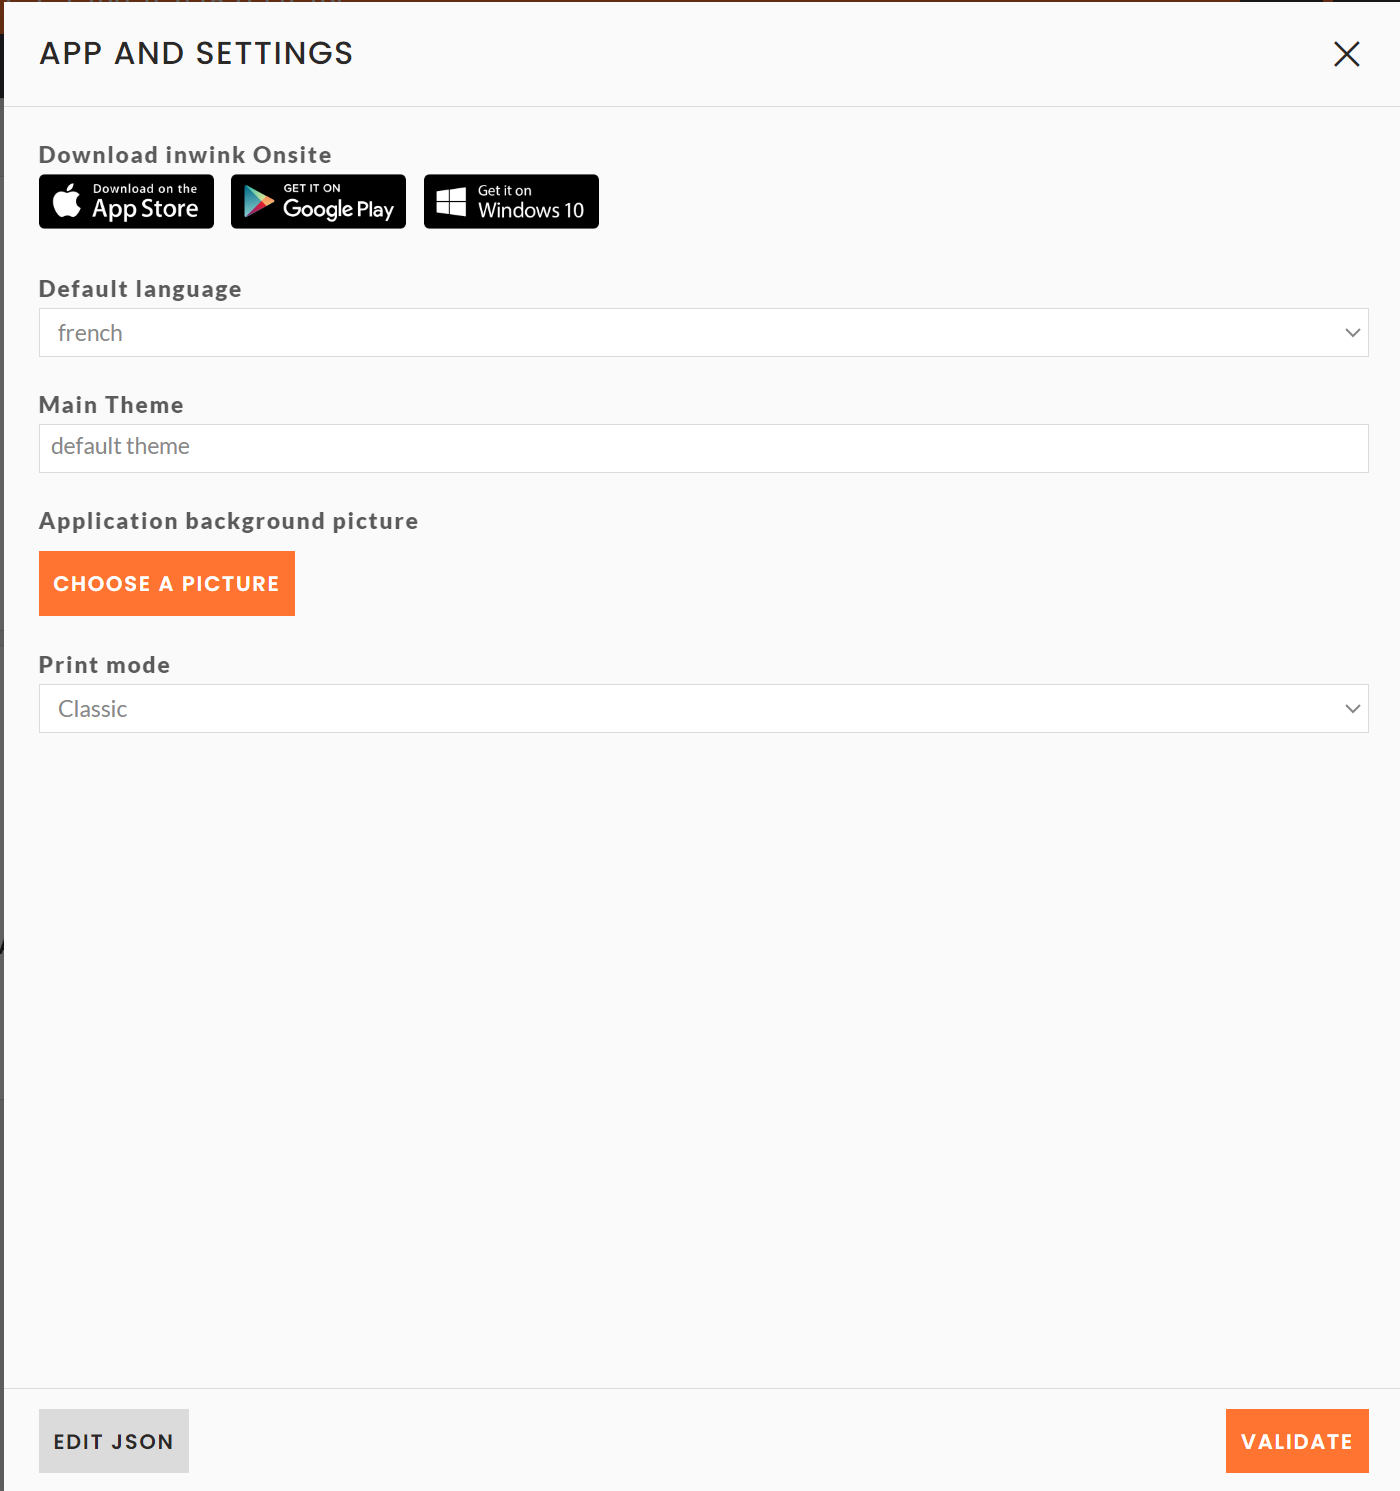
If you see a blank page on one of your Onsite screens, remember to publish the display theme for your site, associated with your application (from your back office > onsite > configuration > then edit the "App and settings" card):