Filter a grid
Apply one filter
On grids columns, you can filter the data to display.
To do so:
- CLick on the button
 on the top of the column
 - Select the type of filter to apply:
- For List and Yes/No fields, go on the next step
- For Text fields:
- Contains
- Is equal
- Is not equal
- Is null
- Is not null
- For Dates and Number fields:
- Is between
- Is equal
- Is not equal
- Is after
- Is strictly after
- Is before
- Is strictly before
- Enter filter value
- For List fields: select one or more values
- For Dates and Number fields: select True, False or Not set
- Click on APPLY
- Your grid is filtered
Apply several filters
To apply several filters on your grid, two options are possible:
- Repeat instructions on section Apply one filter on all columns to filter
- Use the multiples filters functionnality
For the second option, follow steps below:
- Click on the icon
 on the top right of the grid
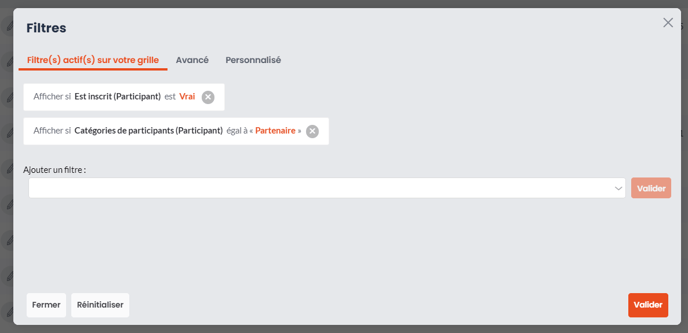
 - Select the first field to filter and select its value, same way presented on section Apply one filter
- Click on VALIDATE to add the filter
- Add all other filters and click on VALIDATE on the bottom of the window

- Your grid is filtered:
- On the top, next to All Participants, you have the number of lines on the grid
- An orange dot on the icon
 indicate the number of filters applied on the grid
Advanced filters and personalised tab
Advanced filters
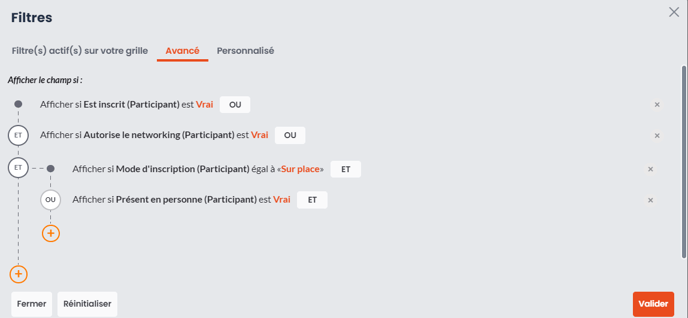
On all inwink grids, when you click on the icon  to access filters, you have an Advanced tab.
This tab allows you to add filters with options AND and OR.
Example: the grid must show all participants who are registered AND who have authorized networking AND whose badge has been printed on site OR if present in person is equal to true.

Personalized tab
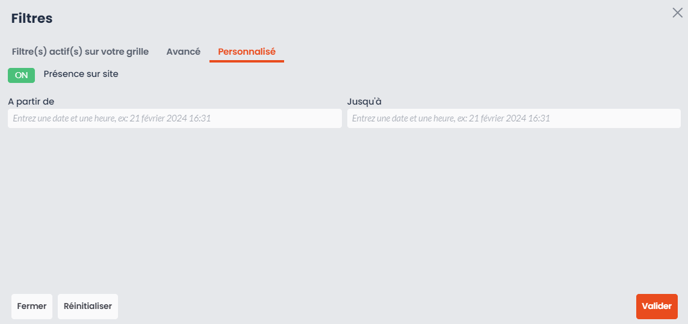
On participants grid, when you click on the icon  to access filters, a tab Personalized is available.
This tab allows you to filter participants by their presence at the event: it is interesting to use this filter to create a view to pin on a dashboard.

