Discount codes creation
Create a discount code
Creation fields
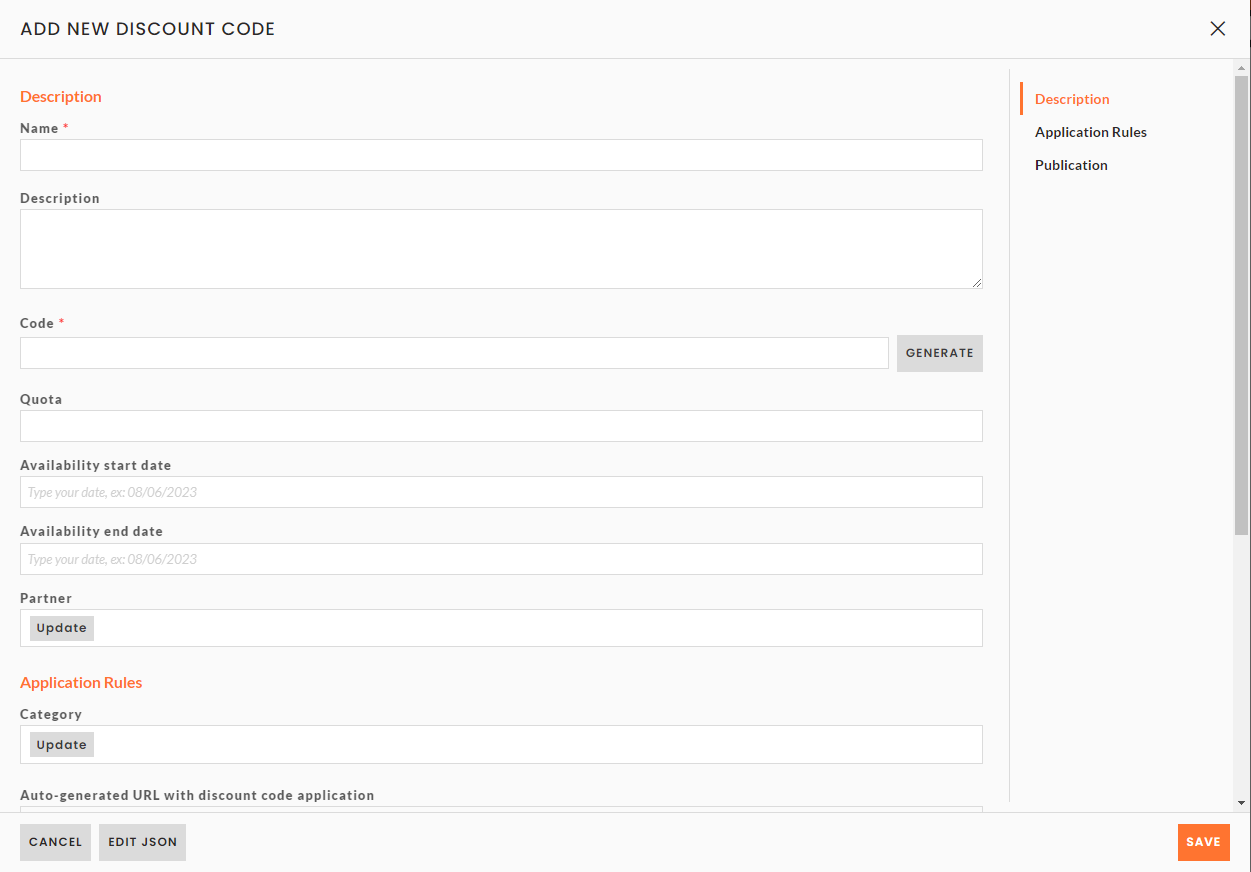
To create a discount code, from the menu Sale/ Discount codes:
- Click on ➕ in the Sale/ discount codes menu
- Enter discount code information:
- Name: name of the code, visible only on back office
- Description: description of the code, visible only on back office
- Code: can be entered directly or click on the button GENERATE to generate it automatically
- Quota: maximum number of uses of the code
- Activation dates: allows giving dates during which the code can be used.
- Partner: allows associating a code to a partner for him to invite participant
You can see the display for partners on the Partners / Discount codes page.

Application rules
Next fields allow you to define application rules for the code:
- Category:
- Order: code applies on global order, no matter the number of pricing selected
- Pricing: a question appears below to choose if the code is applied:
- On the most expensive pricing of the order
- On the cheapest pricing of the order
- On a specific pricing to select
➡️ If you combine several products (e.g. a badge and a single-use ticket) when ordering from the ticketing service, the discount type will also apply to the most expensive or cheapest fare in the order.
Then, select a maximum number of tickets per order on which the discount code can be applied on.
- Discount mode: choose if the discount is applied as an amount or as a percentage.
- Discount amount: indicate the discount amount or percentage that will be applied on the all taxes included amount
- Participant category: allows to automatically apply a category to the participant who used the code.
If a participant category is defined in the pricing and another in the discount code, then the participant will have both categories
- Publication status: must be entered as published for the discount code to be used by participants.
- Click on SAVE to create the discount code.
URL with self-generated discount code
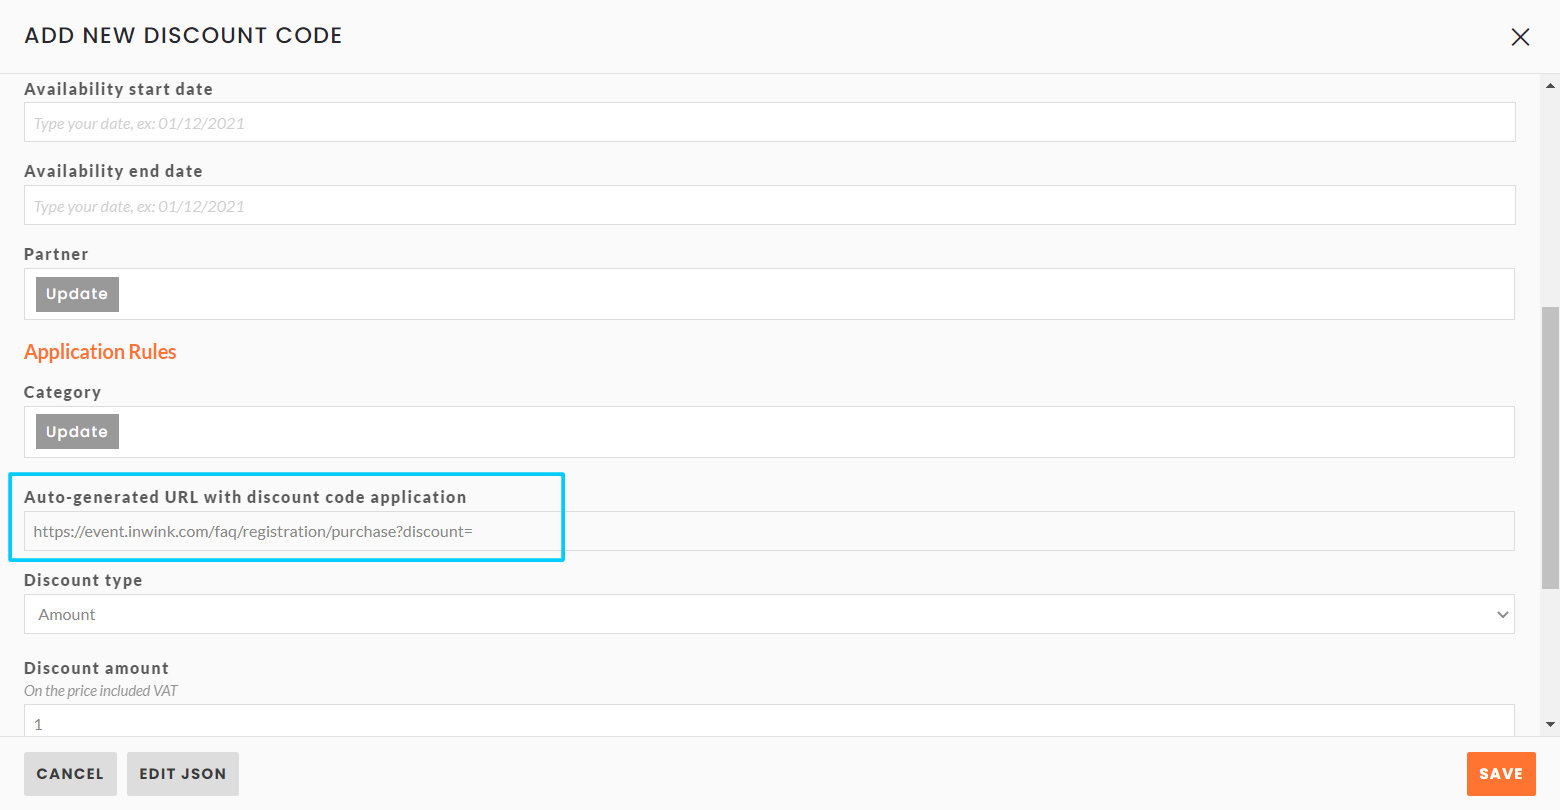
From now, when a discount code is created, a specific URL is generated:

If your ticketing service is not named purchase, we invite you to modify the auto-generated URL by replacing "purchase" with the name of your ticketing service (you can find the name of the ticketing service in the URL of your ticketing service on your published site) before sending it.
You also have the possibility to add in the URL link the ticket ID and the number of tickets. So by sharing the link, the ticket and the number of tickets will be pre-selected.
Here are the elements to add in the URL according to your need:
- discout=code name to add the discount code
- productid=ticket id to add a specific ticket
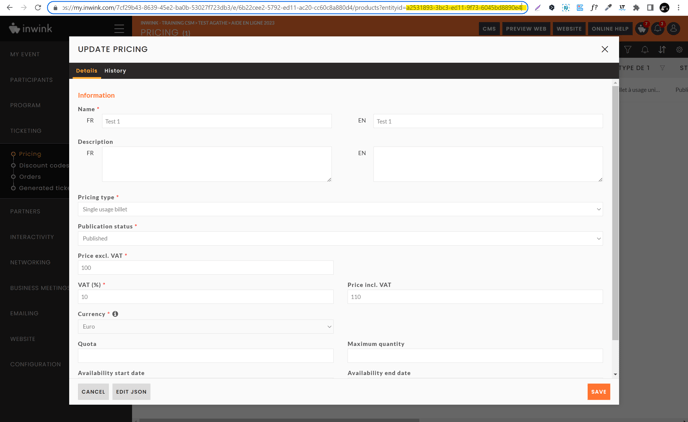
You can find the ticket ID in the event back office > Sales > Pricing> Update Pricing > You will find the ID in the URL :

You can also find the ticket ID by exporting your tickets from the Sales > Pricing grid. The ID will be found in the first column "ID".
- qty=wanted quantity to add the number of tickets
The first parameter must be added after the ticketing URL, by adding a ?
The following parameters must be separated by a &.
URL of your ticket office + ? + discount = your discount code + & + productid = the ticket identifier + & + qty = the quantity
More information on this video
A little tip in addition to the video, you can change the number of tickets in the link of the URL code to send if needed:
Usage tracking
Click on the button to see participants who used a discount code.

Generate several codes at once
You can generate X codes with the same applications rules at once.
To do so, from the menu Sales/ Discount codes:
- Click on
 , then on See... / Generate several codes
 - Enter information for the first step:
- The prefix: precedes every code. Limited to 5 characters tops
- Amount of created codes: indicates the number desired of generated discount codes.
- Restricted use of the code: the maximum number of pricing on which the code can be applied.
- Choosing a partner: allows associating a code to a partner for him to invite participant
You can see the display for partners on the Partners / Discount codes page.
- Click on NEXT and enter information for the second step: this information is the same as the ones presented in the section Application rules
- Click on NEXT and enter information for the third step: this information is the same as the ones presented in the section Creation fields
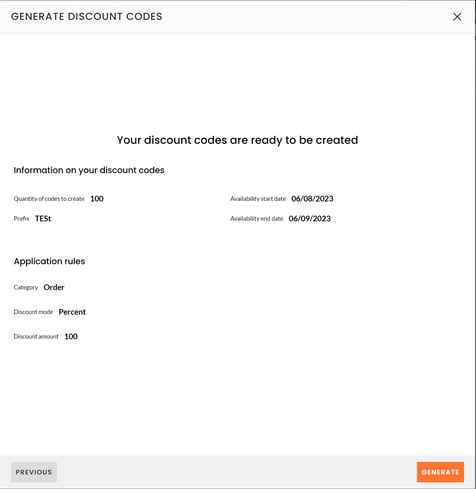
- Click on NEXT: a summary of codes to generate is displayed.
If information is correct, click on GENERATE.

Related articles:
- Pricing
- Customise your ticketing service
- Open the ticketing
- Orders
- How to generate a ticket
- Partner invitation with single usage ticket
- Building a BtoC ticketing service, the steps
