Quick access
1° Activate ticketing
Stripe connector
2° Edit a product
Add a product
Modify a product
Delete a product
3° Create a discount code
4° Access the Ticketing Service
5° Edit forms
6° Order grid (Back-office)
Payment status
Modify buyer information
Validate order (on invoice)
7° Email templates
8° Cancel subscription
1° Activate ticketing
To create a ticketing service in your community, go to Back-office
> Configuration > General information > Membership settings
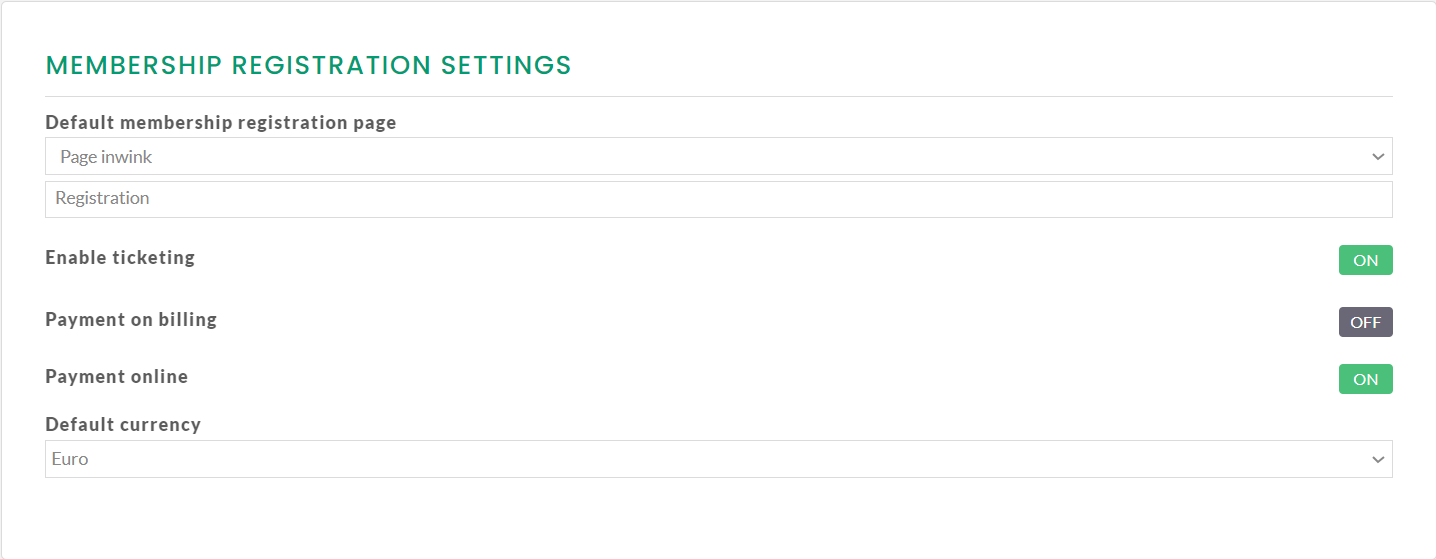
Enable ticketing by switching OFF to ON: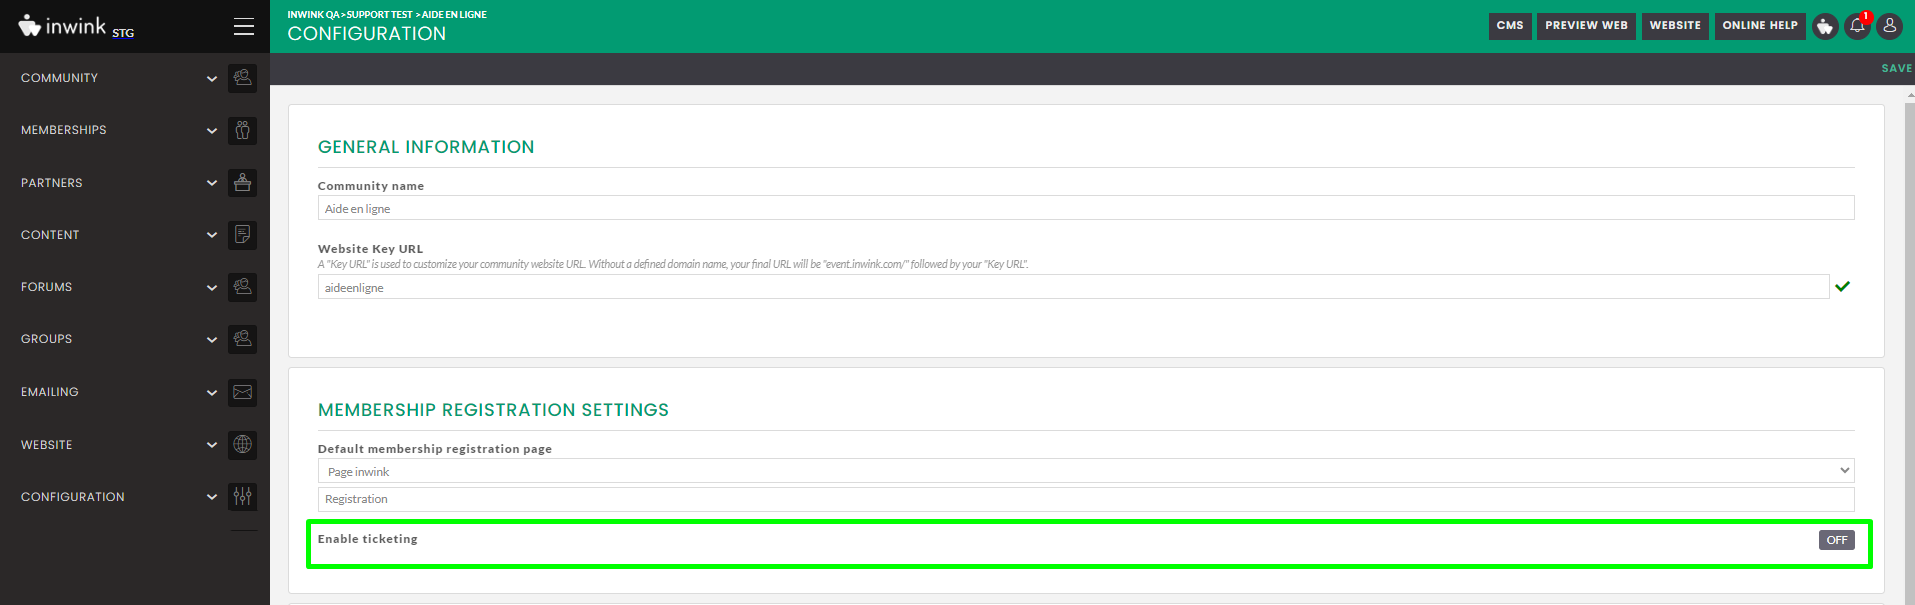
- The default setting is "Payment online"
- If required, "Payment on billing" can be selected here
- Finally, you must also choose a "Default currency"
Once the choices have been made, the settings must be saved by clicking on "Save" at the top right of the page:

When you register, a pop-up window will tell you that you need to configure a third-party payment tool.
Stripe is the solution chosen by inwink as payment tool for the community.
🕵️ To find out how to configure Stripe for use with the ticketing service, please visit this article: Stripe synchronization
Once registered, a new "Ticketing" entry appears in the menu:
2° Edit a product
A "product" on the community corresponds to a subscription. It is associated with a membership level, a duration and the "immediate" or "with administrator validation" subscription methods.
Add a product
To add a product, go to Back-office
> Ticketing> Products> Click on the ➕ icon: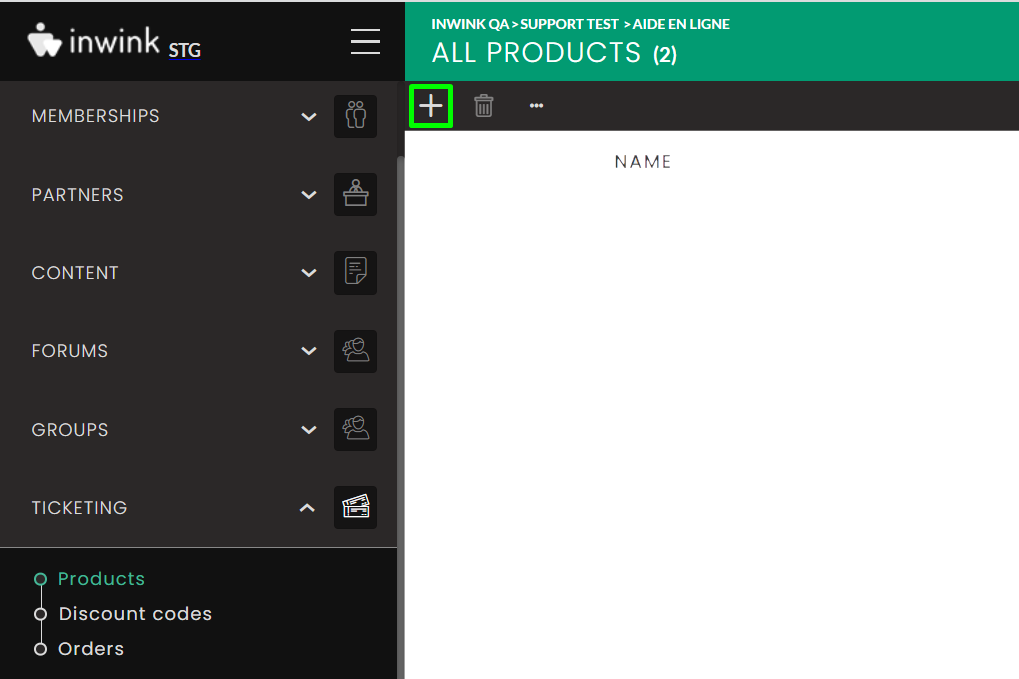
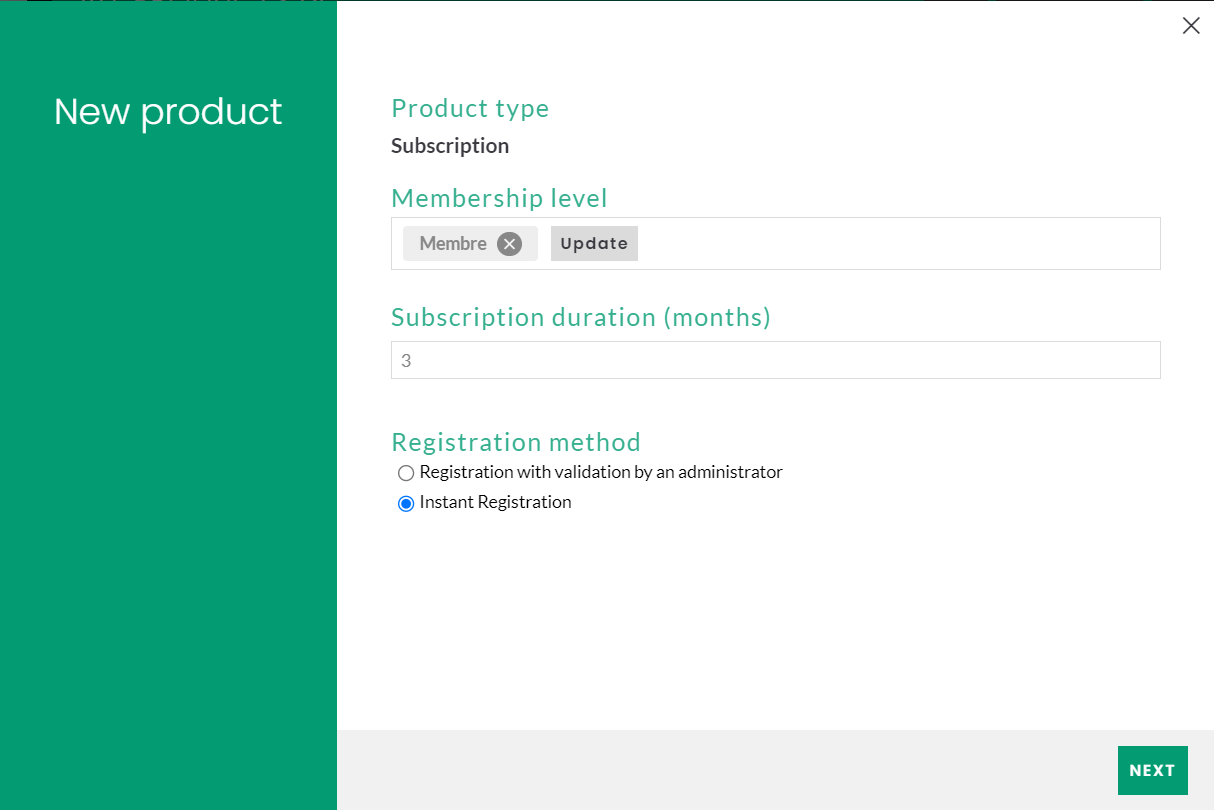
A "New product" window opens:
- Choose the membership level the new subscriber should have after registration (other levels can be added by clicking on new).
🕵️ To find out more about membership levels, see this article. - Indicate duration of membership
- Choose the registration method, immediate or with validation (this choice can be modified later by editing the product).
- Click on "Next"
- Give a name to the product to be created
- Optional: Add a subtitle, a description, an illustrative image
- Enter price without tax and VAT to be applied (in %)

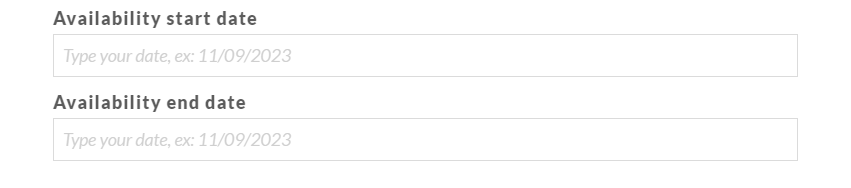
- If necessary, indicate a start and end date for availability
- Finally, click on "Create product"
The product is created, with "Preview" status by default
(visible only in back-office and CMS/preview views)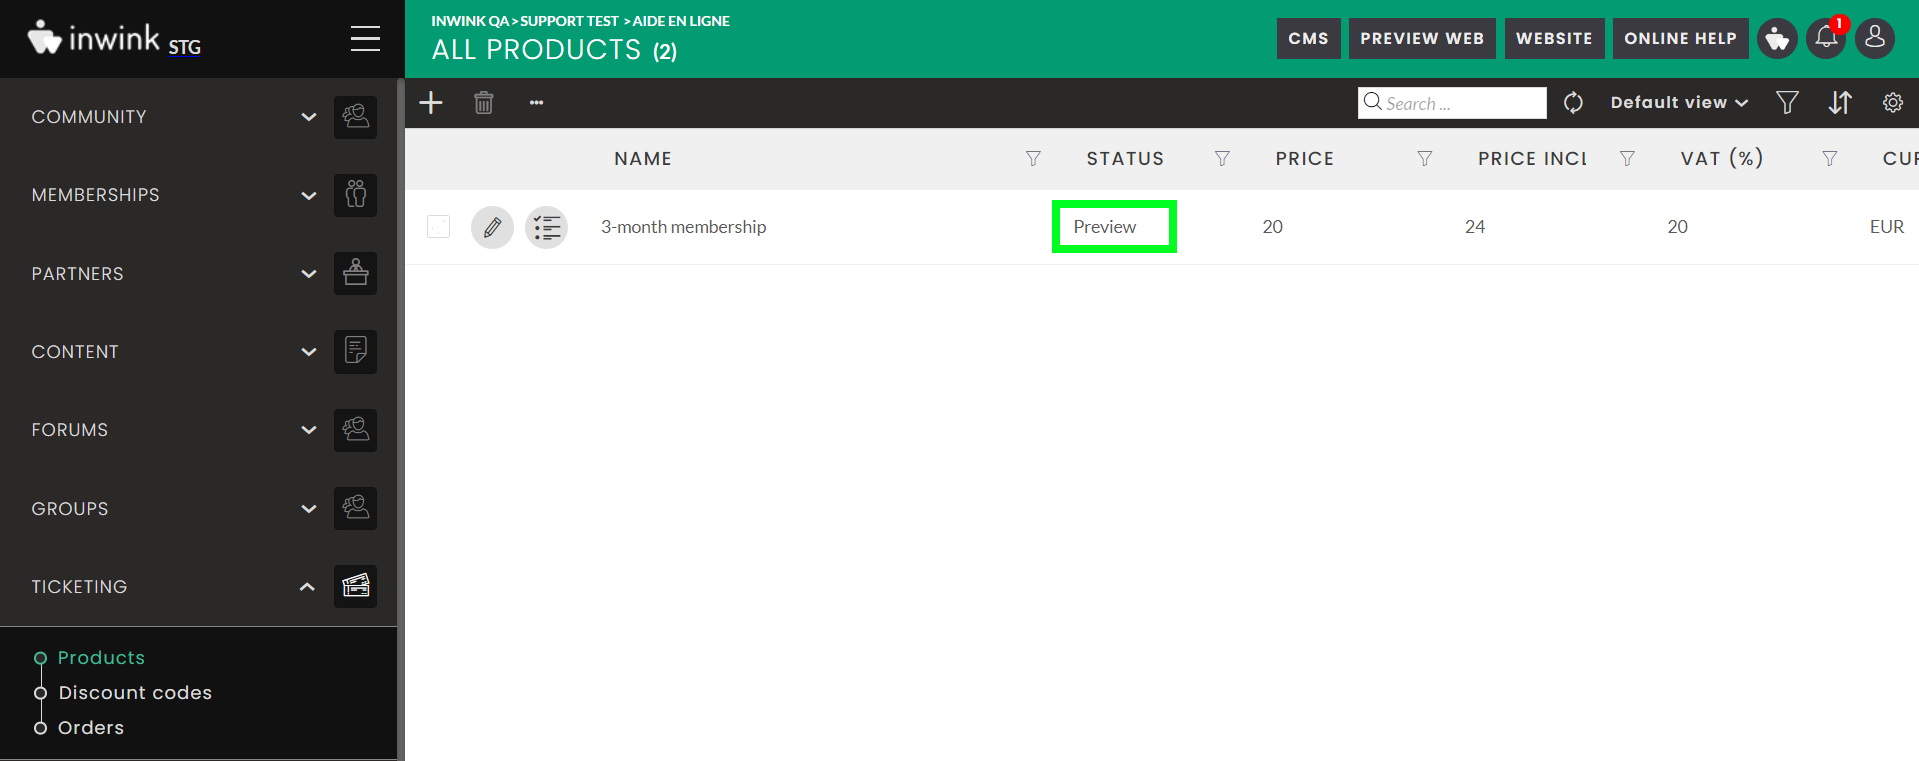
To make the product available on the site, edit it, change the status to "Published" and save: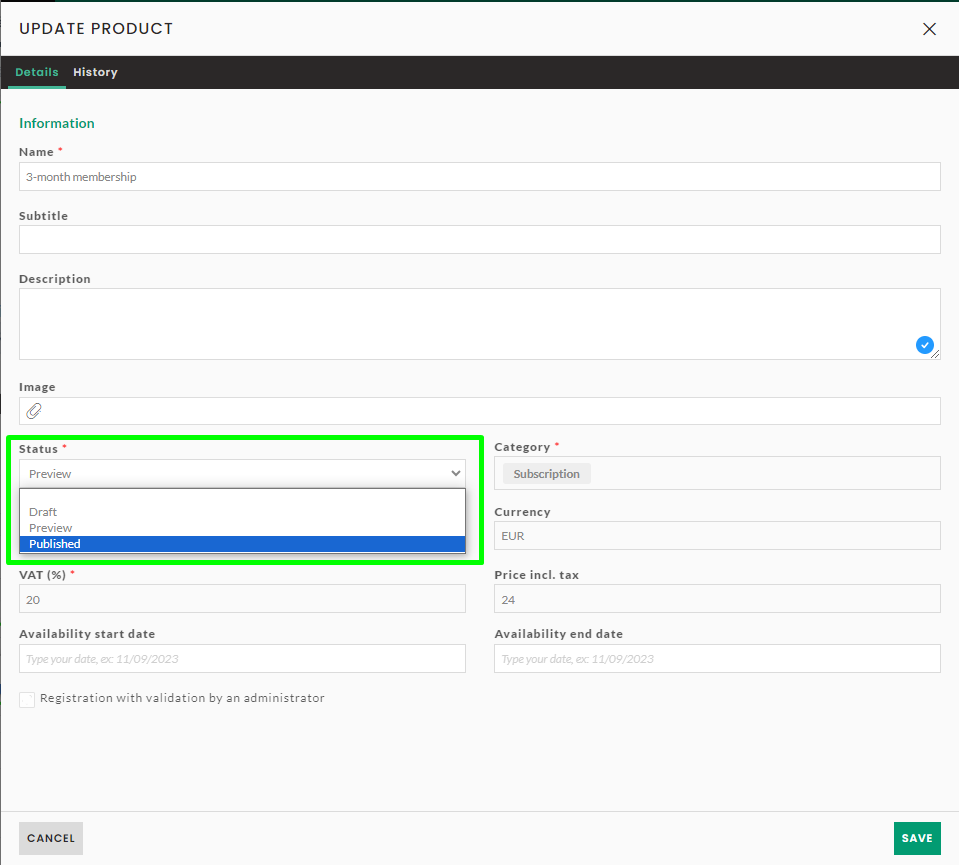
Modify a product
Product name, subtitle, description, image, availability dates and subscription method can be modified at any time by editing the product, regardless of its status.
The product price can be modified as long as it remains in draft or preview status.
⚠️ The price of a product that has already been published cannot be modified.
To change the price of a published product, you need to set it to draft status to hide it on the website, and then create the product again with a new price.
Deleting a product
To delete a product, select it in the "All products" grid, then click on the "trash" icon in the black banner.
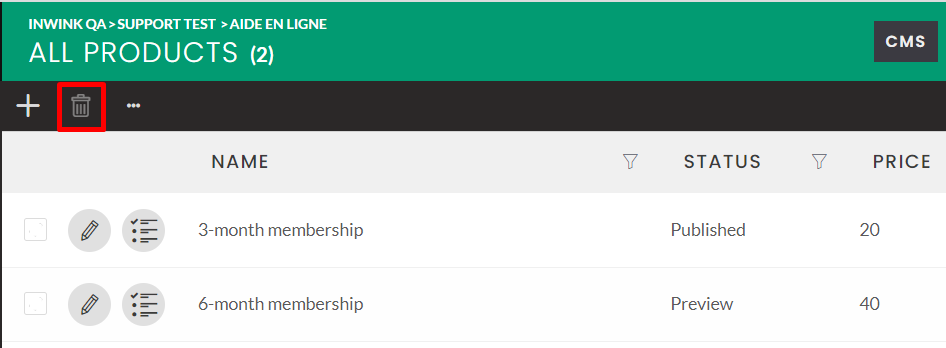
It is impossible to delete a product once an order has been placed using it. It is only possible to make it invisible to users by changing its status to draft or preview.
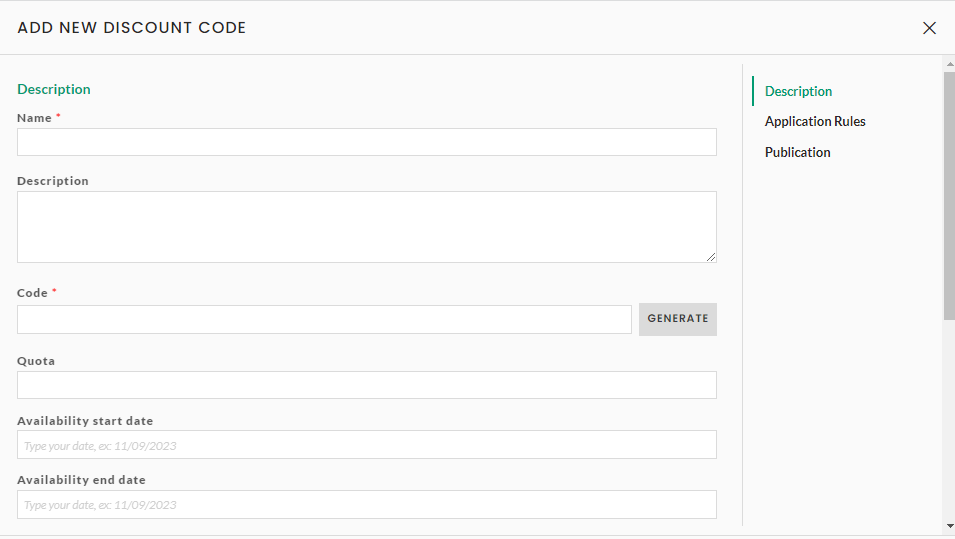
3° Create a discount code
To create a discount code, from the Ticketing / Discount codes menu, click on the ➕ icon at the top left of the grid.
Description :
-
- Name (only accessible in Back-office)
- Description: description of the code (only accessible in Back-office)
- Code: The title of the code to be communicated. Can be generated automatically by clicking on the GENERATE button
- Quota: maximum number of times the discount code can be used
- Activation/deactivation dates: Allows you to define a start/end date, or a date slot during which the code can be used
Application rules:
-
- Discount mode: Choose whether the discount is applied via a fixed amount or a percentage.
- Discount amount: the amount, or percentage, of the discount that will be applied to the amount including VAT
-
- Discount type: defines whether the discount can be applied to all products, or only to a specific product
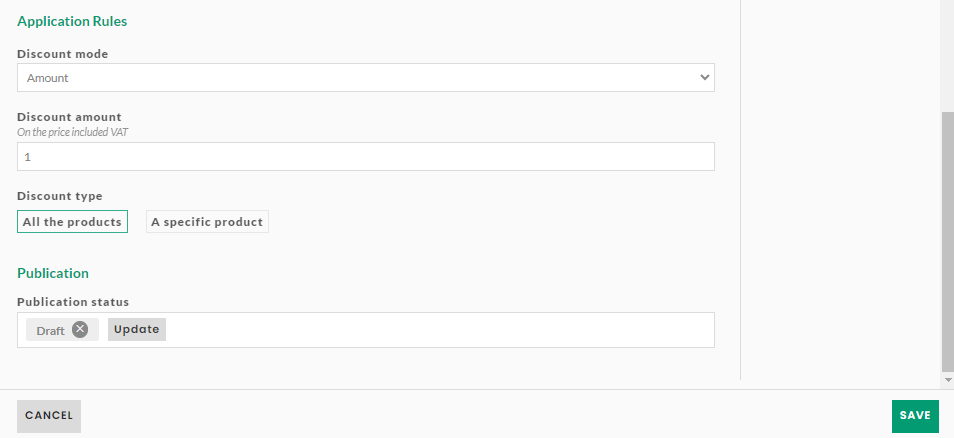
Publication :
-
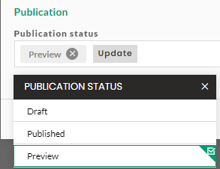
- Publication status: the status must be "published" for the discount code to be usable
- Click on "SAVE" to create the discount code
4° Access the Ticketing Service (Website)
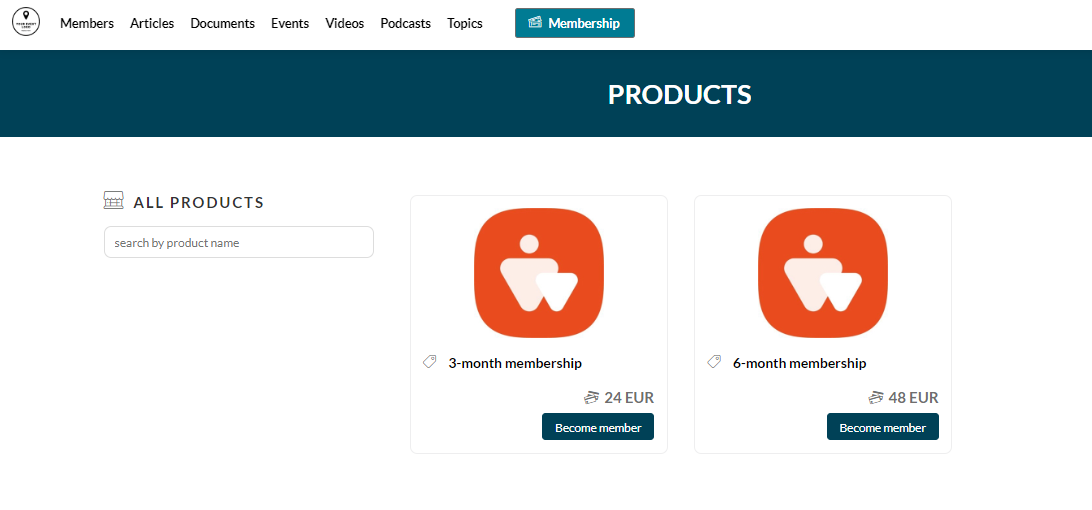
To access the Ticketing service, go to the product list page and select the type of subscription (product). Once the product has been selected, the ticketing page appears.
To enable buyers or future members to select their subscription, it is necessary to create an access point to the product list page.
To make this access clearly visible, we recommend that you add it to the menu bar at the top of the page (as a button, for example).
⇓⇓
The product list page therefore contains the possible subscription formulas, previously configured in the back office:
The default template for displaying subscription formulas can be modified by editing the content of the "Product list" block from the CMS or back-office views.
🕵️ To find out more about templates, consult this article: Templates
When you click on a subscription, the first stage of the ticketing process concerns "Member information".
Here, by default, you'll find :
- The member information block
- The "Shopping Cart", with a reminder of the formula chosen, its price, and a field for adding a discount code.
- A checkbox below the input block to indicate whether the buyer's information is the same as that of the member.
If checked, the buyer's information will be pre-completed in the next step (it is not possible to hide this checkbox)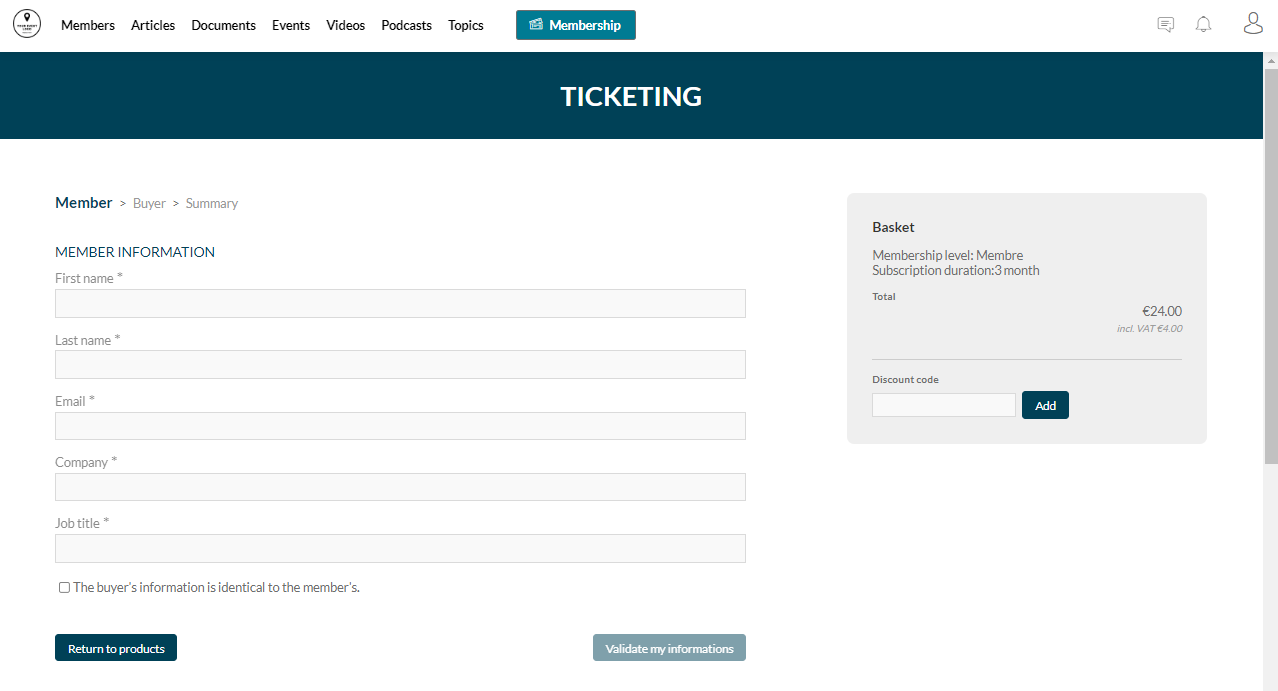
The next step concerns "Buyer information" and "Billing details" (default)
Once you have validated, you will be taken to the "Order summary" stage, where all the information previously entered is displayed.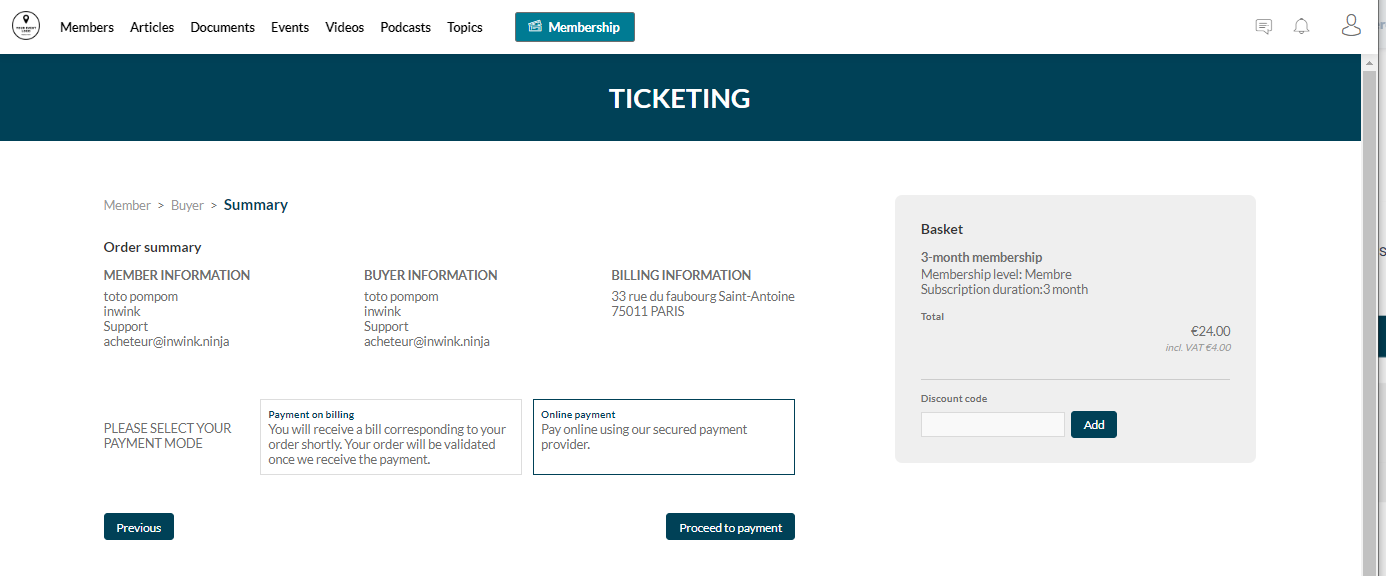
If the information is correct, it's time for the buyer/member to "Proceed to payment"
Two payment methods are available if both have been activated when configuring the ticketing service from the back office (🕵️ See Activate ticketing service).
- Payment on billing
In the case of payment on billing, the message below appears:
"Thank you for your trust
Your order has been processed. It will be validated when we receive your payment. You will then be able to connect to your community account"
For the buyer/member, the membership application procedure via the form is complete.
It's up to the administrator to inform the buyer/member of the payment method to be used, and then to validate the member's membership (See Validate an order).
- Online payment
If you choose to pay online, you will be redirected to the secure payment site to enter your bank details
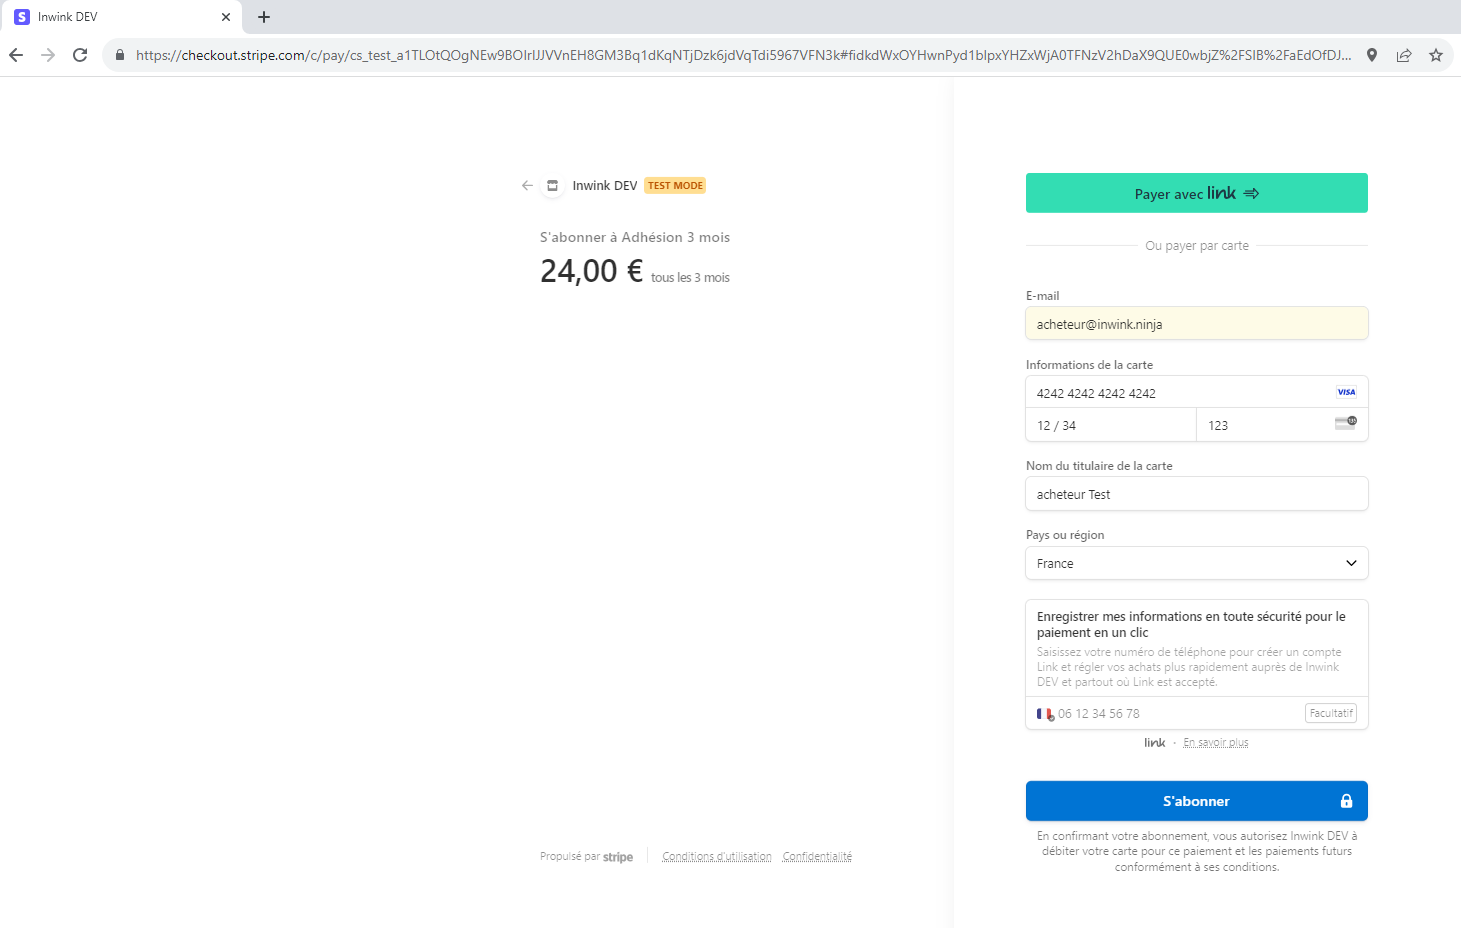
After clicking on "Subscribe", the secure site closes and a closing message appears, informing you of the success of the operation.

In the back-office > Membership > Members, the new member has been added to the "All members" grid.
5° Edit forms
The content of the "member" and "buyer" forms can be modified by editing the block, from the CMS or back-office views.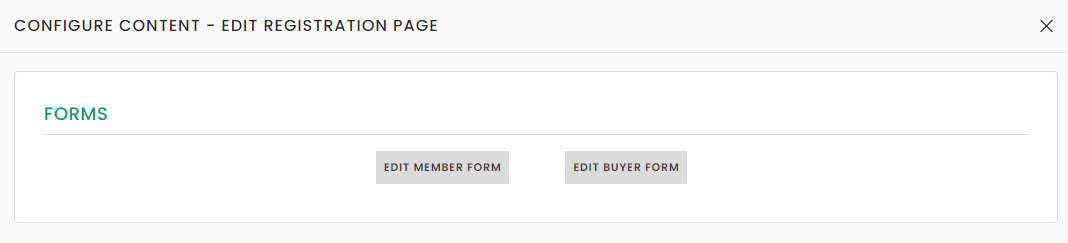
⚠️ Do not delete the default "Email" field present in forms:
This field is used to bring new subscribers up to date in the back office.
In the event of accidental deletion, be sure to use the default "Email" field in the list of fields on your form page.
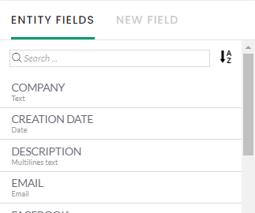
Creating a custom field, entitled "email", from the "new field" tab, is not enough to create the member, as the technical code used is different from that expected in the back-office.
6° Order grid (Back-office)
The order grid is accessible from the Ticketing / Orders menu.
It lists all orders placed on the community website, regardless of payment type or status.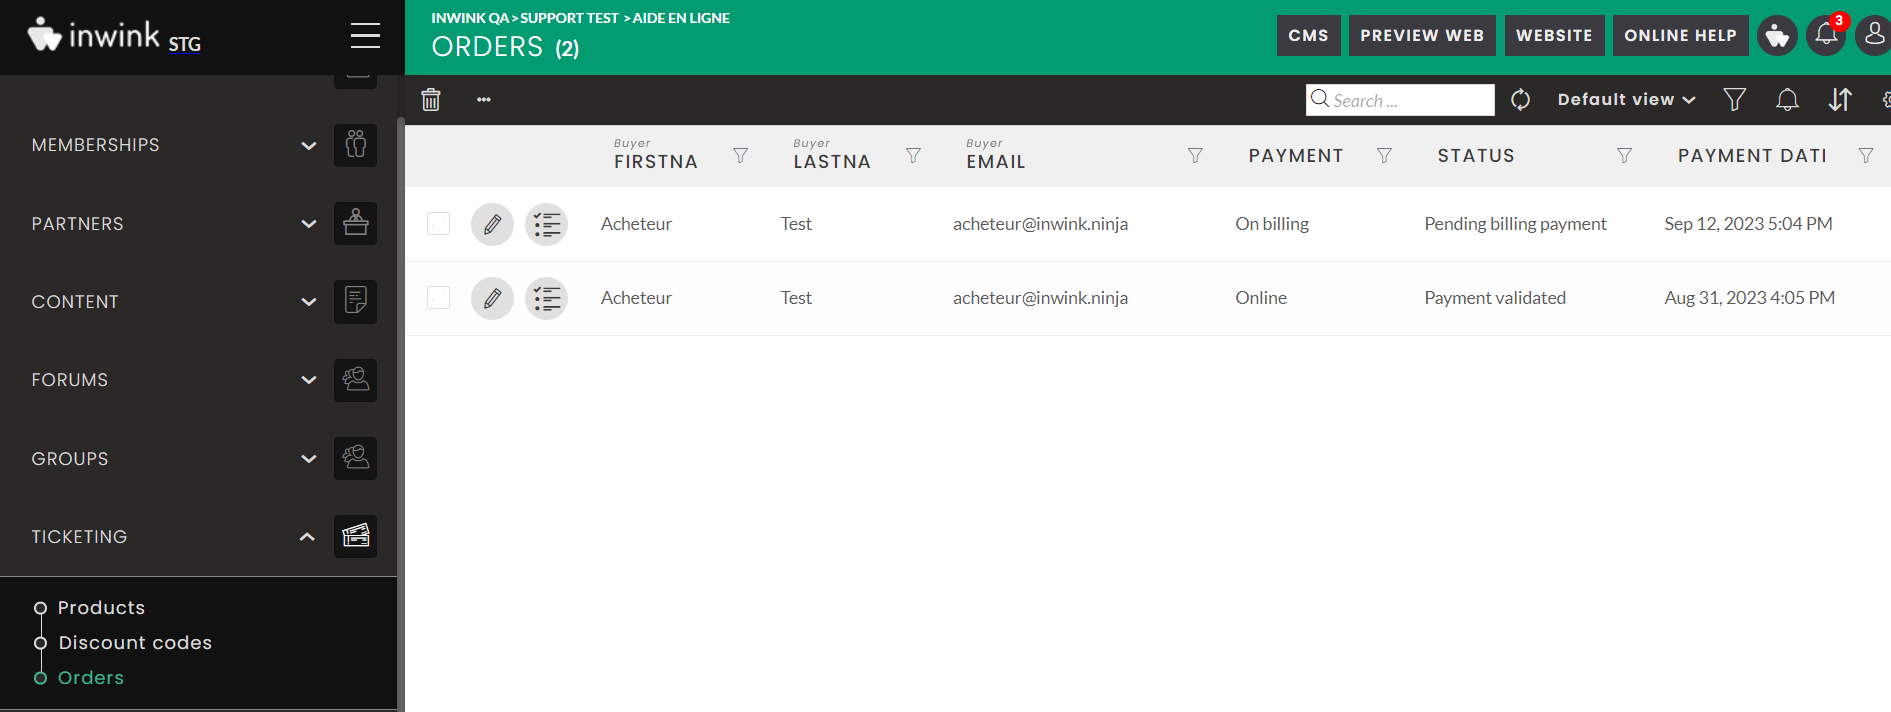
By default, the grid displays the following information:
- Buyer's first name, last name, email address
- Payment method
- Status (list below)
- Currency
- Total excl., incl.VAT
- Date of creation, payment, modification
List of (payment) statuses :
-
- Incomplete cart: online payment unsuccessful (payment not validated by bank, account blocked...)
- Awaiting invoice: invoice payment request from buyer, or if only one payment method has been configured
- Payment validated: payment validated by the payment provider, or via the back-office following an invoice request
- Payment cancelled: payment cancelled by the payment provider
- Payment failed: an error has occurred during payment via the payment provider
- Validating (administrator) : Order status in SAS mode to be validated by the administrator
- Validating (online payment): Intermediate status while payment validation is being processed (rarely displayed)
In the event of failure, if error 107 is encountered at the time of payment, this generally corresponds to an identifier or key error, we invite you to check your input in the configuration of your payment tool.
Click on ![]() to see details of the ordered pricing:
to see details of the ordered pricing: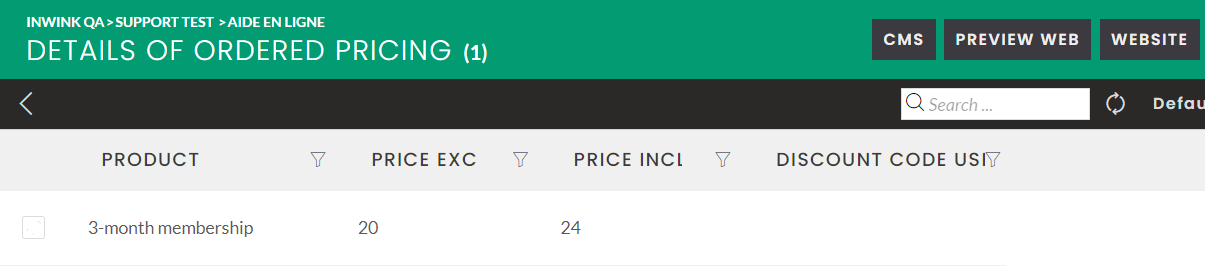
It includes the product name, the purchase price, and the discount code used.
For more details on the order, edit it by clicking on
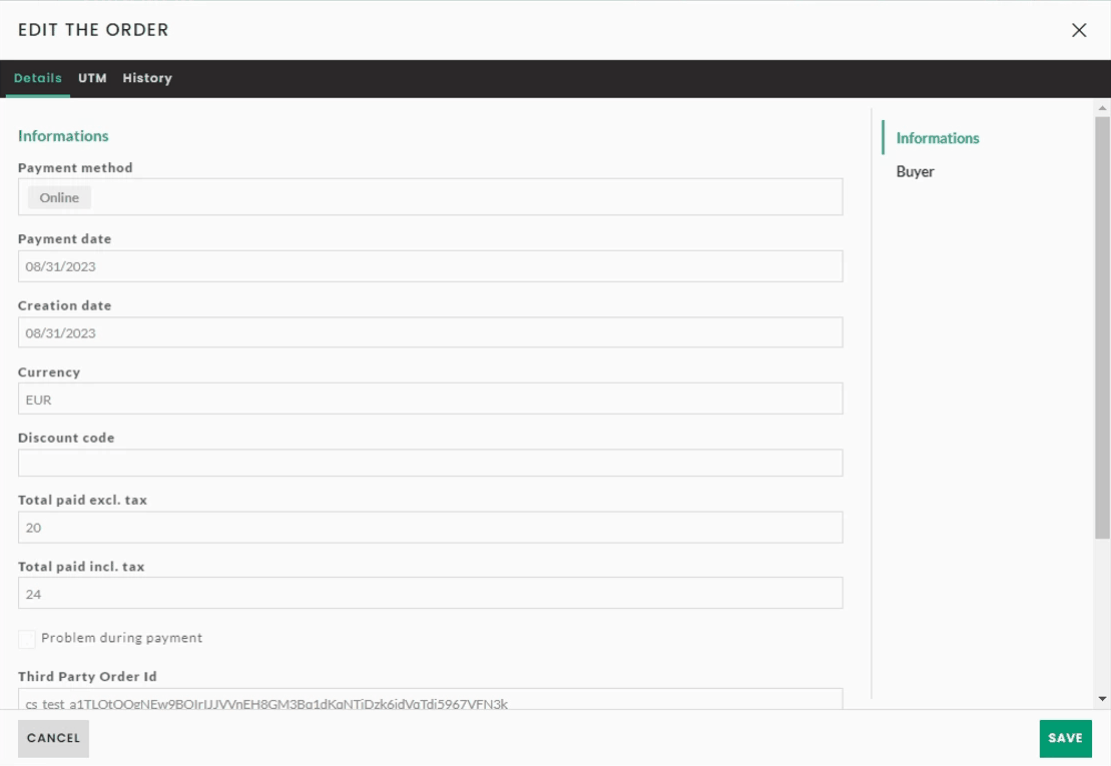
It contains the information seen in the grid, plus:
- Payment error: if ticked, this box indicates the presence of an order payment error.
- Third-party order identifier
- Error message: the message returned by the payment provider
- Buyer: first name/last name of buyer
Modify buyer information
When editing the order, it is possible to modify the buyer's information by clicking on the field: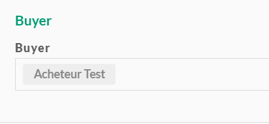

Validating an order (on billing)
In the case of payment by invoice, once you have ensured that your payment has been received, you must validate the order from the grid to finalize it.
- Select the line(s) with "Pending billing payment" status, then access the additional actions by clicking on


- Click on "Validate"
- The order status changes to "payment validated"
In the Membership > Members view, the new member has been added to the "All members" grid.
7° Email templates
In the Emailing > Email templates > All email templates grid, you can add two email templates for order tracking by clicking on ![]() :
: 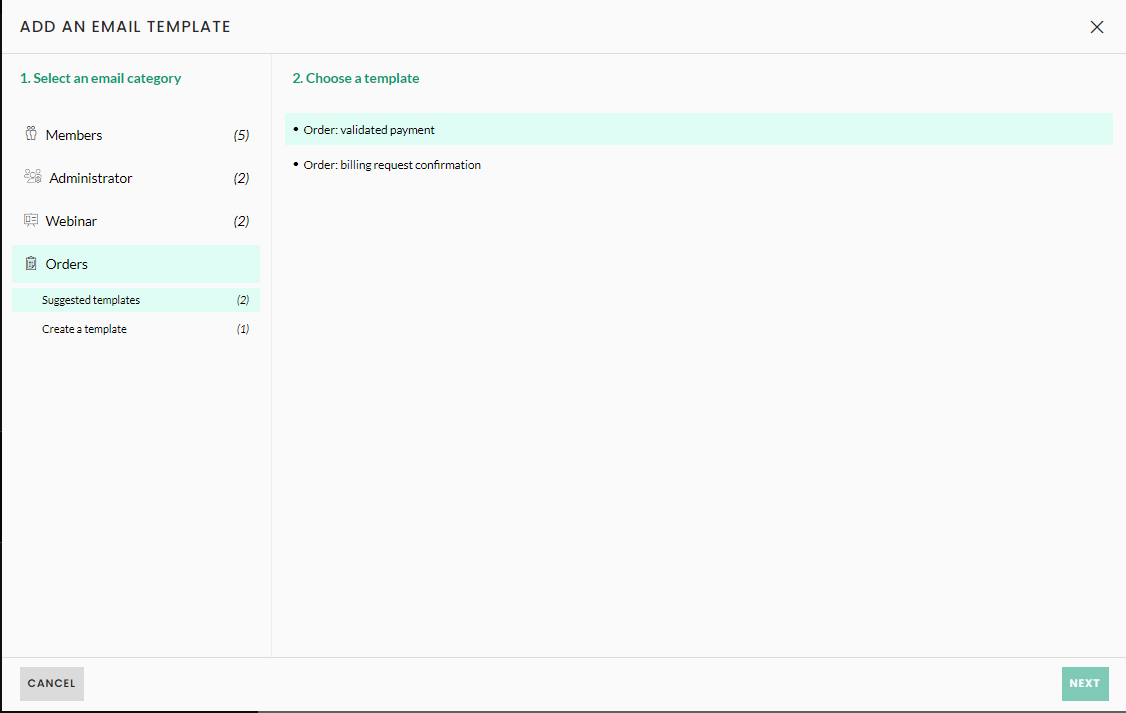
- Validated payment: contains the information required for an order summary, an invoice, etc.
- Invoice request confirmation: contains the information needed to acknowledge receipt of a subscription request with invoice payment
🕵️ To find out more about email editing, visit this article
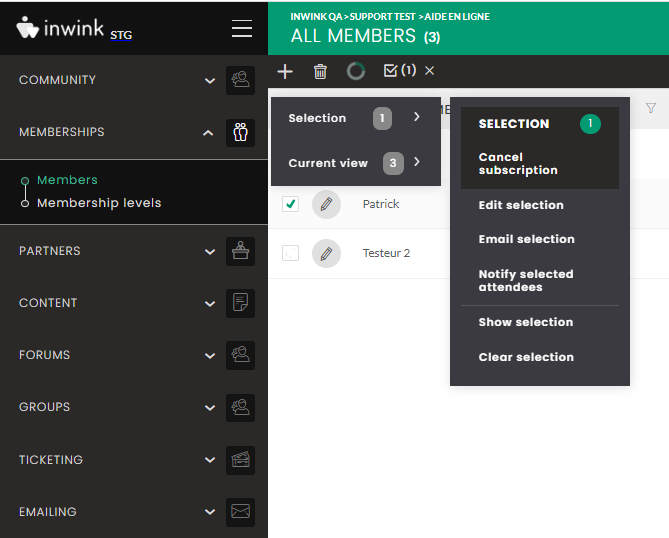
8° Cancel a subscription
Subscriptions can be cancelled either on the website by the member or via the back office.
On the website: members can cancel their subscription at any time from their member menu. They can continue to benefit from their subscription until the end of the current period (end date), after which it will not be renewed.
Via the back-office: cancellation of a subscription via the back-office takes immediate effect → the member can no longer take advantage of the subscription as soon as the cancellation is validated
Cancel a subscription via the back office:
To cancel a subscription via the back office, go to Memberships > Members > All members >
- Select the line for which you wish to cancel the subscription, then access the additional actions by clicking on
- In "Selection" choose "Cancel subscription"
Cancelling a subscription does not delete the account; only the membership end date is modified, resulting in the loss of the member's benefits.
In the event of a request for the right to be forgotten, or in order to empty the member database, you must also click on the "Trash" button after selecting the relevant line to delete the member and his/her information from the community back-office (action to be repeated on the audience if a request for the right to be forgotten is made)