Presentation
View functionality allows you to, on all inwink grid, save the grid presentation to find it the next time you use inwink back office.
A view saves:
- Columns displayed
- Columns order
- Filter(s) added
In order to optimize your use of views, we recommand that you add filters on your grid and that you pin your views to your dashboards.
You can also create a new view if you are doing recurring data exports, with specific columns, in a certain set number.
View functionality is available on the top right of grids, with the button DEFAULT VIEW.
Default view is the same for all inwink users. You can go back to it at any time.
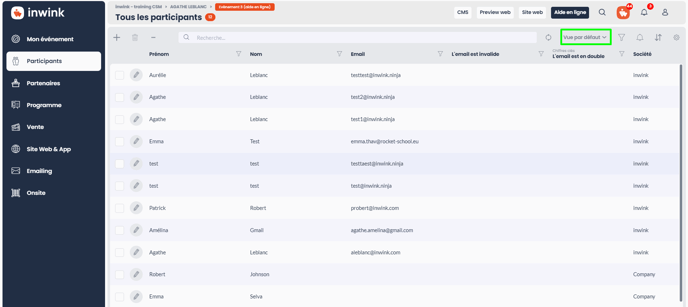
The views function is located at the top right of the grids.
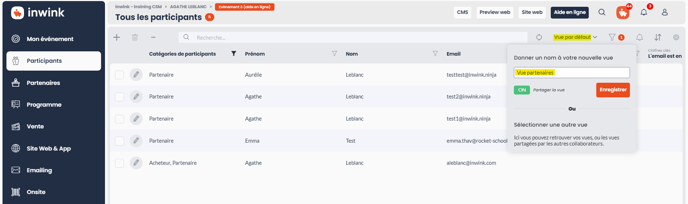
Create a view
From default view
Step 1
- Be sure that you are in default view, this is indicated on the greyheader
- Add and organize your columns in the desired order
- Icon ⚙️ on the top right of the grid
- Change columns order with drag and drop
- Click on + ADD A COLUMN to add other fields
- Add your filters
Step 2
- Once your filters added and your columns in the desired order, click on DEFAULT VIEW
- In the text fiel, enter your view's name
- If you want all persons who have access to the back office to see this view, activate the option Share this view ON
- Then click on the button "Save"
From an existing view
Step 1
- Select the desired view by clicking on DEFAULT VIEW on the top right of the grid and then on the view's name
- Reorganize your view by changing columns order, by adding columns and filters
Step 2
- Click on the views button NAME OF YOUR VIEW
- Rename your view and click on
➕New
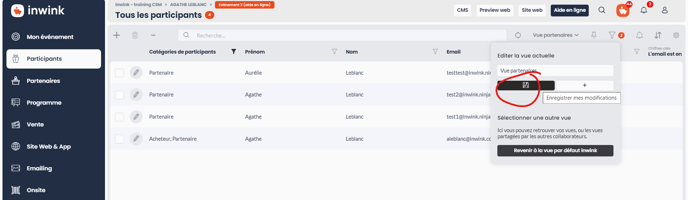
Update a view
Step 1
- Select the desired view by clicking on DEFAULT VIEW on the top right of the grid and then on the view's name
- Reorganize your view by changing columns order, by adding columns and filters
Step 2
- Click on the views button NAME OF YOUR VIEW
- Rename your view and click on
💾Save this view