SET UP ONLINE NETWORKING TABLES
Presentation
On events that take place physically, it is good practice to create a networking space where attendees who want to network with other attendees can meet attendees with the same goal easily.
On digital events, inwink lets you create such a networking space on your event website, thanks to the online networking tables.
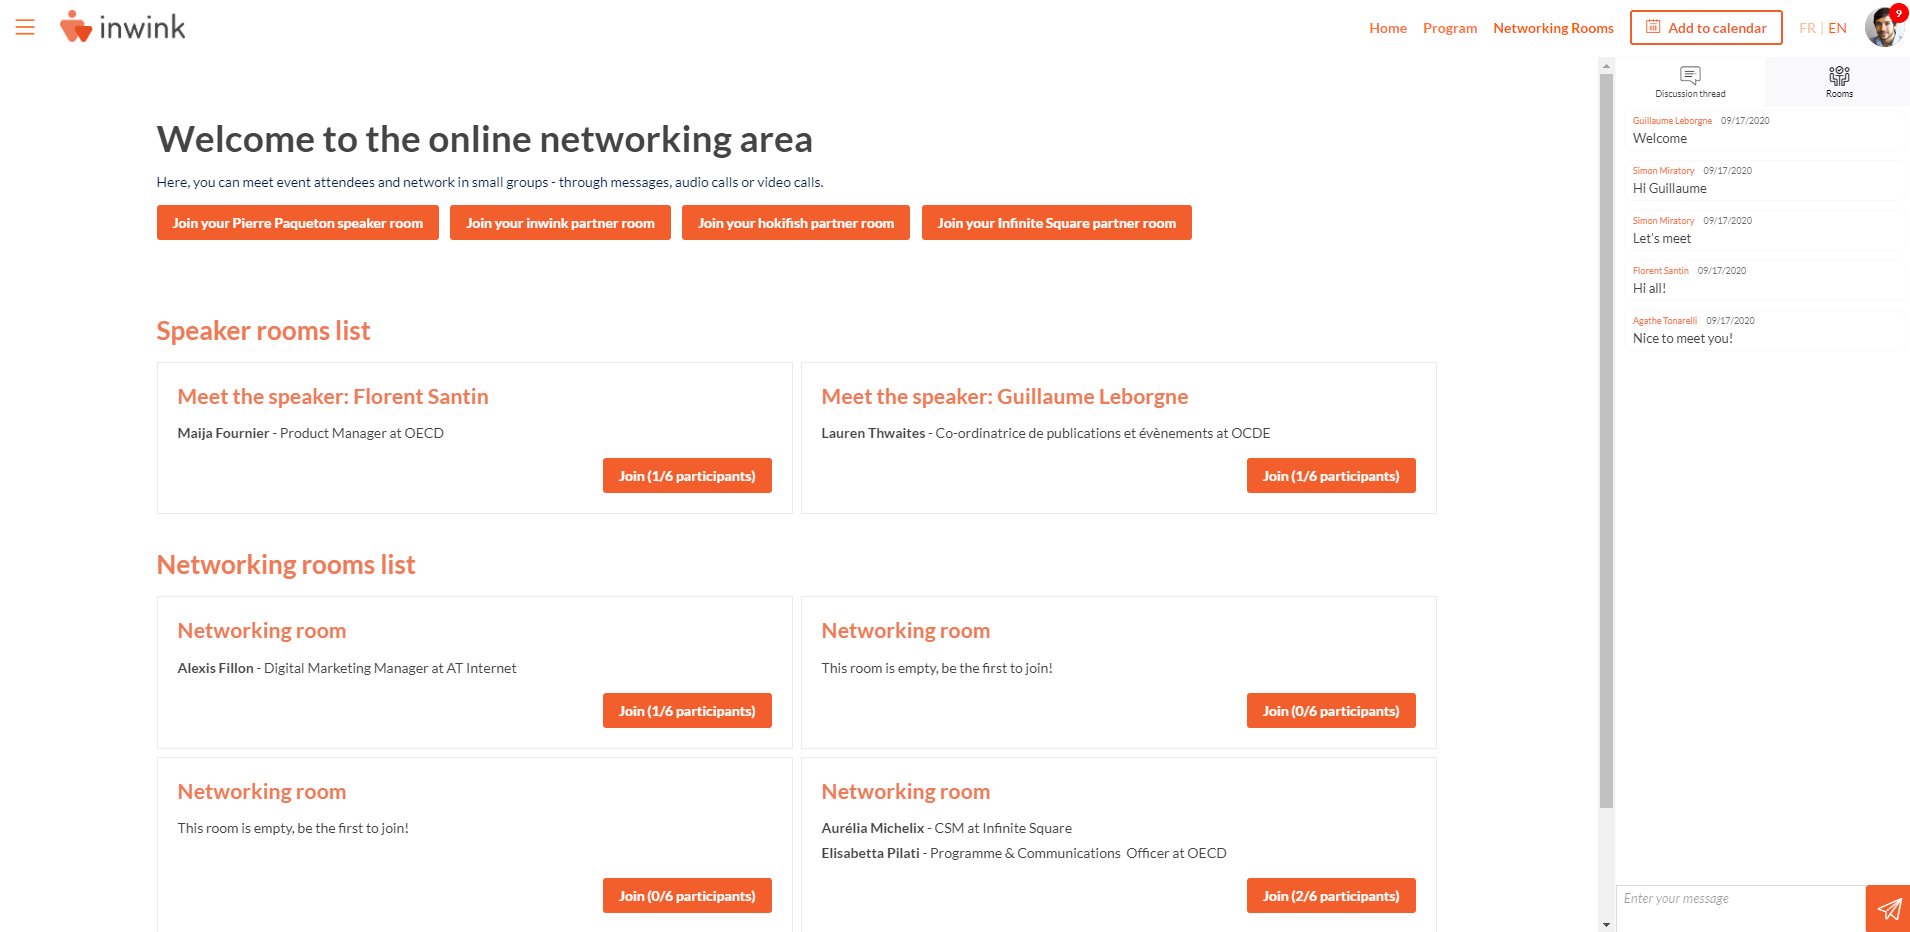
When you add the online networking tables page to your event website (also names Hall), you add a page where your attendees will find:
- tables to attend a videoconference with other attendees (max capacity of 12 attendees), either associated with a theme of your event, or open discussion networking tables
- tables to attend a videoconference with speakers who are logged in and have created their own online networking tables
- tables to attend a videoconference with partners who are logged in and have created their own online networking tables
- a sidebar with two tabs :
- a general disscussion thread where attendees can leave public messages
- a list of the active online networking tables where they can look for tables where a specific attendee is active
 Online networking tables page
Add online networking tables to my website
In order to add online networking tables to your event website, you first need to make sure the event type of your event is online or physical and online in CONFIGURATION > General information in the back-office of your event.
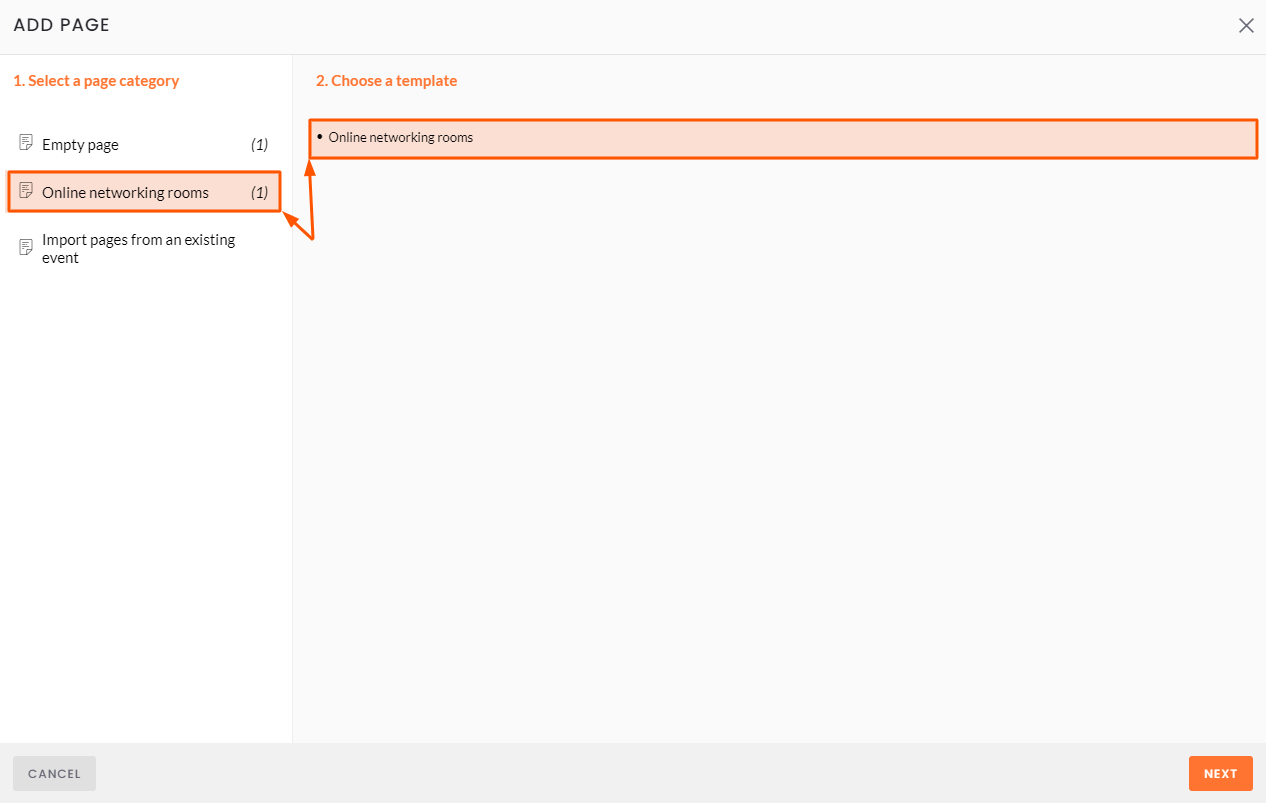
Once this is done, go to the CMS of your event, click on the page selector at the top left corner of the screen, then on the ADD A PAGE button. Click on CONTENT PAGE, and select Online networking tables:
 Add the online networking tables page to your event website
Click on NEXT, fill in the information of your page, and create the page.
Note: when creating online networking tables in the back-office, you can specify a hall for all tables. The tables with a specified hall will only appear in the Online networking tables pages associated with the same hall. You can associate an Online networking tables page with a hall only at the creation of the page, so make sure, if you use halls, to associate the page you create with the right hall.
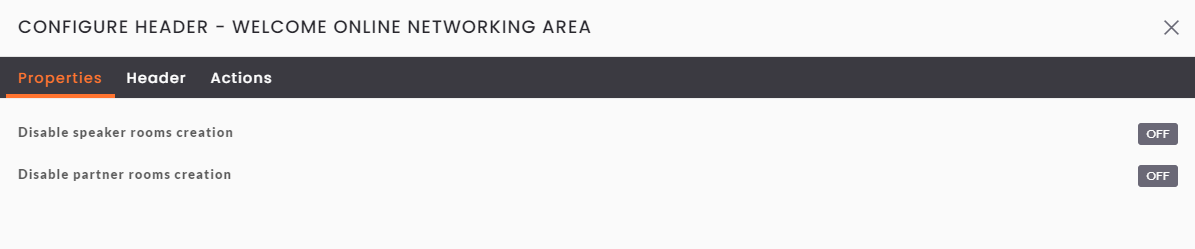
Edit the first block of the page if you want to disable the following default options :
- Disable speaker tables creation : speaker will no longer be able to create their own online networking tables
- Disable partner tables creation : partners will no longer be able to create their own online networking tables
 Online networking tables options
The second block of the page will display tables associated with partners, the third block will display tables associated with speakers, and the last block will display all other tables.
Add tables
In the online networking tables page, there are two ways to create tables:
- if a speaker logs in, they can create a room where 5 attendees will be able to join them in videoconference. When the speaker leaves and there's no participant left, the table will disappear.
- if a partner logs in, they can create a room where 5 attendees will be able to join them in videoconference. When the partner leaves and there's no participant left, the table will disappear.
Tables can also be created manually in the back-office, in the online networking tables grid.
 Networking table edition
There, you can set up the following information:
- Title: add a title for the table
- Description: add a description of the table
- Capacity: specify the max. number of participants who can be at the table (max. 12)
- Start Date: specify a date when the table should appear
- End date: specify a date when the table should disappear
- Hall: specify a hall where the table should appear
- Partner: associate the table with a partner, which will appear on the card of the table on your website. You can create several rooms for a partner.
- Event Theme: associate the table with one of your event's themes
- Automatically duplicate the table whenever it has at least one participant: when ticked, this option lets inwink make sure there's always one empty instance of the room on your website by creating duplicates of the room
- Display conditions: specify who can see the table
KPIs
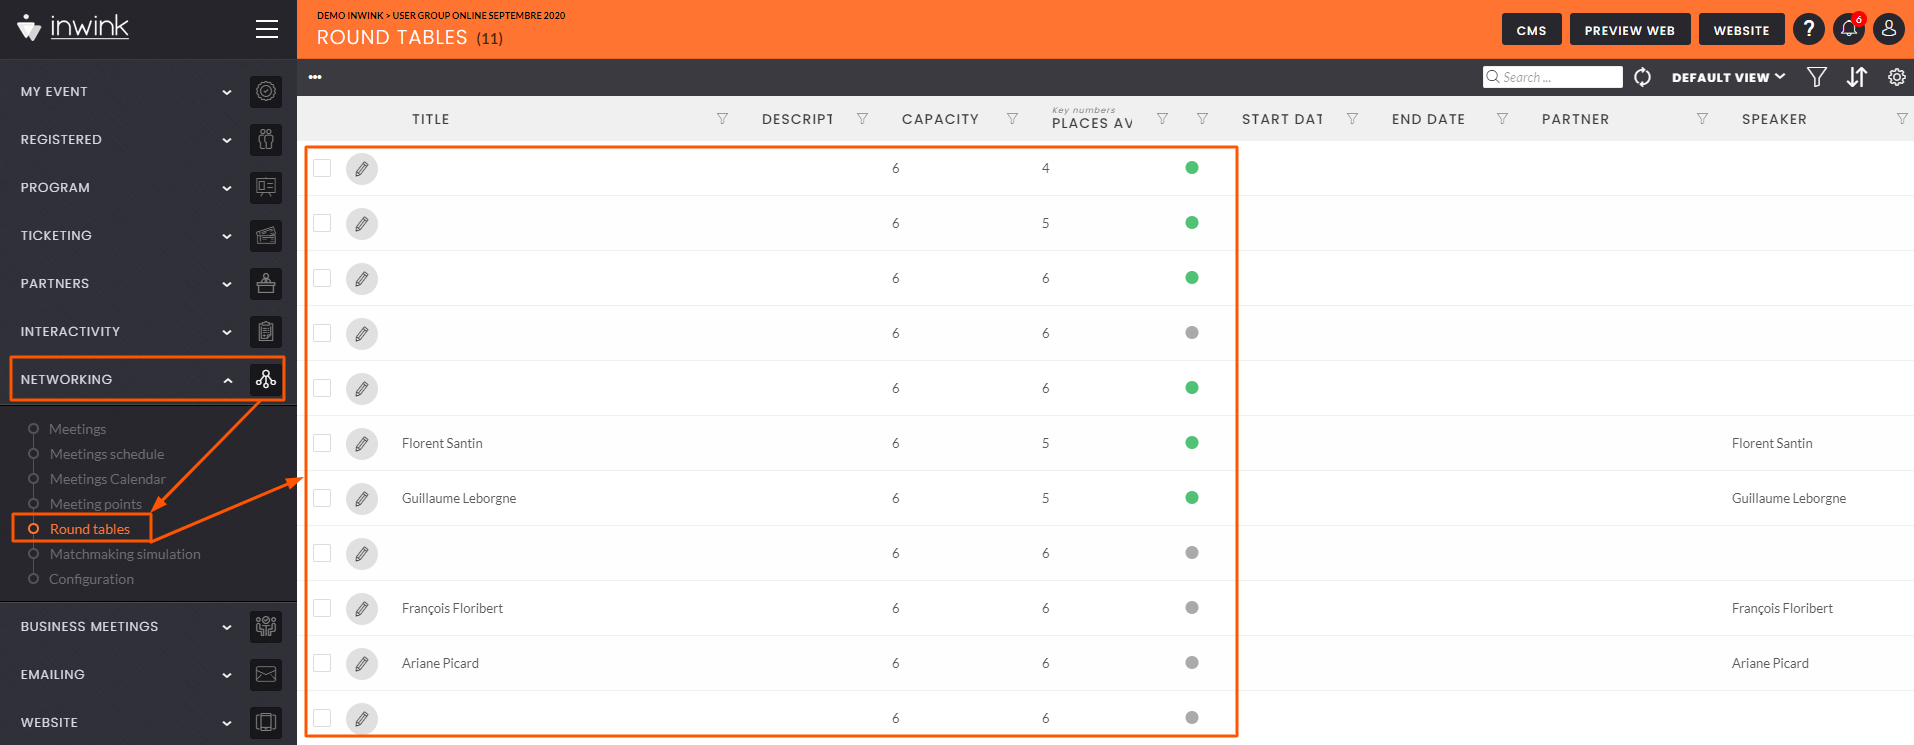
In the Back-Office, in NETWORKING > Round tables, you will find a grid containing all the networking tables that have been created at your event.
 Online Networking tables grid
When you edit one of the tables, you can check whether it is active or not, who has joined the room, the textual messages that have been sent in the discussion.
If you have ticked the Automatically duplicate the table whenever it has at least one participant for a table, all the data of the different instances of the table that might have been created during your event will be gathered in the master table in the back-office.