Prerequisites to configure the Marketo connector:
Have a Marketo account and have the administrator role.
On inwink, you can set up a synchronisation between your event and your Marketo account, so that leads who register to your event can be automatically uploaded in Marketo.
What the Marketo connector does
For each participant in inwink back end, the connector asks Marketo database:
- If the inwink participant’s email matches with a Marketo lead’s email:
- inwink creates the connection between the participant and the lead, and updates the Marketo lead’s fields
- If the inwink participant’s email doesn’t match with a Marketo lead’s email:
- inwink creates a Marketo lead with the following information:
- first name, last name, email, and all the fields you allow inwink to synchronize in Marketo
- To link an inwink event and a Marketo program, you need to get the ID of the program
- When you consult your program in Marketo, the ID is the last 4 numbers below:
- https://app-sd19.marketo.com/#ME1002A1Marketoand inwink2
Set up the Marketo connector
Creation of a Marketo Rest API
1. In order to synchronize your event with Marketo, you need to create a Marketo Rest API.Please find here the Marketo document to guide you.
2. When you create the Marketo Rest API, you need to note the 3 following information:
-
-
- Endpoint, it is an URL, like the following one: https://AAA-999-XXX.mktorest.com
- Client ID, like the following one: c781f7am-ba1f-31re-9f3a-gg5f608dcd2d
- Client Secret, like the following one: 0i9vE1cDitj4PbFZz2c1HW0RkR97vY7K
-
3. If your Marketo Rest API is already created and you have not noted these information, please check the next slides to find it on Marketo.
4. Follow the next steps to find the IDs:
-
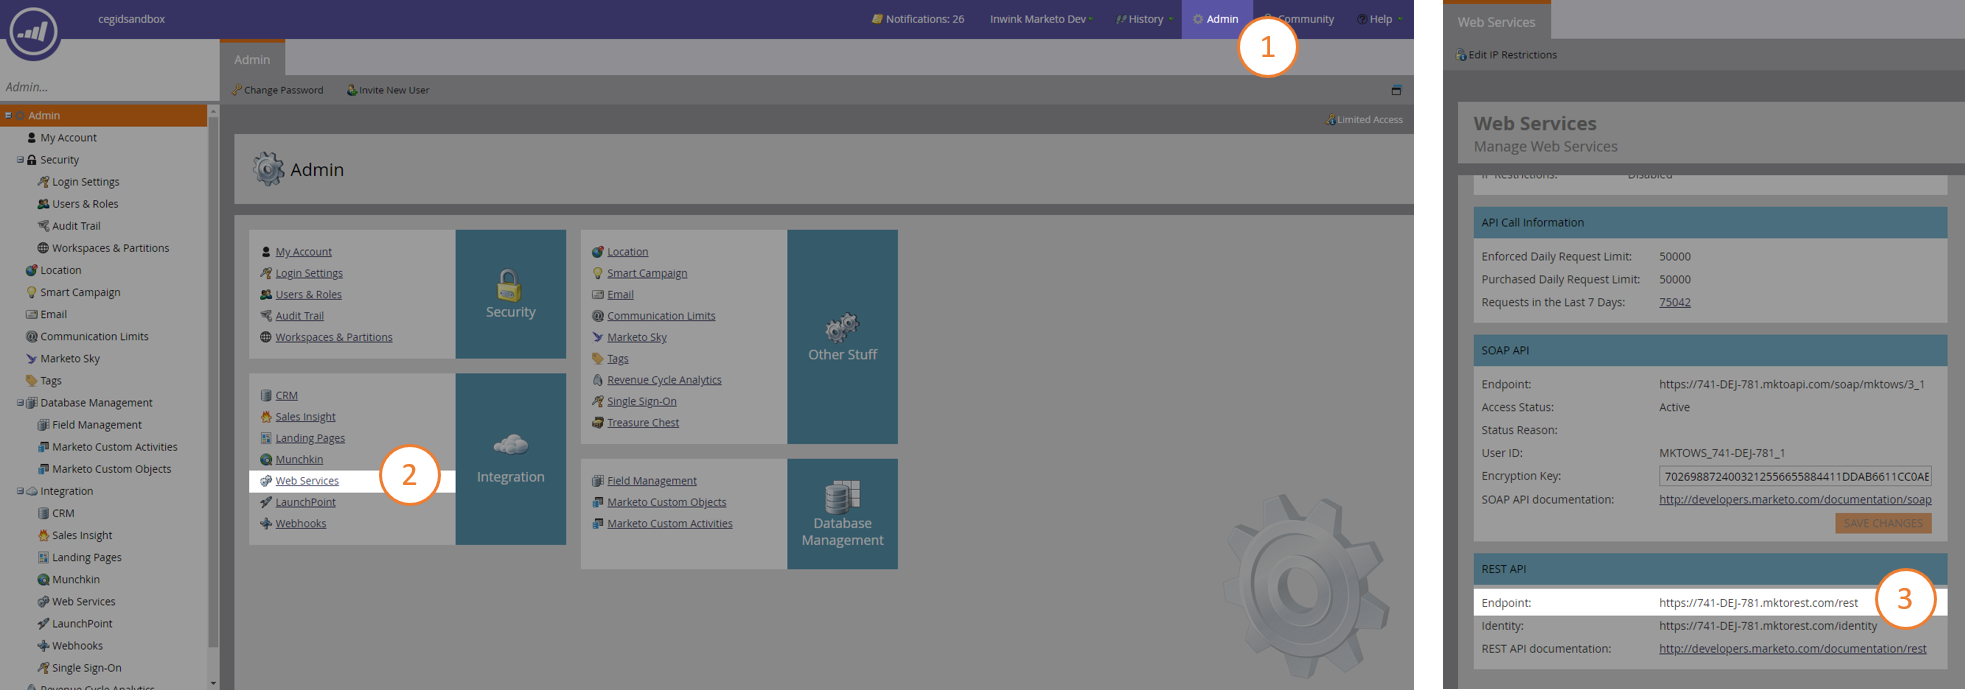
- Go on the Admin menu on the top right of the screen
- Click on Web Services and go on the section API REST
- You will find the endpoint (remove the « /rest » at the end)
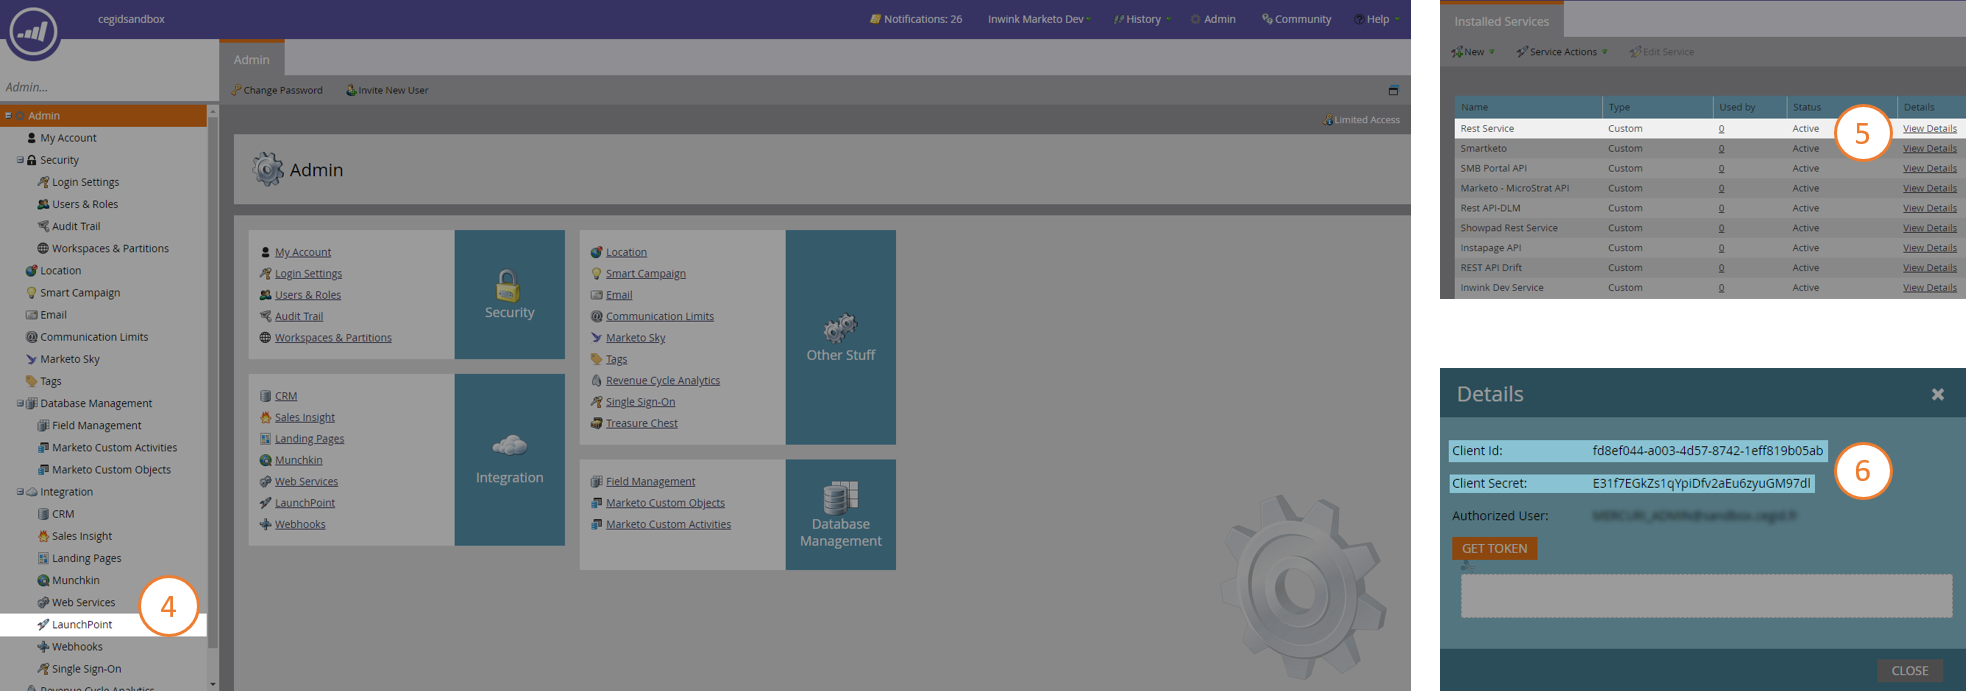
- Then click on LaunchPoint on the left
- On the line « Rest Service », click on « View details »
- You will find the Client ID and Client Secret
 Find the IDs : Steps 1 to 3
 Find the IDs : Steps 3 to 6
What to do on inwink
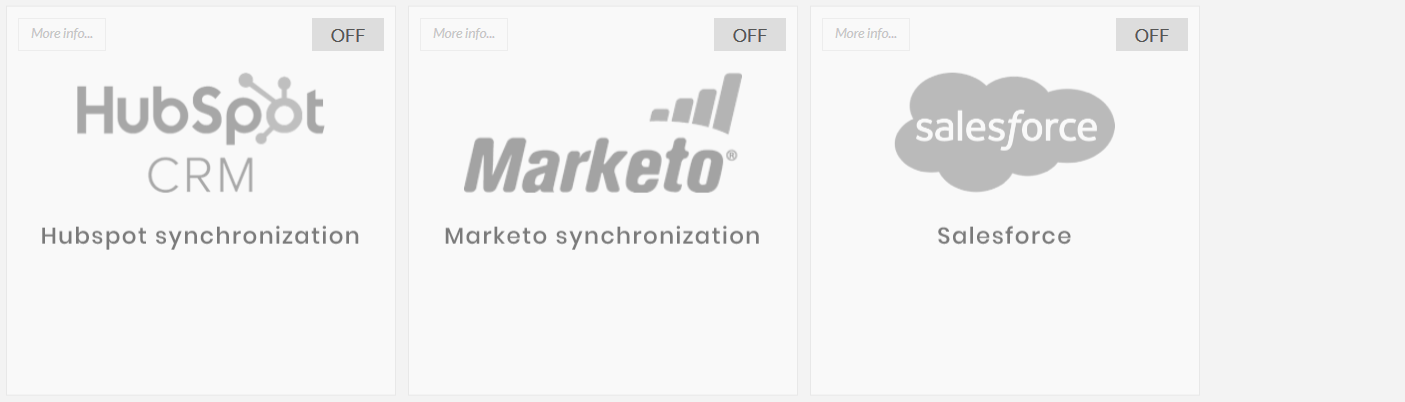
- On your inwink back end, go on the menu Configuration, Third-party integration
- Click on the button OFF on the Marketo module, a pop up will open
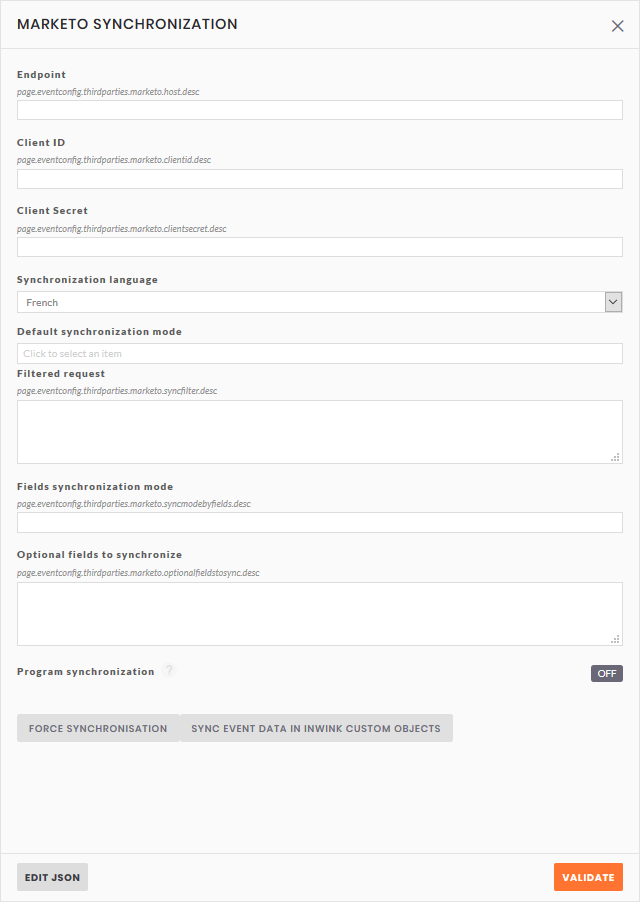
- Fill in the fields and click on VALIDATE
 Step 1 & 2
Explanation of the requested fields
- Endpoint is the URL you have noted at the creation of your Marketo Rest API
- Client ID is the ID you have noted at the creation of your Marketo Rest API
- Client Secret is the ID you have noted at the creation of your Marketo Rest API
- Synchronization language: if your event is in multiple languages, and some fields need to be fill in in multiple language, inwink will only synchronize the language set here
- Default synchronization mode: the synchronization mode defines the way the participants fields are send to Marketo.
- By default, inwink synchronizes the participants fields with the « Synchronized » mode, you can change this mode based on the following indications:
- Synchronized:
inwink participants fields are forwarded to Marketo, whether there is a value already set on Marketo or not
- Synchronized if value set in inwink:
inwink participants fields are forwarded to Marketo only if there is a value set on Marketo
- Synchronized if no value set in Marketo:
inwink participants fields are forwarded to Marketo only if there is no value set on Marketo - Filtered request: advanced configuration that allows to export only some inwink participants, based on the information on their profile.
- Contact your CSM to configure this field. Here are some examples of how you can use this feature:
- Sync registered people only:
{
  "isRegistered": {
    "equal": true
  }
} - Sync everyone but speakers:
{
  "not": {
    "kinds": {
      "contains": "speaker"
    }
  }
}
- Sync buyers only:
{
    "kinds": {
      "contains": "buyer"
    }
}
- Sync registered people only:
- Contact your CSM to configure this field. Here are some examples of how you can use this feature:
- Fields synchronization mode: allows you to assign a specific synchronization mode to some inwink fields.
- Enter the fields you want to sync and how you want to sync them:
{In this exampble, myfieldMarketo1 will be sync to Marketo whether there's already a value in Marketo or not, myfieldMarketo2 will never be synced, myfieldMarketo3 will only be synced whether the field has a value in inwink, myfieldMarketo4 will only be synced whether there's a value in Marketo.
"myfieldMarketo1": "Sync",
"myfieldMarketo2": "NotSync",
"myfieldMarketo3": "SyncIfSet",
"myfieldMarketo4": "SyncIfNotSetOnMarketo"
}
- Enter the fields you want to sync and how you want to sync them:
- Optional fields to synchronize: allows you to specified the additional fields to synchronize between inwink and Marketo, with the first name, last name and email:
- To have the list of all Marketo fields code, follow the instructions below: https://docs.marketo.com/display/public/DOCS/Export+a+List+of+All+Marketo+API+Field+Names
- Enter the fields you want to sync from inwink to Marketo in the following manner:
{
	"myfieldinwink": "API_Code_Marketo",
	"myfieldinwink2": "API_Code2_Marketo"
}
- Program synchronization: allows you to forward inwink participants in a Marketo program
What types of fileds can be synced from inwink to Marketo ?
inwink can sync the following types of fileds with Marketo:
| inwink | Marketo |
|---|---|
| Text | Text / String |
| SelectList | Text / String |
| MultiselectList | Text / String |