Forms are used for registrations, polls, update profile, etc. So, it is important to understand what presentation options are available in order to create efficient forms.
There are a lot of display options in forms. Here are:
1. How to create and handle the display of form pages
2. How to create and handle the display of field groups
3. How to add and handle the display of fields
4. How to add and handle the display of text areas
Click here to understand what are the different fields and their own display options.
Click here to understand how to add a form on a website.
1. Form pages and display options
It is possible to create a form containing one or several pages in inwink.
By default, every form has a first page named Page 1. Find its name at the top of the form’s editing window.
 Edit form pages
It is possible to:
- Click on the
 button on the right to edit the name and the display mode.
 - Click on
 to delete an active page. The page and its groups of fields and text areas are deleted. However, fields that were part of the page will remain available in the list of suggested fields during the addition of a field to the form.
 - Click on the ADD A PAGE button to add a new page.
The following window appears when editing or adding a page:
 Page edition window
Parameters |
Action |
|---|---|
| Display mode |
|
| Title | Allows to give a title to the page, which will be used at the top of the form. It is not mandatory. |
| Description | Allows to give a description to the page. Will be displayed underneath the page’s title. It is not mandatory. |
Click on CONFIRM once these parameters are given.
Click on ![]() or
or ![]() on the left of the page’s recycle bin to reorganize several pages once they are created:
on the left of the page’s recycle bin to reorganize several pages once they are created:
 Reorganize the pages
2. Groups of fields and display options
It is possible to group the fields, to give them a name, a description, even a conditional display for created groups inside the pages.
In the form editor, groups are indicated with light grey boxes.
To add a group, select the page in which to insert it and click on the ADD A GROUP button. It is possible to whether add a group to a page (white button) or to a group (grey button).
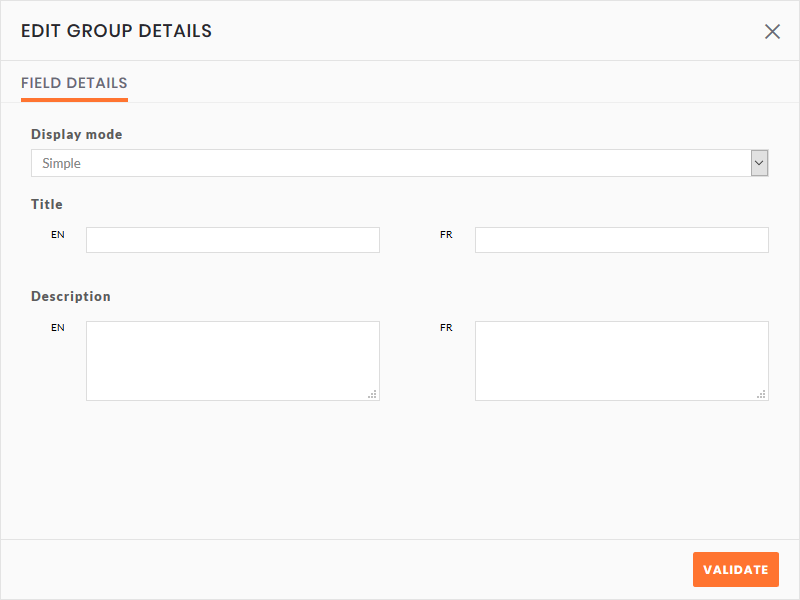
A group editing window containing several options appears:
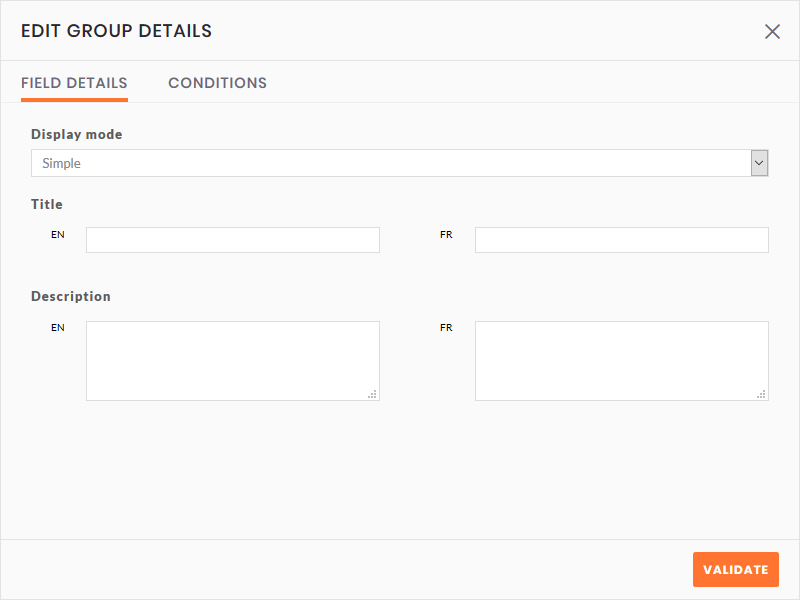 Group editing window
It is possible to enter the following parameters in the DETAILS thumbnail:
Parameters |
Action |
|---|---|
| Display mode |
|
| Title | Allows to give a title to the group, which will be used in the form at the top of the group. It is not mandatory. |
| Description | Allows to give a description to the group. Will be displayed underneath the group’s title. It is not mandatory. |
To parameter the group’s display conditions regarding the answers given by the user beforehand, go to the Conditions thumbnail.
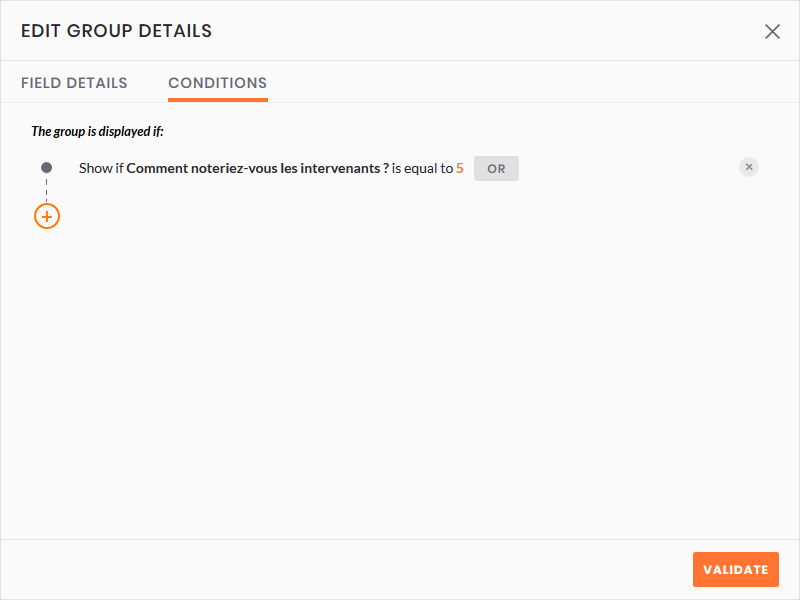 Conditions editor
Here, the group will only be displayed if the grade the user gave the speaker beforehand equals 5.
It is possible to display another necessary condition for the display of the group (AND condition) by clicking on the + button.
It is possible to add a second condition allowing the display of the group (OR condition) by clicking on the OR button.
Once the group is configured, click on CONFIRM to add it to the page.
 Display of a group in the form editor

🐱👤 A group of fields will always appear after the fields belonging to no group of field on a same page.
3. Fields and display options
It is possible to add fields to a group or directly to a page in a form.
Click on ADD A FIELD at the bottom of the page to directly add a field to a page.
Click on ADD A FIELD at the bottom of the page to add a field to a group.
It is possible to add a field to an existing one, or to create a new field to add to the form.
Click on the ![]() button appearing at the top right of a newly added field when hovering it with the mouse to edit it. It is possible to change the information, and also to add display conditions, as seen before with groups.
button appearing at the top right of a newly added field when hovering it with the mouse to edit it. It is possible to change the information, and also to add display conditions, as seen before with groups.
Click on the field and slide it to a new position or with the help of the ![]() and
and ![]() buttons to change fields’ position inside a same group/page.
buttons to change fields’ position inside a same group/page.
Click on ![]() when hovering a field with the mouse to delete it. It will be deleted from the form but will remain available in the list of fields that can be added to a page when once again clicking on ADD A FIELD.
when hovering a field with the mouse to delete it. It will be deleted from the form but will remain available in the list of fields that can be added to a page when once again clicking on ADD A FIELD.
🐱👤 If the same field is displayed twice in a form, the second answer to the field will delete the user’s first answer. Be aware not to use twice the same field in a form, even if they have the same title.
4. Text areas and display options
Finally, click on ADD A TEXT to add text areas. This is the same process than for the fields.