The General Data Protection Regulation (GDPR) and the e-Privacy directive require every website owner to ask for consent before collecting any personal data / installing any cookies on the browser of a visitor.
Install a cookie banner
If you are configuring an event, go to WEBSITE > Webmaster > CMP / COOKIE BANNER.
If you are configuring a root website, go to Webmaster > CMP / COOKIE BANNER.
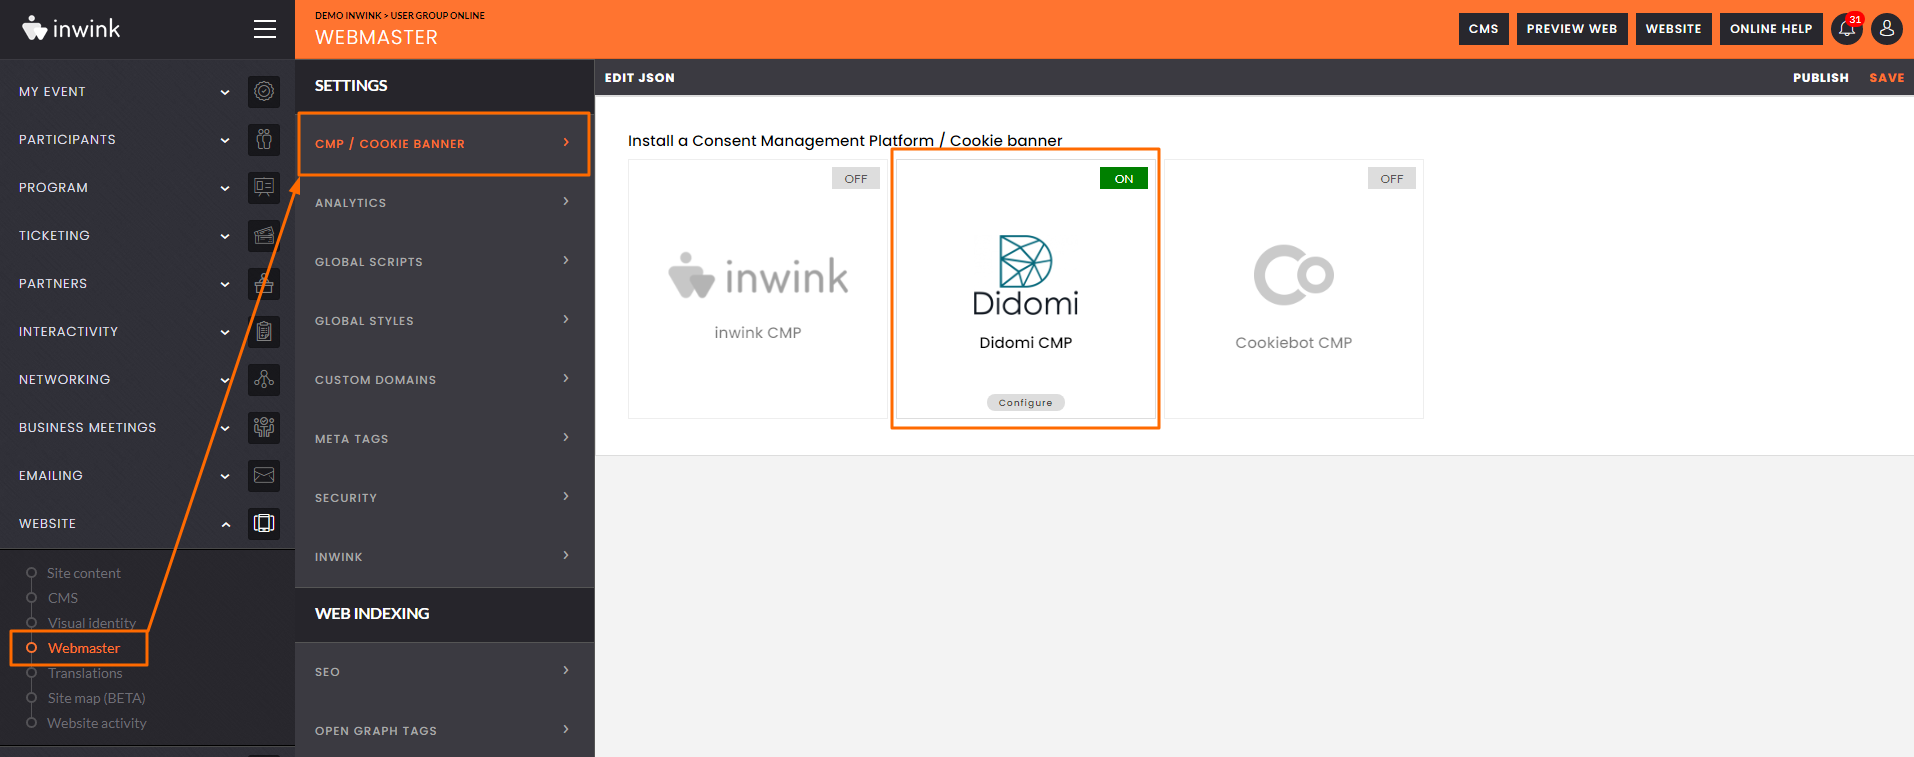 CMP / Cookie Banner screen
You have 3 options:
- use the inwink cookie banner
- use a CMP banner from Didomi
- user a CMP banner from Cookiebot
You must select on and only one of these options to manage the consent of your website users.
inwink Cookie banner
This is the cookie banner of inwink. When using this cookie banner, you can :
- select the position of the cookie banner on your website (bottom, center or top of screen)
- associate a visual theme with the cookie banner to manage the colors
- enable implicit consent, which will grant consent when the user navigates on the website. This is not a recommended practice.
- configure the banner title and the description of the cookies you want to install. This should list all the cookies you want to install, and a precise description of what you intend to do with the collected data
- if need be, you can pick other background and text colors
- add banner actions: Accept, Refuse and Custom. You need to display at the very least an Accept and a Refuse buttons in order to be compliant with the European regulation directives.
Didomi Cookie Banner
inwink can directly integrate Didomi. You will need to have a Didomi license and a Didomi banner preconfigured in the Didomi console to use this feature.
Once you Didomi cookie banner is configured in Didomi, copy-paste the Public API Key of your Didomi account into the Didomi configuration in inwink:
 Get your Didomi account Public API Key
During the configuration of your cookie banner in Didomi, make sure :
- the cookie banner will work on the domain names of your website, and on preview.inwink.com if you want to see it in preview (you will find it in the first configuration step of the cookie banner, in Targets)
- the cookie banner uses a TCF-approved text to ensure compliance with the IAB TCF and the main GDPR obligations (this ensures your cookie banner will work with Google Consent Mode)
- the following vendors (IAB/SDK IDs) are selected if you use on of the connectors below:
- google if you use Google Analytics and Google Tag Manager
- twitter if you use twitter
- facebook if you use facebook
- c:adobe-tagmanager if you use adobeDTM
- 804 if you use LinkedIn
- c:hubspot if you use hubspot
If you wish to integrate your tags with Google Tag Manager, please follow the documentation available here.
Important: if you need one of your analytics tags to be considered as Essential, you will need to do it in your CMP configuration in Didomi. The Essential configuration of tags in inwink only works with the inwink cookie banner.
Cookiebot Cookie Banner
inwink can directly integrate Cookiebot. You will need to have a Cookiebot license and a Cookiebot banner preconfigured in the Cookiebot console to use this feature.
Once your Cookiebot cookie banner is configured in Cookiebot, copy-paste de ID of your banner into the Cookiebot configuration in inwink:
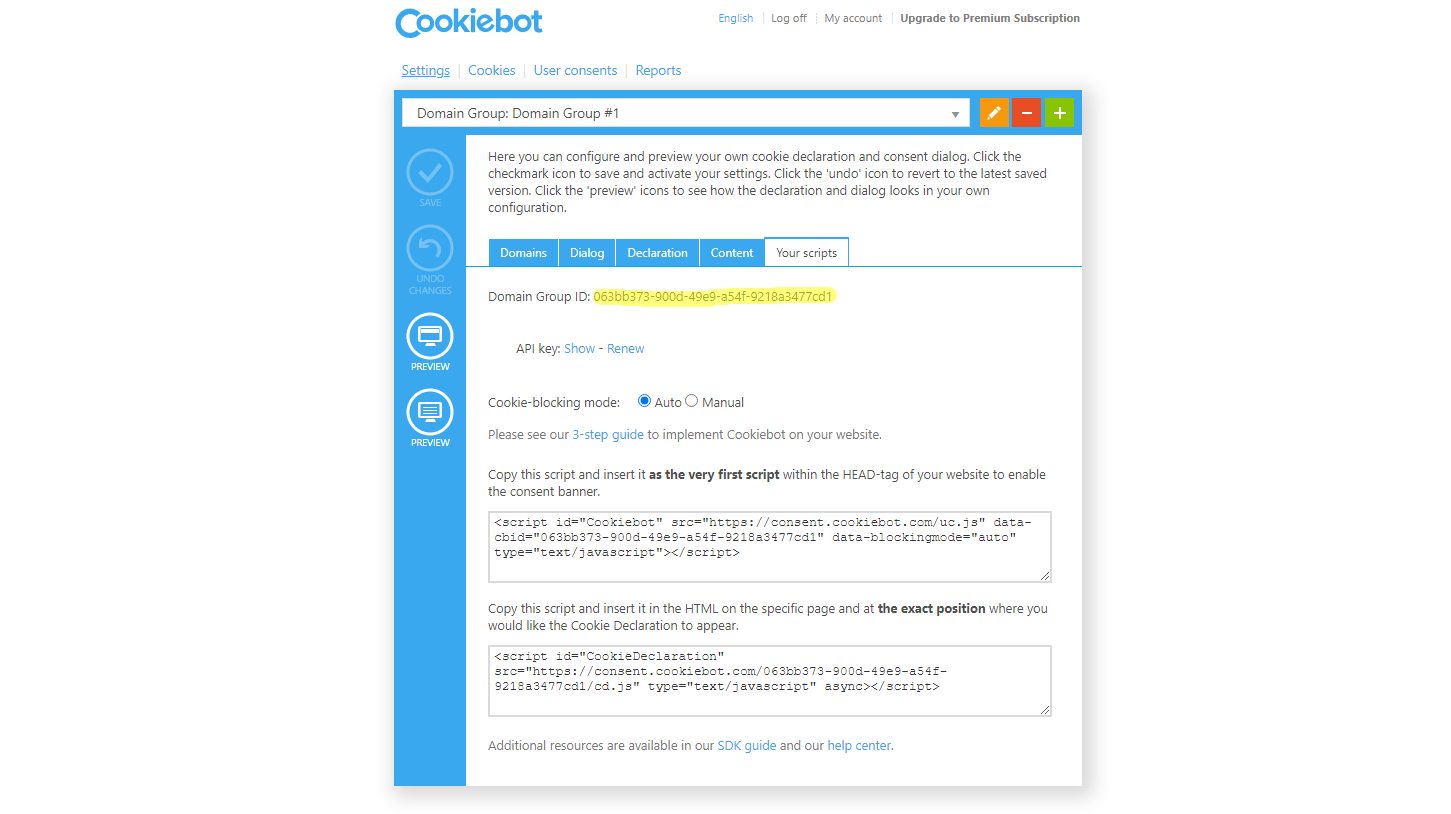 Your Cookiebot banner ID
In your Cookiebot banner configuration, you need to make sure that:
- the domain names of your website and preview.inwink.com are set up in Domains
- the cookies you are using on your website are configured in the Cookies section of your Cookie banner (Cookiebot scans don't work with inwink, so you need to enter the cookies manually)
All analytics tags you can add with inwink are added with a Statistics category.
Cookies Axeptio
inwink can directly integrate Axeptio. You will need to create an Axeptio account and customize the steps (welcome screen, information screen, statistics and audience...). First, check that your site is published in order to get its final URL.
Once these steps are done, go to the step "Integration of cookies on your site" and click on the "Publish" button. Then retrieve the project ID:
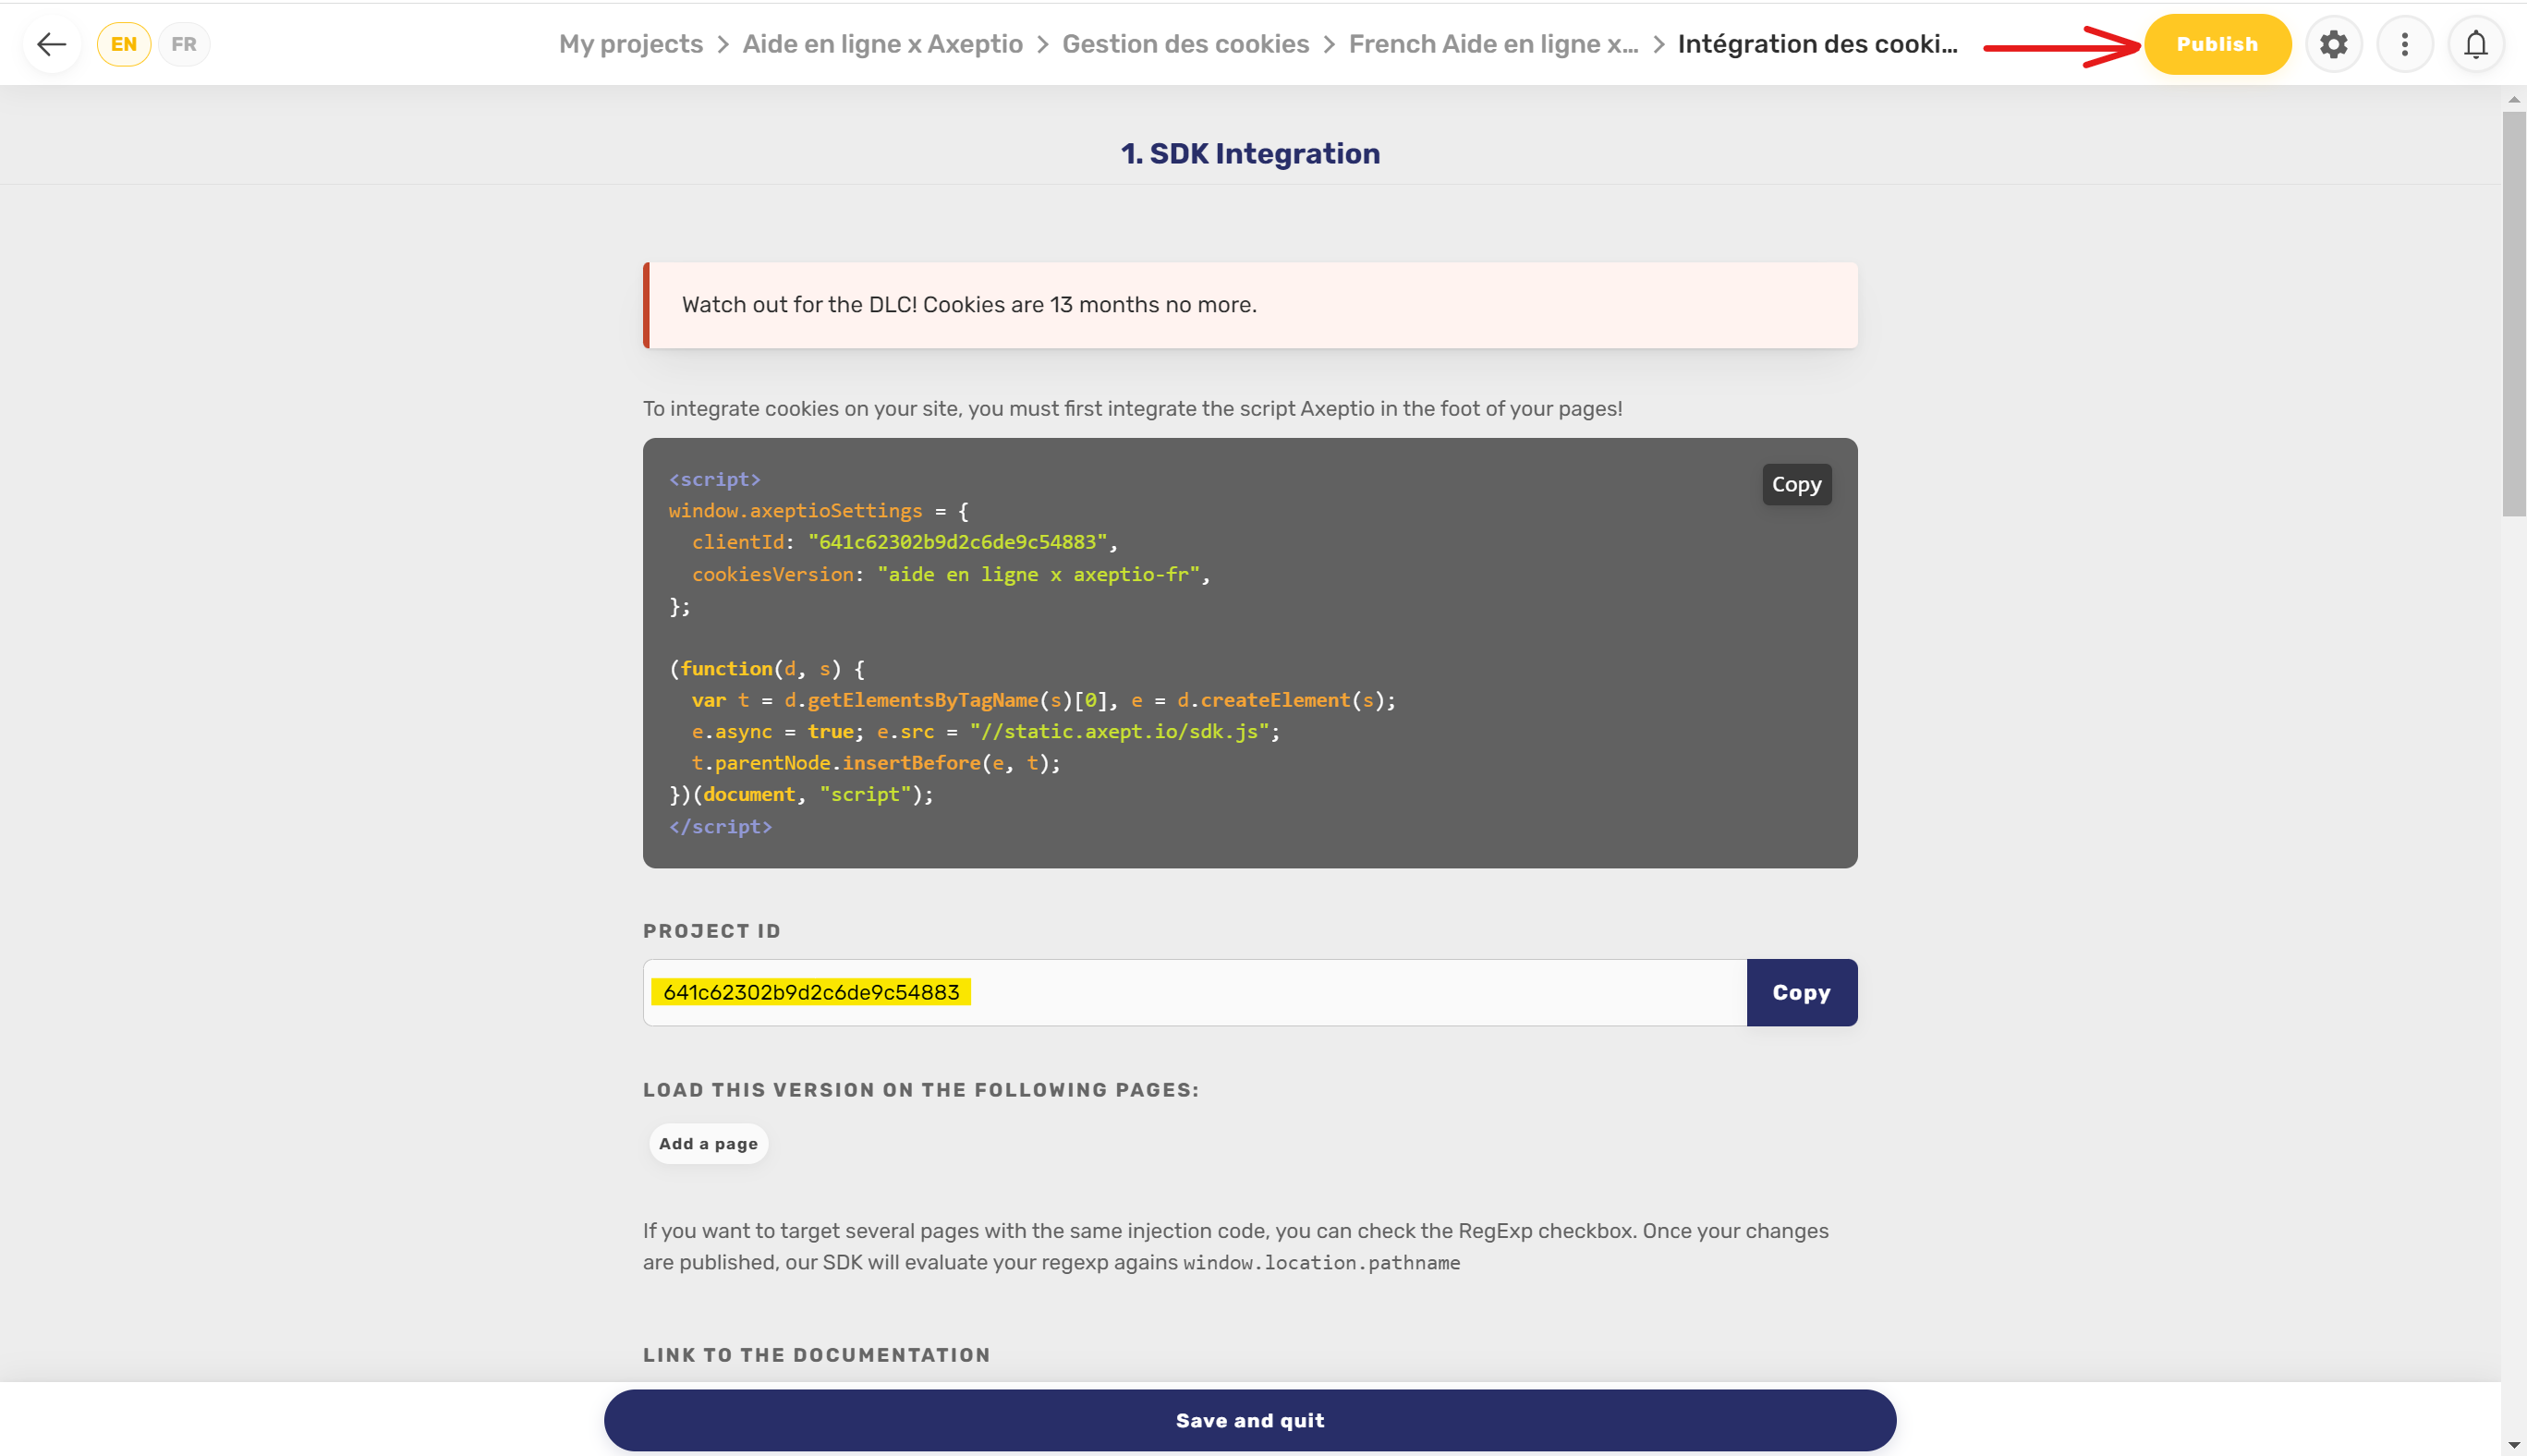
To insert it into inwink, into the Axeptio card.