1. inwink default templates
When you create your very first event with inwink, you will need to choose one of the following default templates to start from:
- In-person event: a template designed for in-person events, with preconfigured dashboards, forms and content pages (such as practical information)
- Online event: a template designed for online events, with preconfigured dashboards, online networking tables, detail pages adapted to online events
- Live Session: a template for Live Session events, with one inwink Live session directly followed by Online networking using the online networking tables
- Single page event: a single-page template containing a registration form and information on the event, designed for events for which you only need a simple registration form
- Online job fair: this event model is dedicated to putting forward offers for participants, with a precise lexicon (for partners looking to recruit for example)
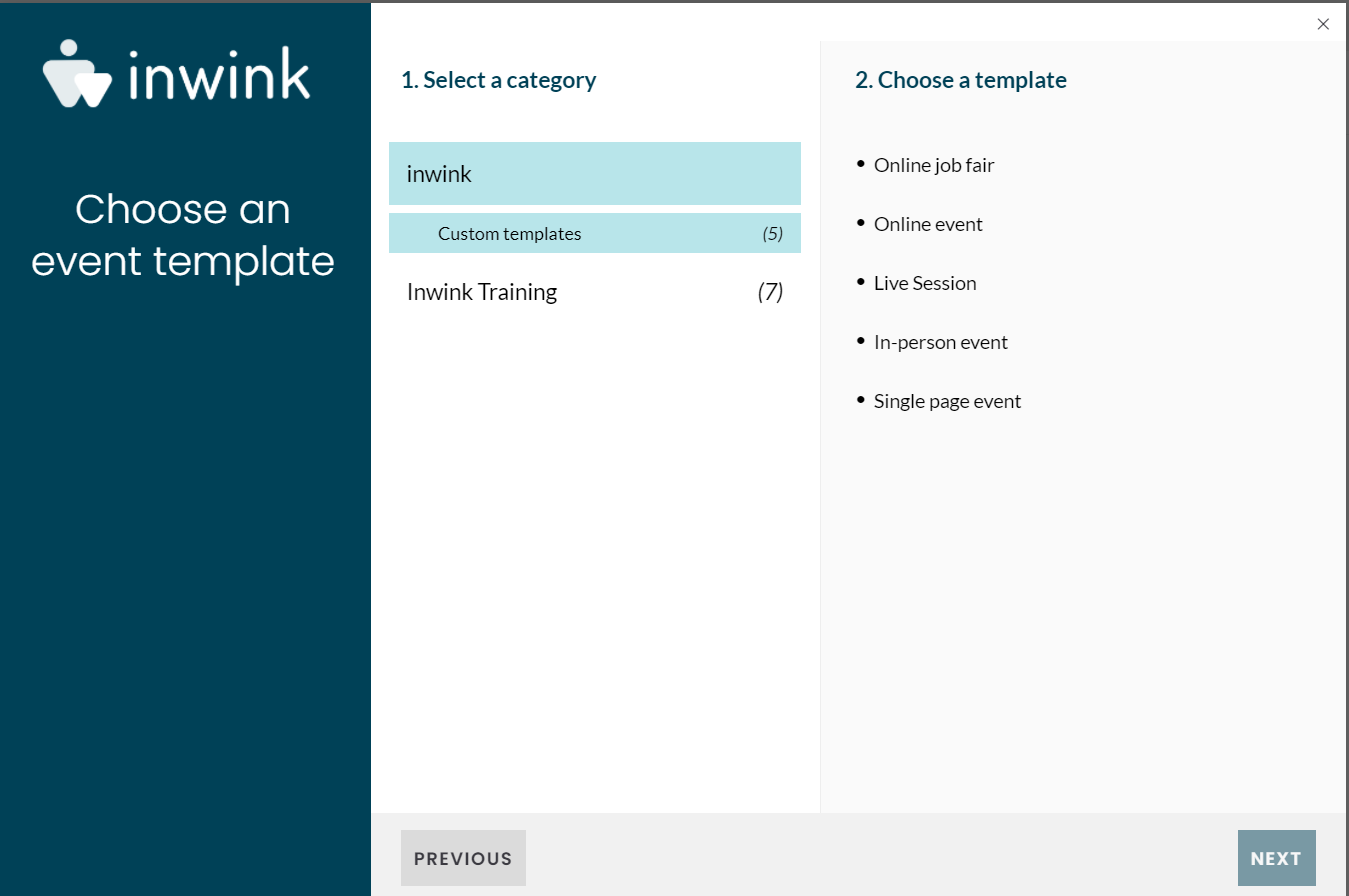 The 5 event templates proposed by default by inwink
For all these templates, the following content is preconfigured:
- Main dashboard
- Event themes
- Participant categories
- Sessions
- Speakers
- Partners
- Parner offerings
- Online networking tables
- Email templates
- Email triggers (disabled, you need to activate them)
- Website pages and content
- Activated features
All you need to do once your event is created from one of these templates is to add your content (sessions, speakers, partners, partner offerings), link sessions to timeslots, adapt the colors, logos and texts in the website, change the header banners in email templates, and activate the email triggers you want to use.
2. Create your own templates
You may want to create your own templates, with their own designs, their own email templates, and content you commonly use for your events (frequent partners, for instance).
When you create a template, the following content will be duplicated when creating a new event from the template:
- Shared dashboards
- Fields of participants, speakers, partners, sessions, partner offerings
- Speakers
- Sessions
- Partners
- Partner offerings
- Online networking tables
- Email templates
- Email triggers
- Website pages and content
- Activated features
In order to create a template, create an event from an inwink template or by duplicating a past event, make it clean so that you won't need to delete unnecessary content when you create a new event from your template.
Once this is done, go to the event grid in your Client back-office, look for the line where your event is, and click on the ![]() EDIT button. An editing window opens.
EDIT button. An editing window opens.
Tick the Master event option and save.
Now, your event is available as a template for your next events. You can select it when creating a new event:
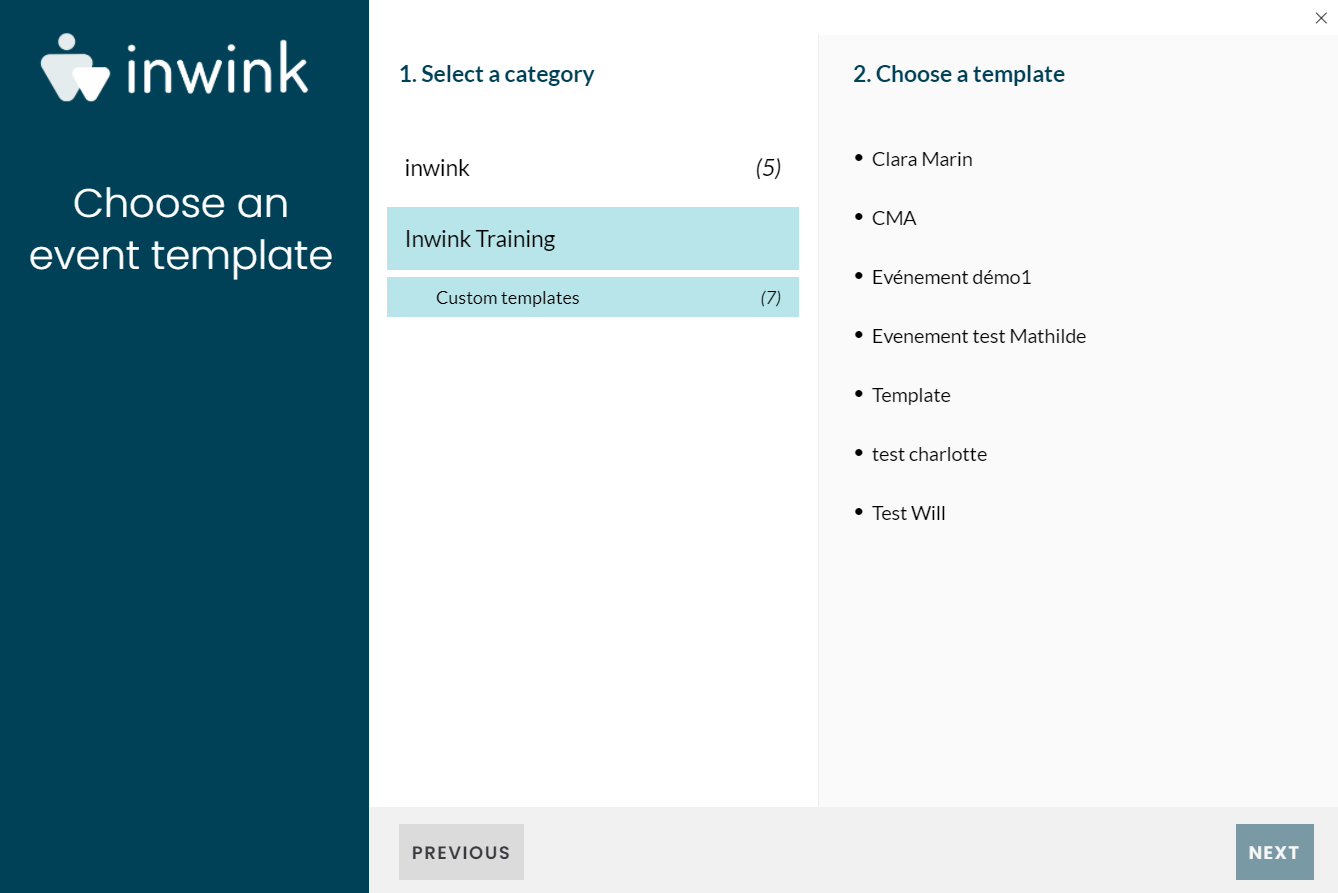 Custom Master Events