Gauges allow to control the number of people present at an event.
Scans at the entrance and exit of events allow inwink to know the number of people present at the event.
Setting up the input/output scan zones
Follow these steps to create your gauges:
1. First, configure the input scan zone:
- In your back office, on the INWINK ONSITE tab, click on Scan Zones
- Add a scan zone by clicking on "+" then please call it for example "Entry".
IMPORTANT below, in the scan type field, please put Entry (with single access control - internet connection required) as in the image below, fill in the desired capacity (not required), then save.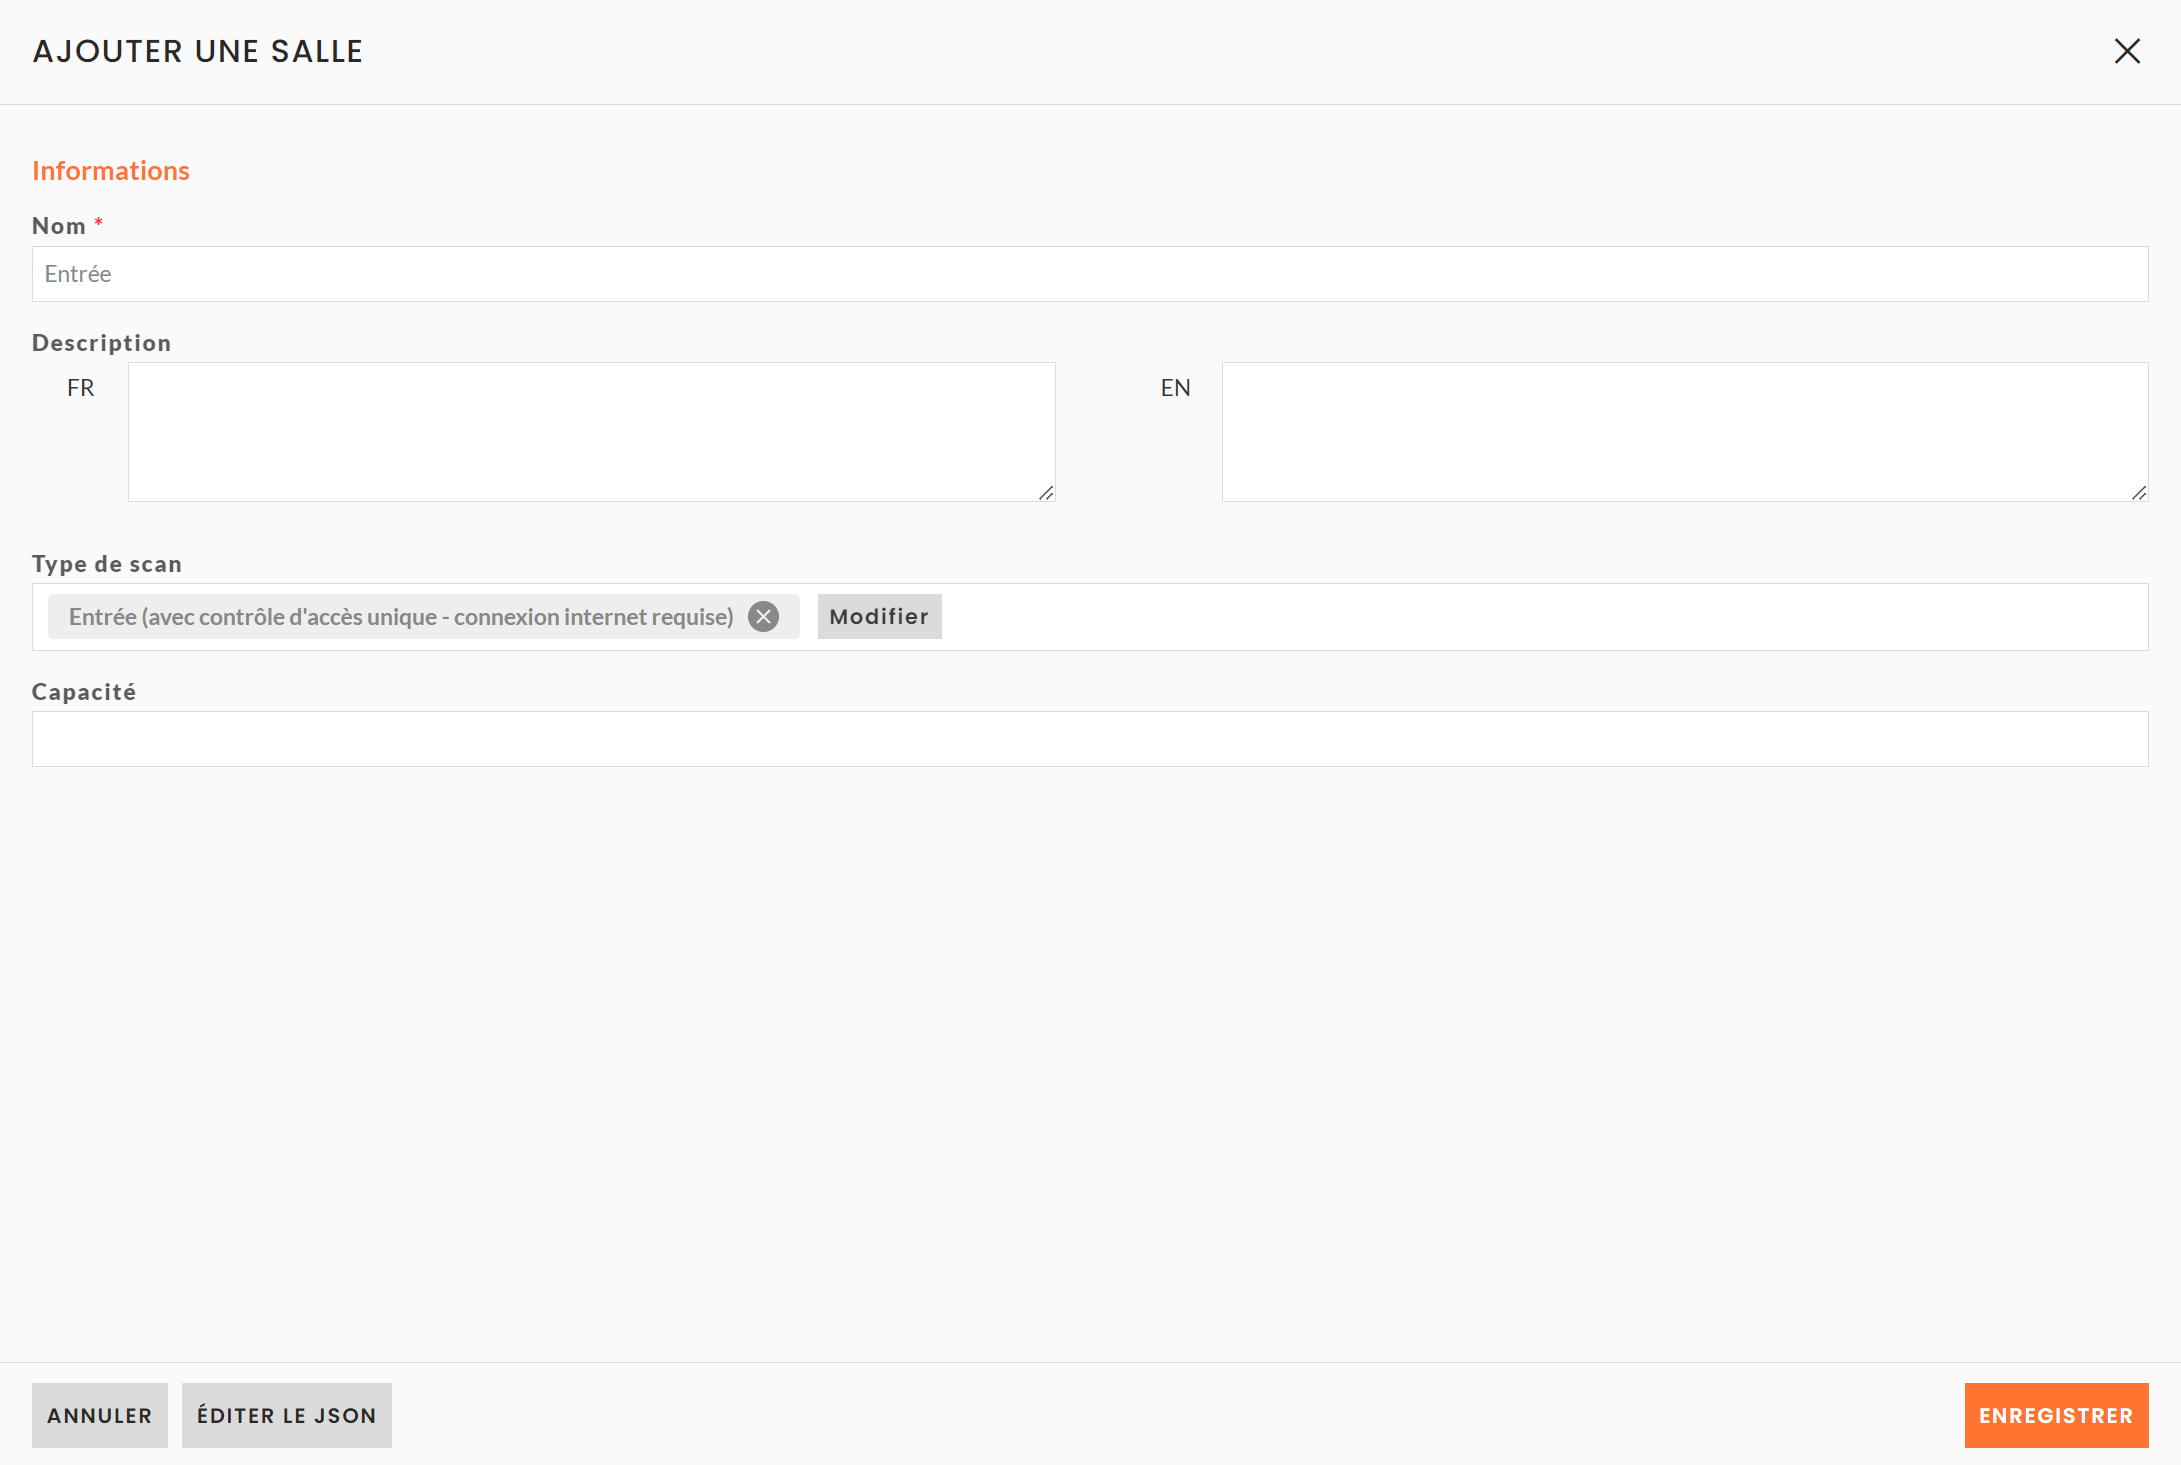
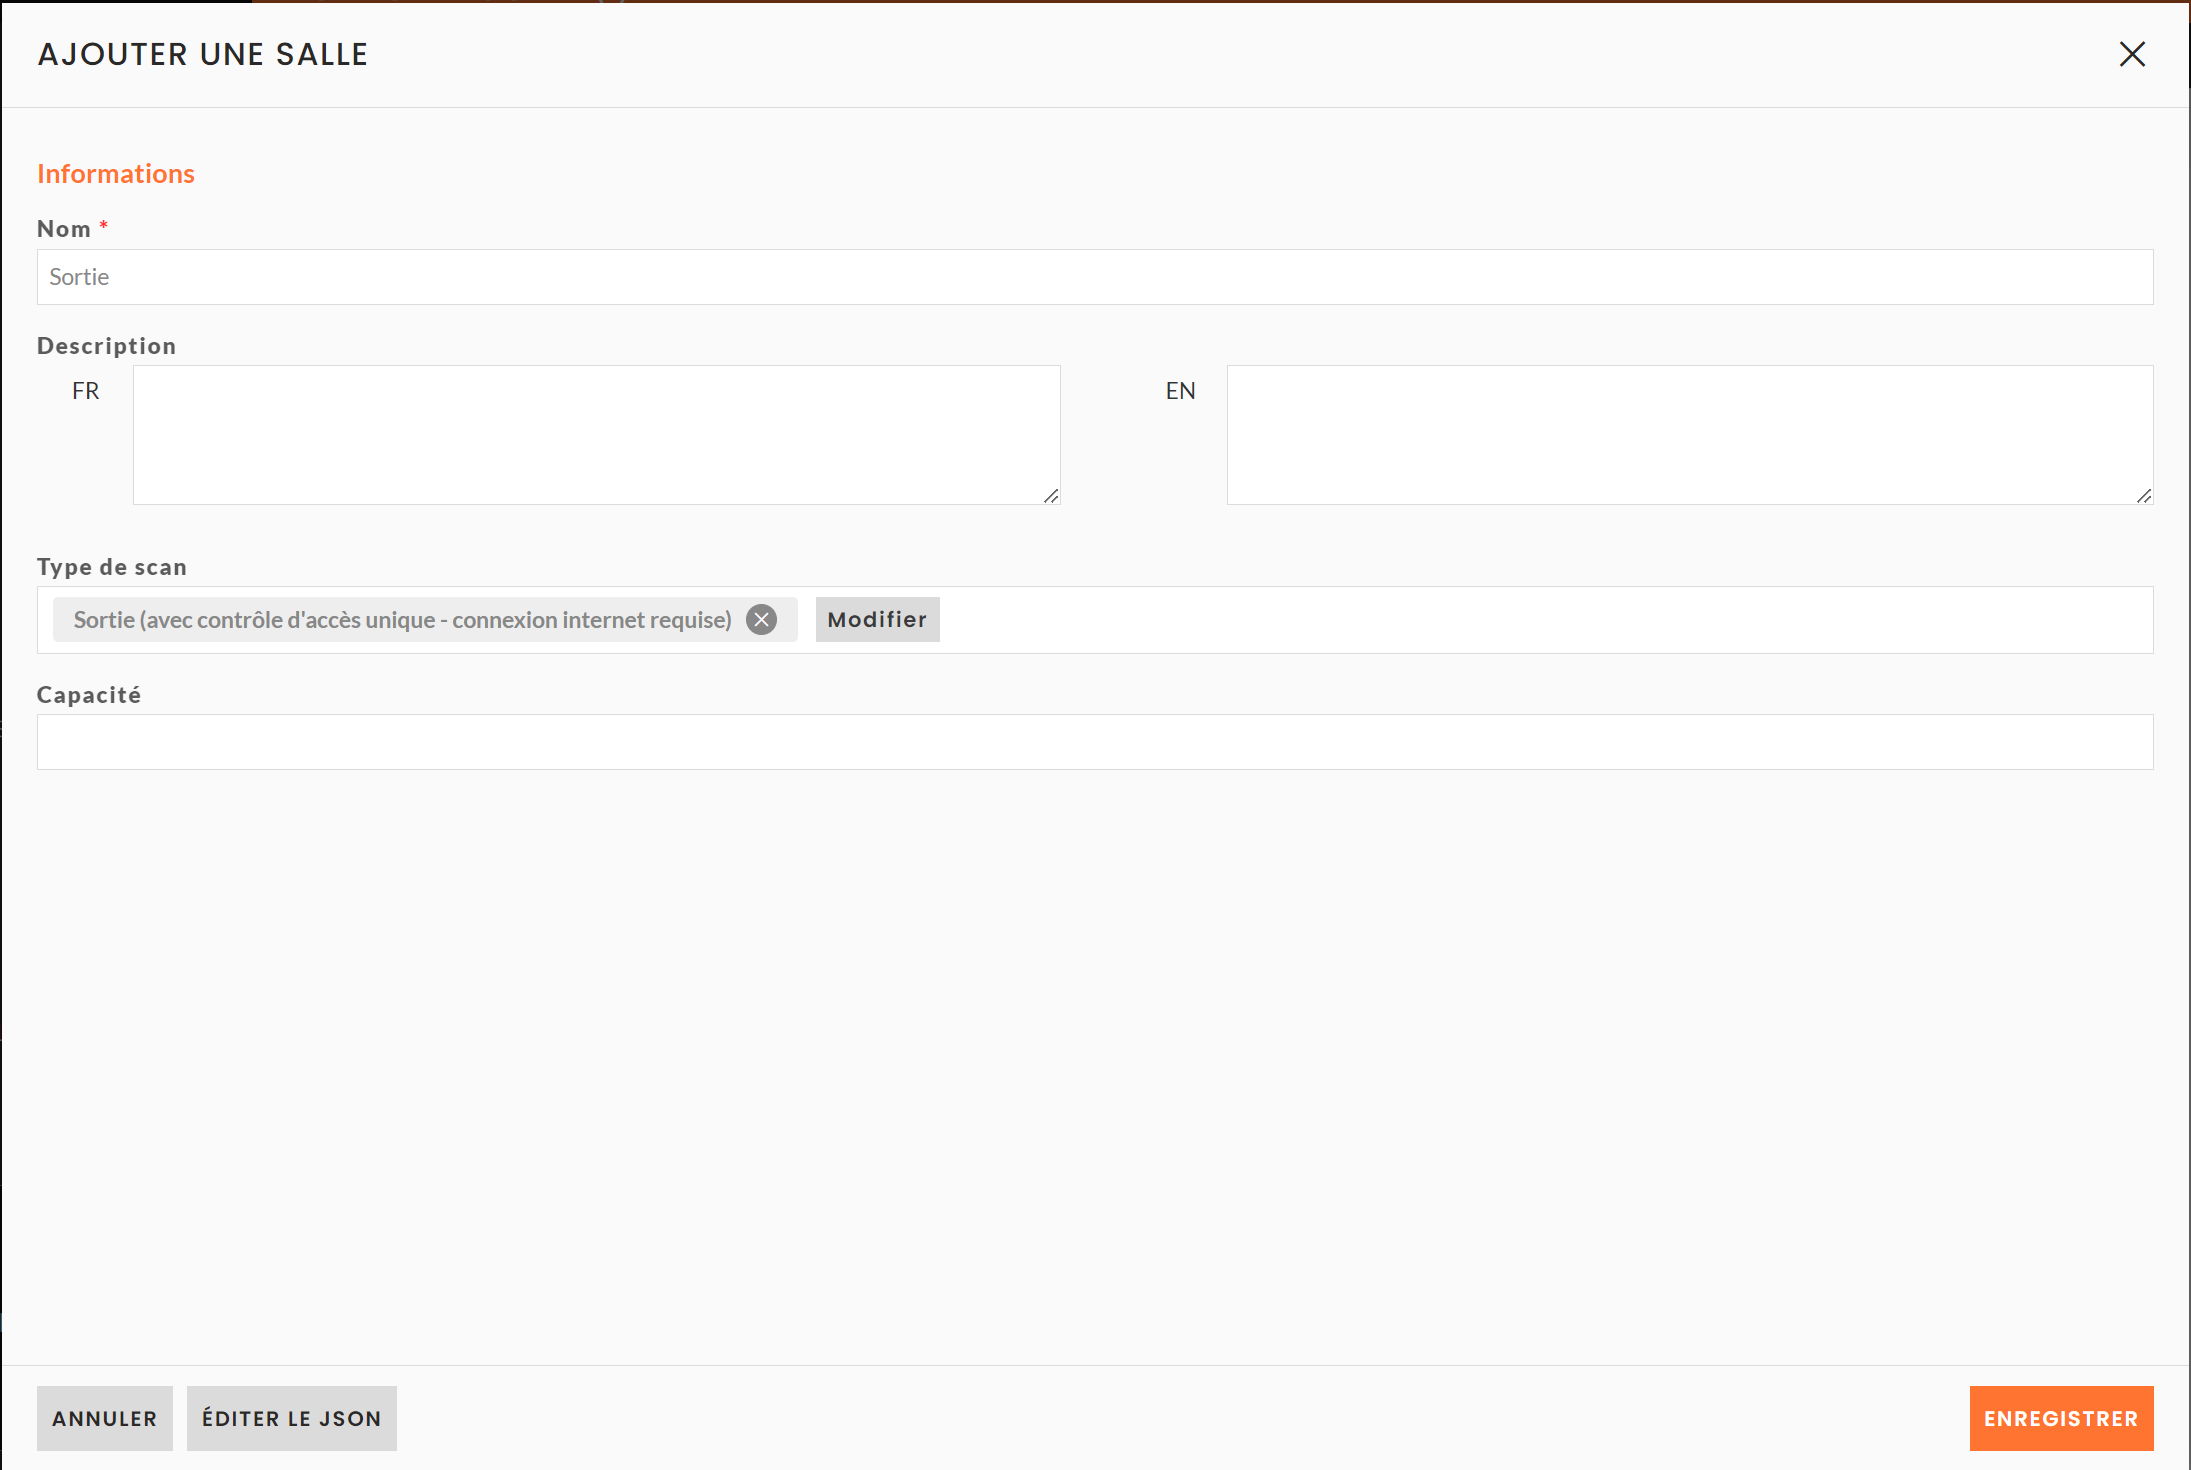
2. Then configure the output scan area
- Please proceed in exactly the same way, you will have to recreate a scan zone by clicking on "+"
- The zone will be the output zone and on custom fields in type of Scan please fill in Output (with single access control - internet connection required), fill in the desired capacity (not required), then save.
Once you have created your entry and exit zones, you will find them in the INWINK ONSITE > Scan Zone tab.
Then, please enter a time slot by clicking on the clock, add a time slot by clicking on "+" follow the steps and save.

Setting up the gauge monitoring
You will be able to consult on your dashboard the number of participants currently present on the event.
To do so, you must configure the indicator on the dashboard.
1. Go to your dashboard: My event tab > Dashboard
2. Add a new indicator in the category "On site" > "No. of people entering/leaving".
3. Save
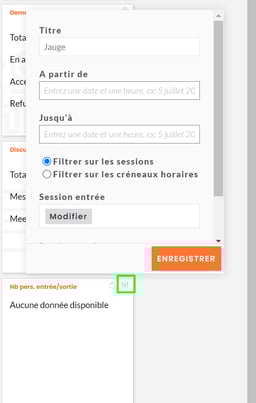
4. Configure this indicator by clicking on the configuration tab located on the top right of the indicator by :
- giving it a name
- by FILTERING ON TIME SLOTS
- by choosing the configured time slots in the scan areas: input and output
5. Save your dashboard.