➡️ Before creating your schedule, check that you have created the email to be scheduled.
To schedule emailing for your event:
Go to your event's/community's back office > Emailing tab > Automatic Sending > then click on the "Access the grid" button on the "Scheduling" card: 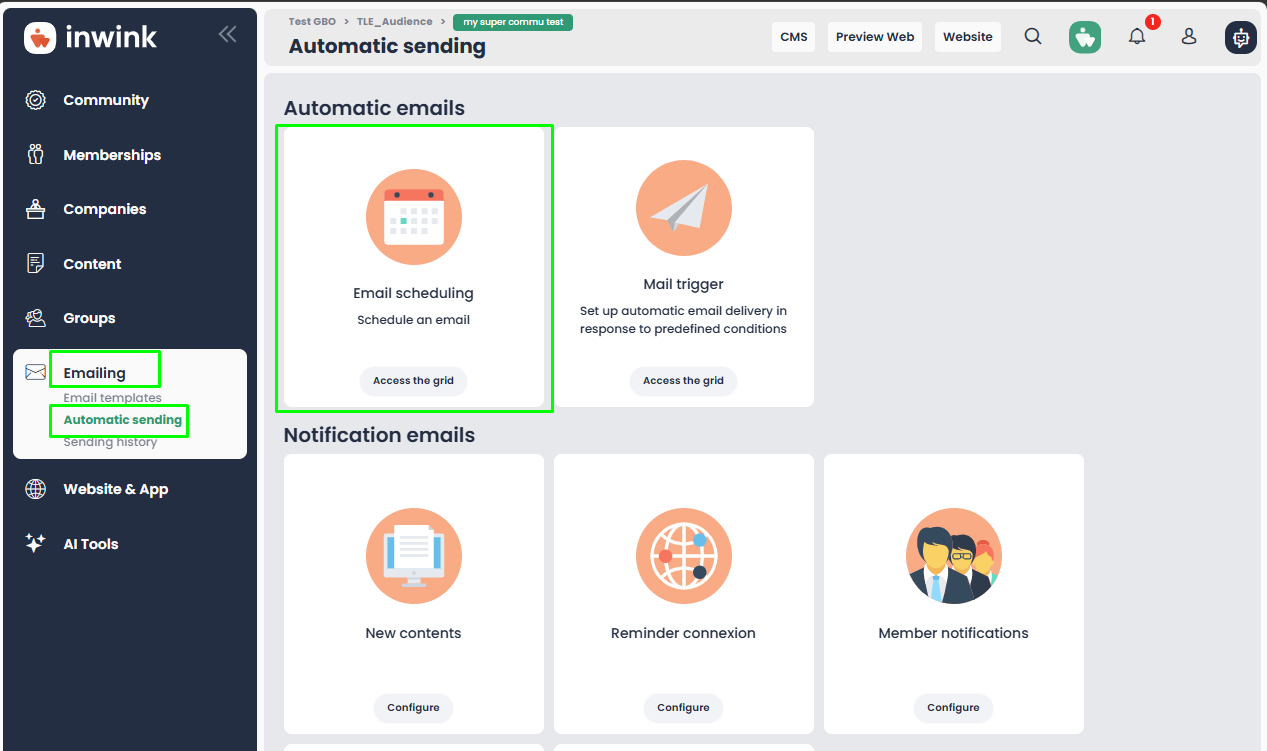
Once you've arrived at the new view, click on the "+" button to create a program.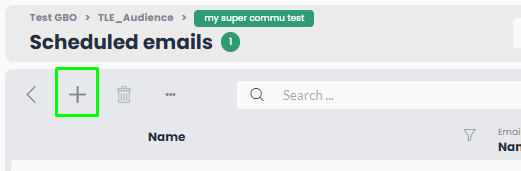
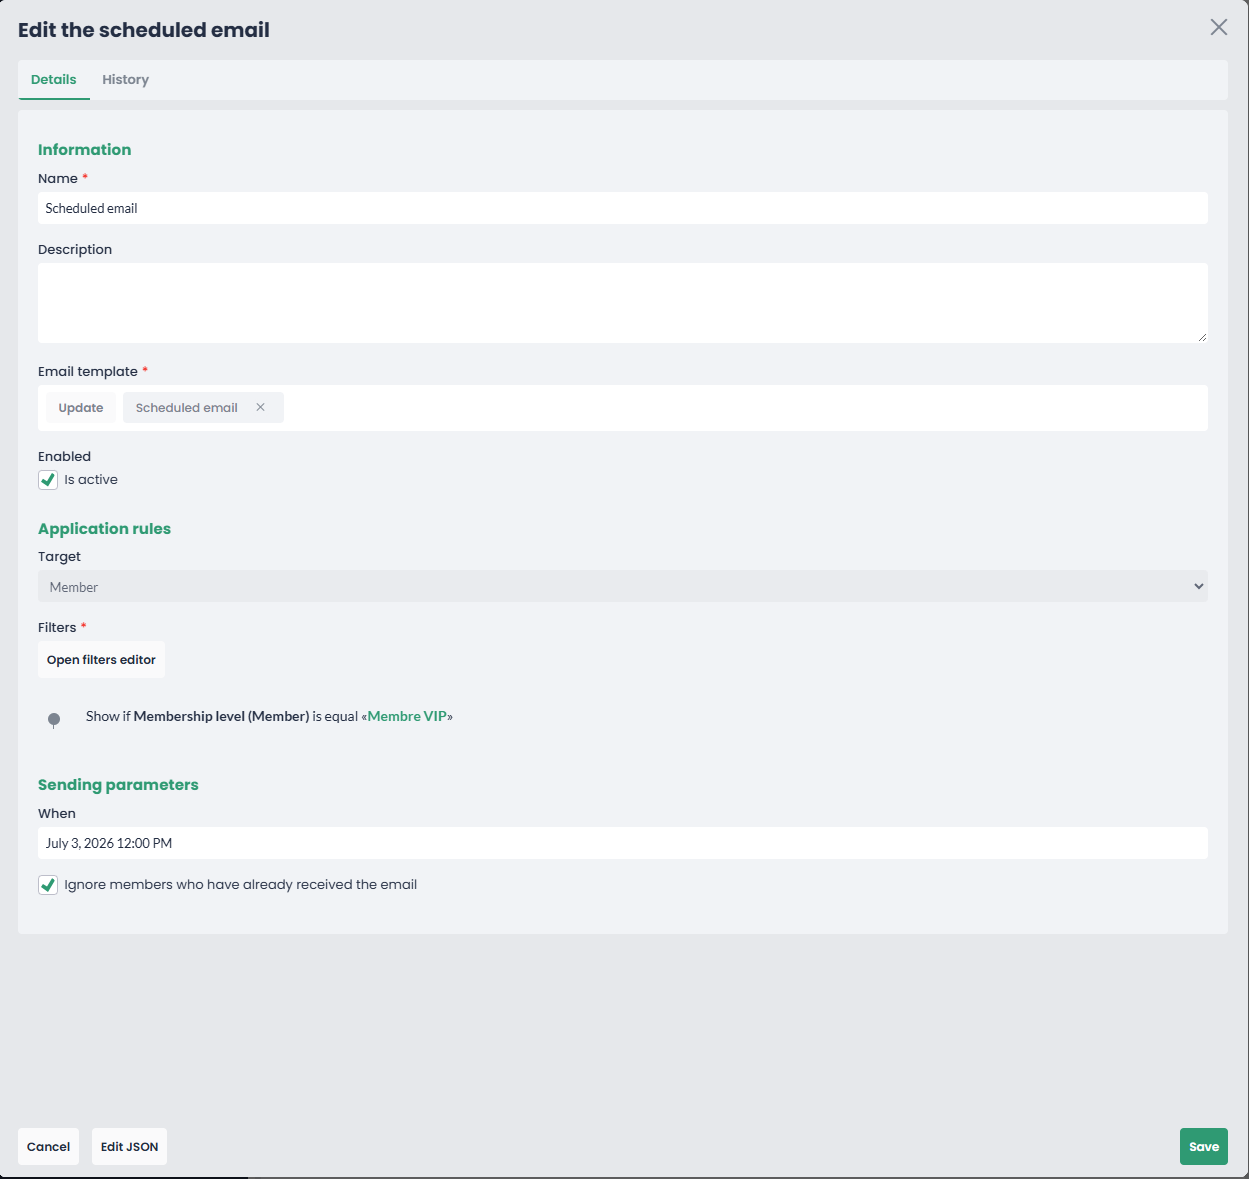
- Name: name of your program
- Description: fill in this option if you wish to add a description
- Email template: select the email template you wish to send
- Enabled: by checking this option, you will activate the schedule and the email will go out on the desired date.
- Target: include the email's target (you can't modify it, as it's automatically indicated when the email is created)
- Filters: filter the population to whom you wish to send this email. By selecting the email, the target will be determined and therefore the fields attached to it will be presented in the filter (for example, if you choose a person type email, you'll be able to filter on the fields attached to participants/members)
- When :
- Custom date: select a specific date and time
- Event only:
- Before the event start date: select a precise number of days/hours/minutes before the start date of your event (set in the Configurations tab of your event back-office)
- After the event start date: select a specific number of days/hours/minutes after the start date of your event (indicated on the Configurations tab in your event's back office)
- Before the event end date: select a specific number of days/hours/minutes before your event's end date (indicated on the Configurations tab in your event's back office)
- After the event end date: select a specific number of days/hours/minutes after your event's end date (set in the Configurations tab of your event's back office)
- Ignore people who already received the email: if you tick this option, people who have already received the email attached in the "Email template" box will not receive it when it is sent via scheduling.
Once all this information has been entered and your program has been set up, click on the "Save" button. The notification center will open to let you know that your schedule has been created.
A notification will appear, informing you of the success of the programming.
📢 Possible actions on the grid :
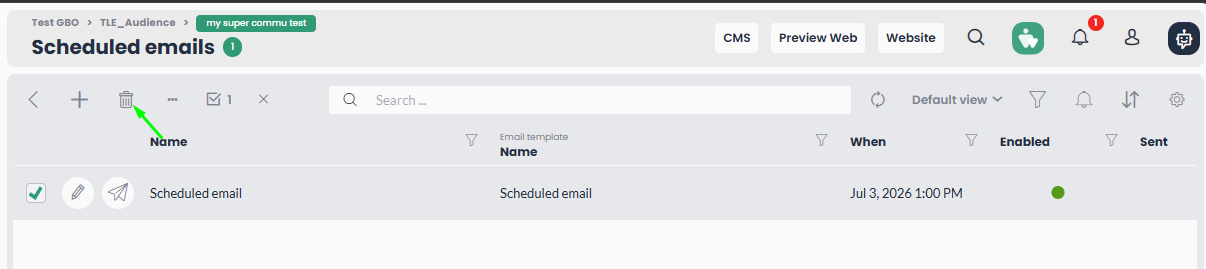
- Delete a schedule: select the desired program > click on the garbage can:
- Edit a schedule: you can edit the schedule you've created and make any changes you like, until the email is sent
- View a sent schedule: you can edit the schedule you have sent, but you will no longer be able to make changes to it (the fields will be grayed out).
There are two ways to make sure an email has been sent:
-
- Go to the sending history tab (Emailing > Sending history)
- Consult the "Sent" column to check the status of the message. A green dot indicates success (if the dot is grayed out, the program has not yet been sent).
