/‼️\ IMPORTANT
As of 14 February 2025, the use of 'event.inwink.com' as a domain name is no longer permitted.
As of March 28, 2025, websites that still rely on the default domain 'event.inwink.com' will be inaccessible.
(This domain is currently used when a site is published without a specified custom domain.)
In this article
Identification du type de site
1. Domain Configuration in inwink
2. DNS Configuration with the Domain Registrar (Host)
Composition of a domain name
To run a website, you need to set up a domain name.
This is made up of three elements:
- A prefix or sub-domain: www
- A radical or domain name: the name of the site
- An extension: .fr/.com/.org/...
These elements or fragments are added to the https:// protocol and constitute the URL of the site.
inwink lets you configure a specific domain name, provided it is a subdomain (or CNAME entry), for example :
www.inwink.com
It is not possible in inwink to set up a domain name without a sub-domain (root or A entry), for example :
www.inwink.com
A sub-domain is simpler to configure, better for referencing and more industrial.
If you wish to communicate on a domain name without a sub-domain (root or A entry), you will need to :
- create a sub-domain for your inwink event/community, which you will use to publish your inwink site
- use your domain name provider to automatically redirect your root domain name to your sub-domain configured for your site in inwink
Tiny URL or Website key URL
A shortened URL, or ‘tiny URL’, is designed to make links easier to remember and use.
In inwink, this shortened URL, also known as the website key URL, is used to uniquely identify an event or community associated with a personalised domain name. This key URL is added to the domain name to form the full address, making it easier to access sites.
Example : https://www.inwink.com/e/the-event
In this example, ‘the-event’ is the key URL, created in the ‘General information’ section of the event itself.
💡 This tiny URL can be renamed, for example, so that the active edition of an event is online while the next edition is being prepared:
- www.inwink.com/e/my-event-paris
- www.inwink.com/e/my-event-lyon
⇒ Point to the current edition of the two events
During this time, it is possible to prepare the following editions
- www.inwink.com/e/my-event-paris-2025
- www.inwink.com/e/my-event--lyon-2025
When it's time to switch over, because the sites are ready:
-
- Simply rename
"../my-event-paris" to "../my-event-paris-2024"
(to archive it) - and publish the sites for the new editions.
- Simply rename
Identifying the type of site
Between the domain name and the key URL of the website, there is a letter :
/e/ ou /c/
These letters are used to identify from the URL that the site is :
- an event: /e/
- a community: /c/
Note that it is not possible to delete/modify these identifiers.
Adding a personalised domain name
1. Configuring the domain name on the inwink side
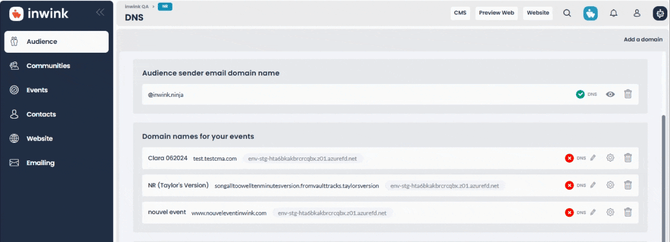
Go to the audience back office
AUDIENCE > DNS and click on ‘Add a domain’.

You can add either :
- A specific or root domain name* for a community
- A forwarding domain name to send emails
(See : Configure your email/whitelabelling domain name) - A specific domain name for an event
🖍️ For each audience, only one root domain name and one email forwarding domain name are possible.
Example of configuring a root domain name:
Prerequisite: A community must first be created and published (publish all) in order to associate it with the root domain name.
(To find out how to create a community, see: Create a community)
Once published, published pages can be deactivated if the site is not intended to be used.
It is nevertheless possible to use the home page as a welcome page for the root domain.

Select the community to be defined as the root community, tick the ‘Define as root community’ box and enter the domain name to be associated with it:
After clicking Next, step 3/3 summarises the operation:

Once saved, the configuration is indicated as being in progress:
A few minutes later, a pop-up will confirm the end of the configuration on the inwink side and ask you to refresh your browser, then click on YES :
This procedure is also valid for configuring a specific domain name for an event or a community. Only the definition as root site will not be carried out in these two cases.
The configuration of a shipping domain name to send emails is covered in this article :
Configure your email/whitelabelling domain name
2. DNS configuration with the domain name manager (hosting provider)

The status has changed from ‘Configuration in progress’ to ‘DNS’.

You can now view the DNS configuration using the edit pencil:

The information to be communicated or configured on the domain name manager side is present.
In this example, the values to be retrieved are:
- For the CNAME type:
www then inwink-fd-eu2-prd-cwdxbghkbyd5egfx.a02.azurefd.net.
TTL : 10800
- For TXT type:
_dnsauth.www puis _w4j99p0f8puzs938gdjip3ma5ysoa4y
TTL : 3600
In the example above, the first term corresponds to the name of the sub-domain and the last to the value of the record, so:
- _dnsauthwww corresponds to the sub-domain to be declared
and
- _w4j99p0f8puzs938gdjip3ma5ysoa4y to the value.
The TTL (Time to live) value contained in the DNS record determines the number of seconds that elapse before new modifications made to the record are taken into account.
On the manager side, you can leave the default configuration for the TTL.
‼️ Important:
Apart from the inverted commas, all characters are required for the record.
The full stop at the end of the value line for the CNAME type is as important as the rest of the text.
To avoid making mistakes, it is preferable to copy and paste.
The TXT value indicated by inwink is valid for one week.
After this time, the configuration will have to be recreated.
3. Checking the configuration on the inwink side
Once the information has been entered on the domain name manager's side, it can take up to 24 hours* for the change to be propagated on the Internet.
On the inwink side, verification is carried out by editing the configuration again and then clicking on the VERIFY button:

Don't hesitate to click on the Check button several times during the 24-hour period*.
(*) Average time generally observed. Hosting companies sometimes announce delays of up to 48 hours.
Below you will find online help for 3 domain name managers that are regularly used:
Click here to consult the documentation proposed by OVH
Click here to consult the documentation proposed by Gandi
Click here to consult the documentation proposed by GoDaddy
Additional information:
Certificate Authority
- If you limit the authorities authorised to generate a certificate for your domains using a DNS record of the CAA type, you will need to add Digicert as follows: yourdomain.com. 600 IN CAA 128 issue "digicert.com"
Modifying the event or community linked to a domain name
If you need to modify the event linked to a domain name (for example, to keep the same domain name as the previous edition of the event):
- Go to the back office > Audience > Configuration > DNS
- Click on the symbol ⚙️to the right of the event's domain name
- Click on modify, and select the desired event
- Click on validate
Related articles: