
Before you start
Make sure you have:
- the AI Pack in inwink;
- a paid Claude account;
- administrator rights for the relevant environment in inwink;
- the URL of the audience, event or community you want to work on;
- already clearly defined your need before getting started.
Step 1 — Choose the scope of your extension
Start by determining where your extension should be available.
It can be created at:
- audience level;
- event level;
- community level.
This choice is important because it determines the context in which Claude will work.
Step 2 — Connect Claude to inwink
Download Claude to your computer, then open it.
Go to your Account Settings > Connectors: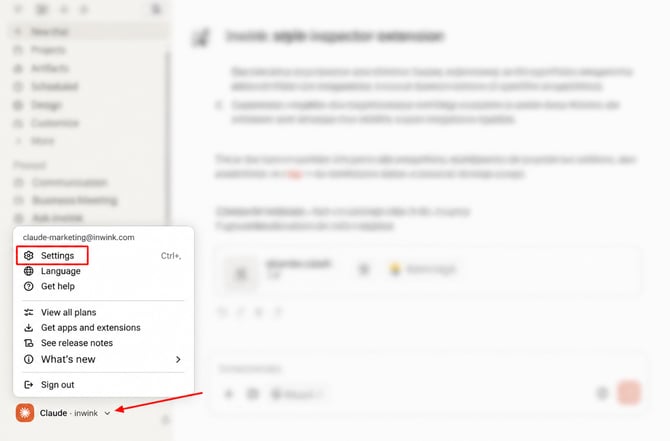
The inwink connectors are not directly available in the Claude connector directory. You therefore need to add them manually using their URLs.
From the Discover section, click Add and add the inwink connectors you need by entering their URLs: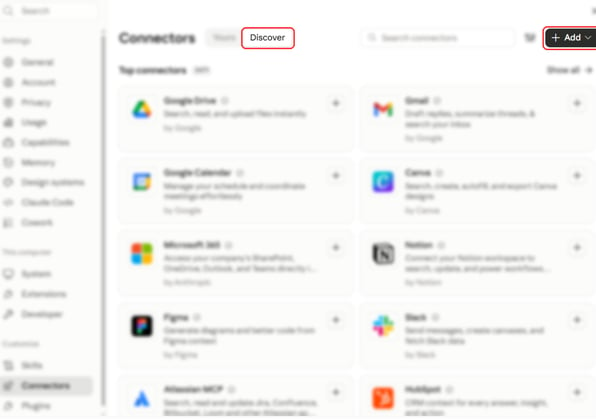
- inwink Data
https://mcp-data.inwink.com/mcp
To work with the data available in inwink DATA. - inwink Extensions
https://mcp-bo.inwink.com/mcp
To create and manage back-office extensions.
You can add only the connector you need, or add both. To create an extension that uses data from your inwink environment, we recommend adding both connectors.
An inwink login window will open so that you can authenticate. Sign in using an inwink account with administrator rights for the relevant environment.
Important: make sure you use the same inwink account that has access rights to the relevant audience, event or community.
Step 3 — Clearly define what you want to create
Before asking Claude to develop the extension, describe your need as precisely as possible.
Feel free to use ChatGPT to help you refine your prompt.
A good prompt can include:
- the context;
- the user profile;
- the problem you are trying to solve;
- the expected features;
- the required data;
- the desired interface;
- the different scenarios that need to be handled;
- the expected final result.
In particular, we recommend that you:
- think in terms of User Stories;
- use natural language;
- explain the context and the reason behind your request;
- work step by step rather than asking for everything at once.
Step 4 — Give Claude the link to your inwink environment
Always include the exact URL of the relevant environment in your request to Claude.
This can be the full URL of:
- your audience;
- your event;
- your community.
Claude can use this link to identify the correct environment and determine the scope in which the extension should be created.
Important: check the URL carefully before starting the creation process, especially if you manage several audiences or events.
Step 5 — Start your request in Claude Code
Send your prompt in a new Claude Code conversation.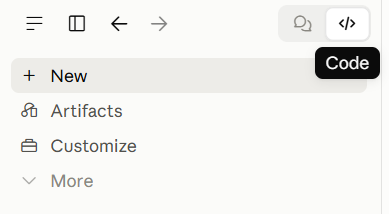
We recommend using Sonnet 5 or Opus 5 when submitting your prompt.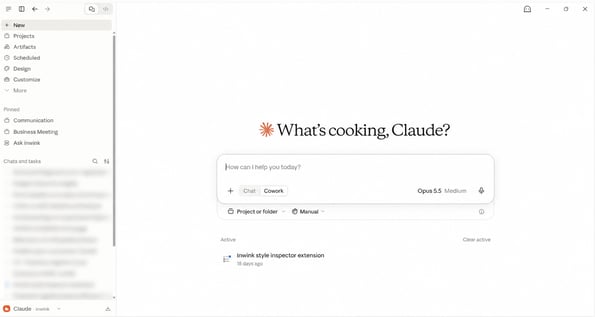
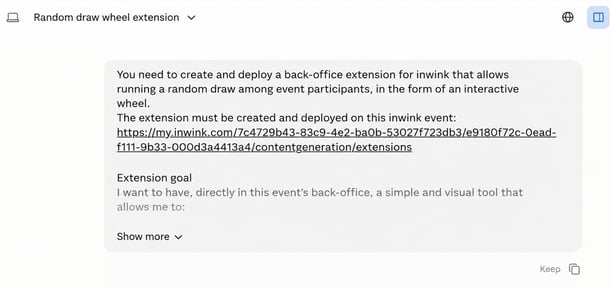
Claude will start by analysing your request and the available resources.
You can follow the progress of its work.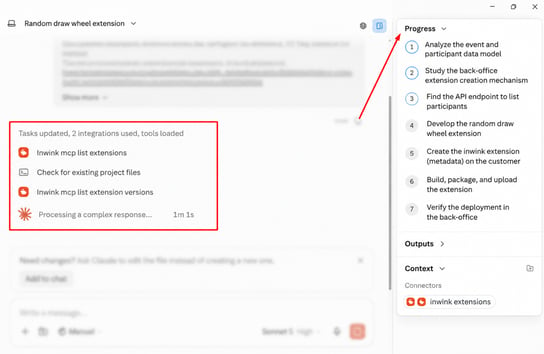
Depending on your request, Claude may:
- check the structure of the available data;
- identify the appropriate resources;
- rephrase its understanding of your request;
- suggest an implementation plan;
- generate a first version;
- provide a preview of the interface.
Claude may also request certain permissions that are required to carry out the requested actions. Take the time to review the proposed actions before approving them.
Claude may also ask you questions as it progresses and suggest different response options.
Claude's work may take a few minutes to complete.
Step 6 — Review the first version
The first version is not necessarily the final version.
Check that the extension meets your initial requirements, including:
- the data displayed;
- how the buttons work;
- filters;
- specific scenarios or edge cases;
- and any other expected behaviour.
If something needs to be changed, simply continue the conversation with Claude and explain precisely what you would like to adjust.
For example, you can ask Claude to add new elements to your extension, such as:
- simplifying the interface;
- displaying the total number of participants;
- displaying a button only when a specific condition is met.
Creating an extension is therefore an iterative process: you can gradually correct and refine your request.
Step 7 — Test the extension with real data
Once you are happy with the result, test the extension in its real environment.
In particular, check that:
- the correct data is loaded;
- users have the appropriate permissions;
- no unnecessary data is exposed;
- the different use cases work properly;
- any potential errors are handled correctly.
The extension must rely on inwink's mechanisms and APIs and must not access the underlying data directly.
Step 8 — Deploy the extension in inwink
Once your tests are complete, ask Claude to deploy the extension to the specified back office.
Claude may also offer to provide you with the extension folder so that you can download and upload it yourself as an alternative solution.
You can therefore import the extension directly into the back office using the ZIP file.
We also recommend keeping all files created with Claude, including your extensions, in a dedicated folder on your computer.
Step 9 — Find and publish your extension in inwink
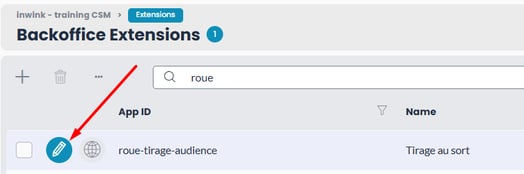
Go to your Audience back office > AI Tools > Back-office extension management: 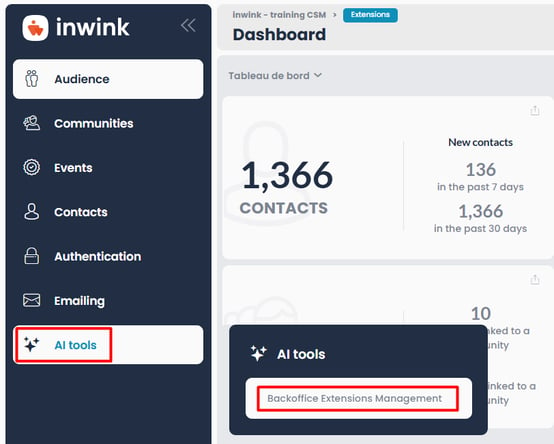
Here, you can find the extensions that have been created for this environment.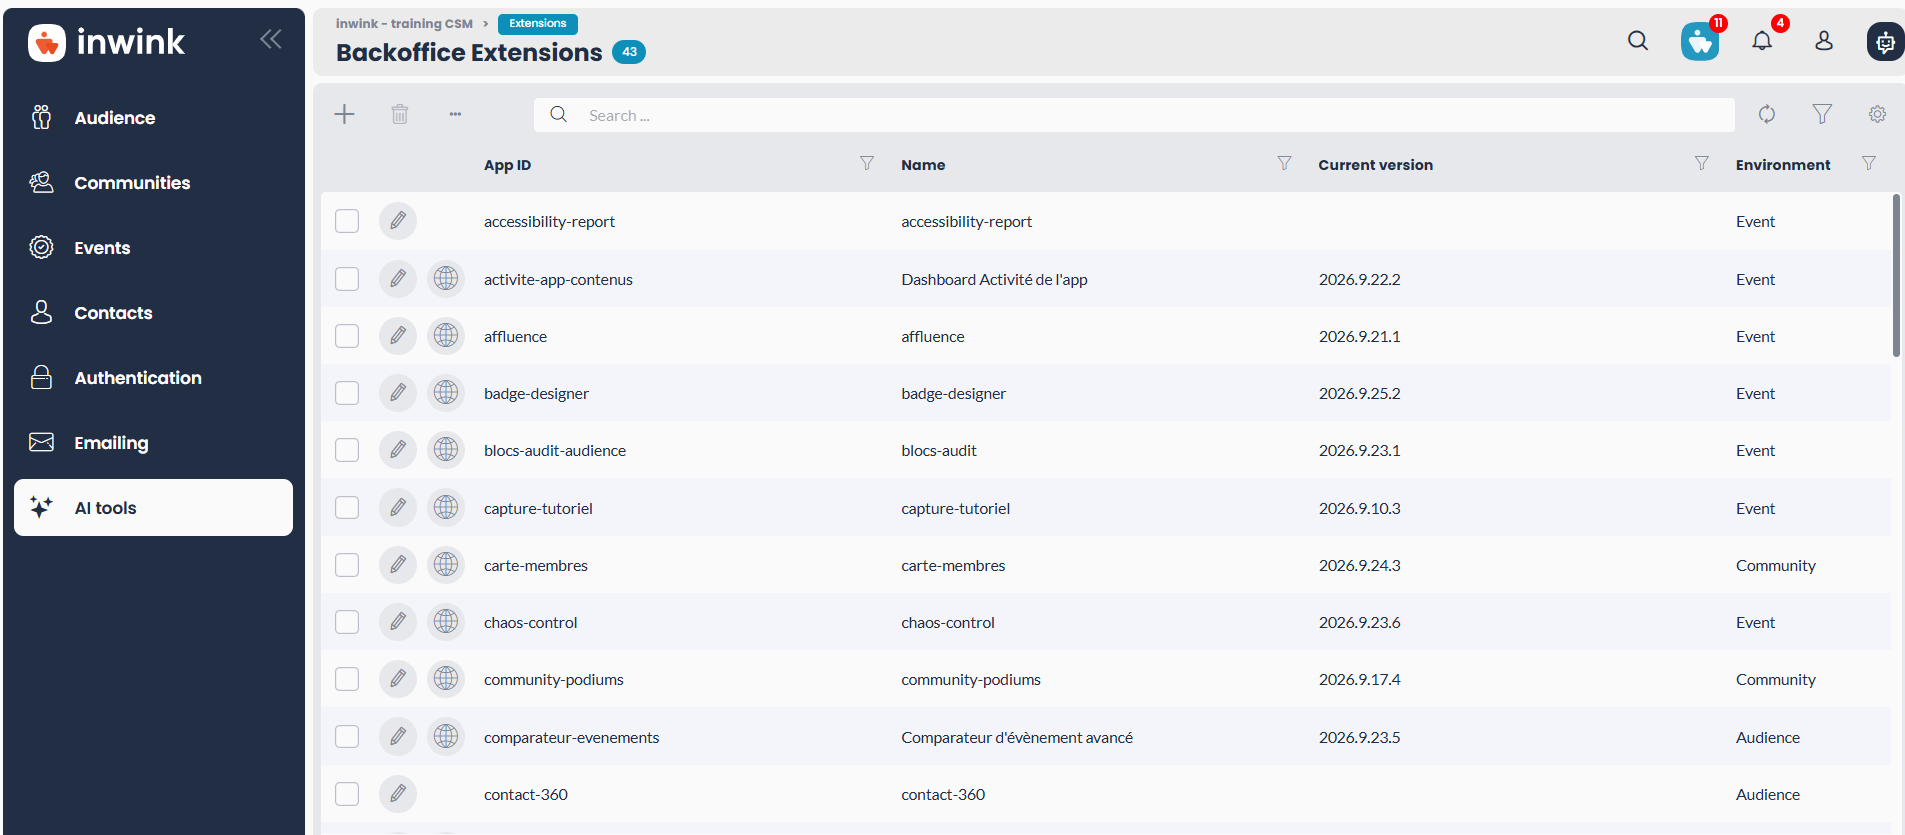
This section allows you to:
- edit an extension:
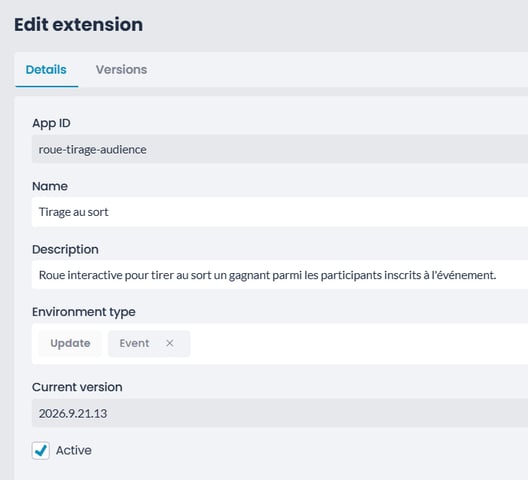
- view the extension details:
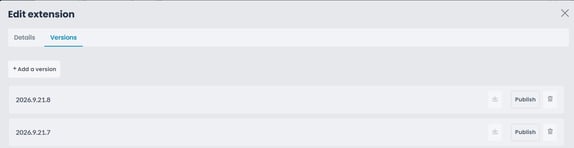
- view the different versions of your extension from the Versions tab:
- view its history
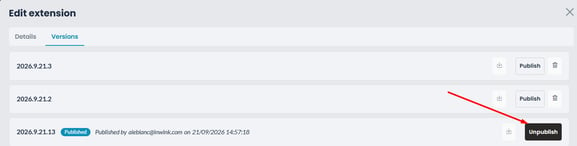
- publish or unpublish the extension:
- upload a new version of the extension using a ZIP file:
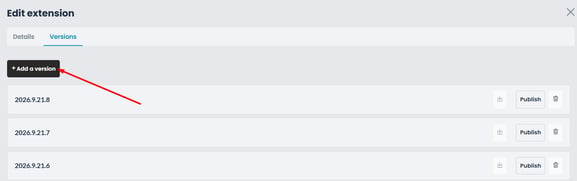
This means you remain in control of which version is actually available in your inwink environment.
Step 10 — Update your extension
An extension is not fixed permanently.
If your needs change, you can return to Claude and request modifications.
A new version can then be tested and published directly in inwink.
In your extension settings, make sure that the published version is the latest one.
Step 11 — Use your new extension
To access your extension, go to the environment where it was created and click Open extension.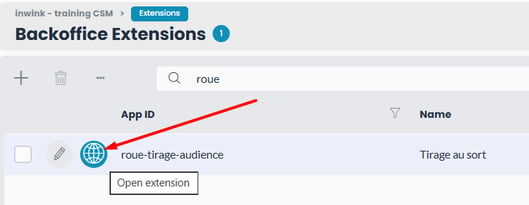
Your extension will open in a new tab.
If you are working from an audience, use the selector to choose the event on which you want to use the extension.:

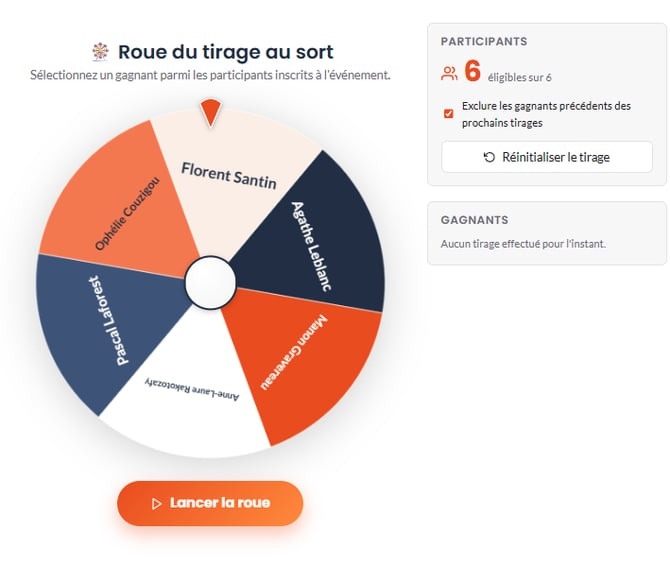
You can now start using your extension:
A few best practices
- Describe your business need before discussing technical implementation.
- Ask Claude to check which data and capabilities are actually available before developing the extension.
- Work progressively: a simple first version is often easier to test and improve.
- Always test an extension before publishing it for your teams.