
Before you start
Make sure you have:
- the AI Pack in inwink;
- a paid ChatGPT account;
- the required permissions for the relevant scope in inwink;
- the URL of the audience, event, or community you want to work on;
- a clearly identified need before getting started.
Please note: This tutorial is based on the ChatGPT interface as of October 15, 2026. As ChatGPT is regularly updated, some menu names, navigation options, or steps may change. The instructions below reflect the process available on that date for connecting inwink to ChatGPT.
Step 1 — Choose the scope of your extension
Start by determining where your extension should be available.
It can be created at:
- audience level
- event level
- community level
This choice will help you provide ChatGPT with the correct inwink environment to work on. Inwink
Step 2 — Add the inwink plugins to ChatGPT
Sign in to your ChatGPT account (you must have a paid account).
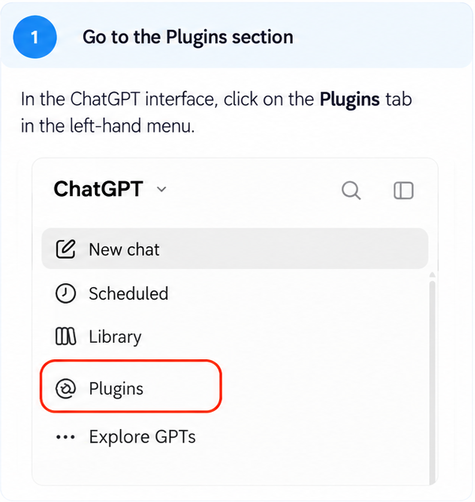
From the ChatGPT interface, click on Plugins in the left-hand sidebar.
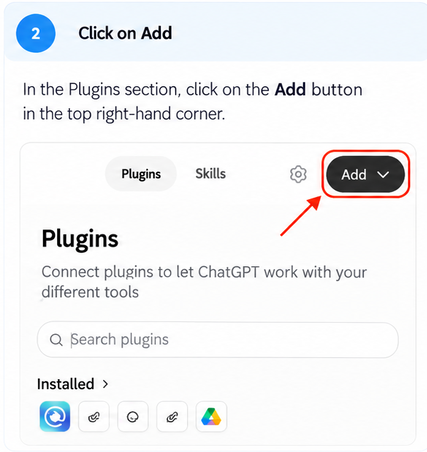
In the Plugins section, click the Add button in the top-right corner.
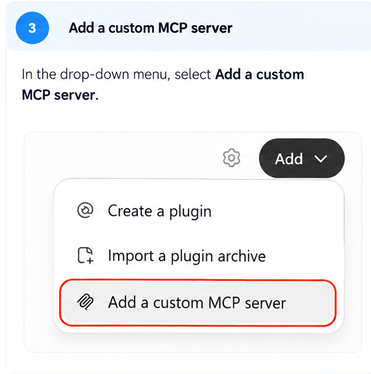
From the drop-down menu, select Add a custom MCP server.
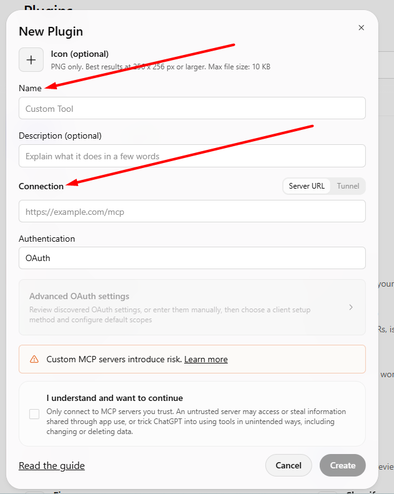
Then enter the following information:
- the plugin name;
- its URL in the Connection field;
- then check the “I understand and want to continue” option.
You can add two inwink plugins depending on your needs:
- inwink Data
https://mcp-data.inwink.com/mcp
To work with the data available in inwink DATA. - inwink Extensions
https://mcp-bo.inwink.com/mcp
To work on creating and managing back-office extensions. Inwink
To create and manage back-office extensions.
Once you have entered the required information, check the “I understand and want to continue” option, then confirm the plugin setup.
Step 3 — Connect the plugin to your inwink account
An inwink login window will appear.
Click the button provided to sign in with inwink.
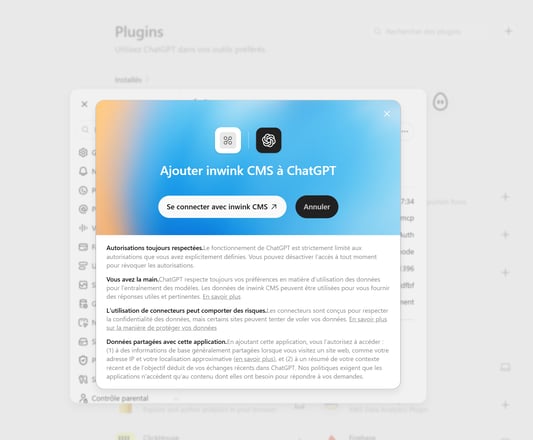
Then sign in using your inwink account.
Once the connection is complete, the plugin is added to ChatGPT and can be used.
Important: make sure you use the inwink account that has the required permissions for the relevant scope, especially if you have access to several audiences, events, or communities.
Step 4 — Start working with ChatGPT
Once the inwink plugins are installed and connected, you can start a new conversation in ChatGPT and submit your prompt.
You have two main options for starting your work: use a standard ChatGPT conversation or use Codex.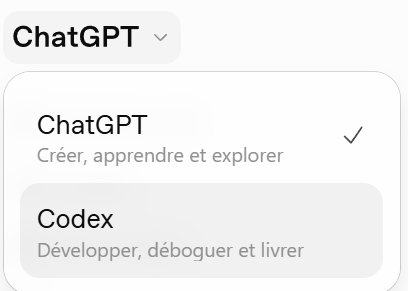
Use a ChatGPT conversation
A standard chat is suitable for:
- describing your need;
- discussing it with ChatGPT;
- progressively refining what you want to achieve;
- asking questions;
- thinking through how your future extension should work.
It allows you to work conversationally and refine your request as the discussion progresses.
Use Codex
Codex is more focused on working directly with code and project files.
It can therefore be particularly useful when you start building your extension and several files need to be created or modified.
To use Codex directly on your computer, you need to install the ChatGPT desktop app.
You can then work in Codex while using the inwink plugins you previously connected.
In summary:
- use ChatGPT chat to define, explain, and refine your need conversationally;
- use Codex when you want to work more directly on the technical build and files of your extension.
Once your environment is configured, you can submit your prompt in ChatGPT or Codex.
Step 5 — Submit your request in ChatGPT
Send your prompt in a new ChatGPT conversation or in Codex.
ChatGPT will first analyze your request and the inwink resources you have given it access to through the plugins.
Depending on your request, it may:
- check the available data and resources;
- identify the tools required to complete your request;
- restate what it has understood;
- suggest the different implementation steps;
- start building the extension.
You can follow its progress directly in the conversation.
ChatGPT may also ask you questions to clarify certain aspects of your request or suggest several options when different approaches are possible.
In that case, take the time to provide the necessary details before it continues.
It may also ask you to approve certain actions performed through the inwink plugins. Always check the proposed action before authorizing it. Inwink
Step 6 — Review the first version
A first version is not necessarily the final version.
Check that the extension meets your initial requirements, including:
- the data displayed;
- the interface layout;
- how the buttons work;
- filters;
- available actions;
- specific cases included in your request.
If some elements do not match your needs, simply continue the conversation with ChatGPT and explain precisely what you want to change.
For example, you can ask it to:
- simplify the interface;
- add new information;
- add or modify a filter;
- move certain elements;
- modify a button or its behavior;
- hide a feature under certain conditions.
Creating an extension is therefore an iterative process: you can progressively correct, refine, and expand your request within the same conversation. Inwink
Step 7 — Find the extension created in inwink
When creating the extension, ChatGPT can declare your new extension directly in the inwink back office corresponding to the scope you provided.
Go to the back office where the extension is hosted, then open the relevant section.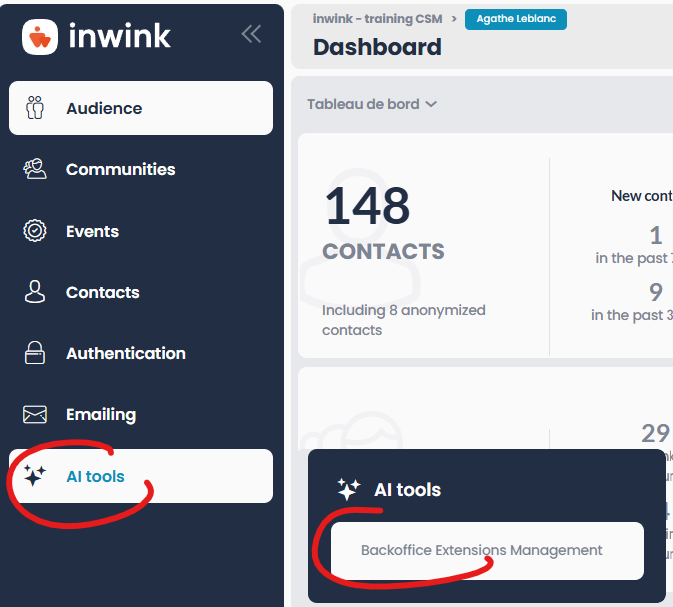
You can then find the extension that was created.
The extension now exists in your back office, but you still need to attach the version containing the files generated by ChatGPT. Inwink
Step 8 — Attach the ZIP file to your extension
ChatGPT generates the files required for your extension to work.
Download the ZIP file containing these files.
In the inwink back office, open the extension you previously created, then add this ZIP file as a new version of the extension.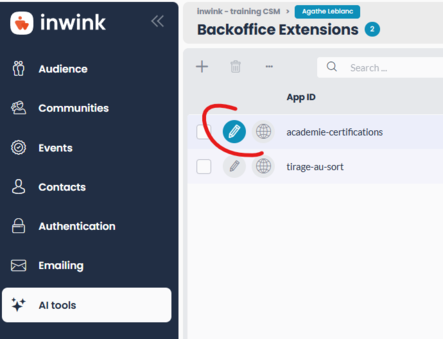
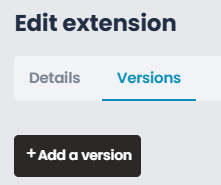
This step links the generated files to the extension declared in inwink.
We also recommend keeping the ZIP file and your extension files in a dedicated folder on your computer.
This makes it easier to retrieve a previous version or continue working on your extension later. Inwink
Step 9 — Manage your extension in inwink
From AI Tools > Back-office extension management, you can find the extensions created for your scope.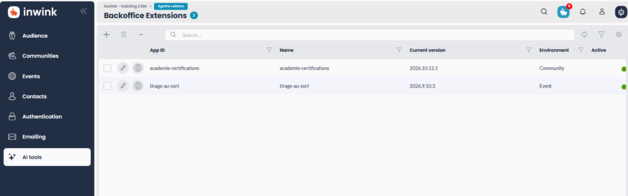
When editing one of your extensions, you can:
- view the main information about your extension;
- edit its information;
- view the different versions;
- check creation and publication dates;
- view its history;
- upload a new version using a ZIP file;
- publish or unpublish a version.
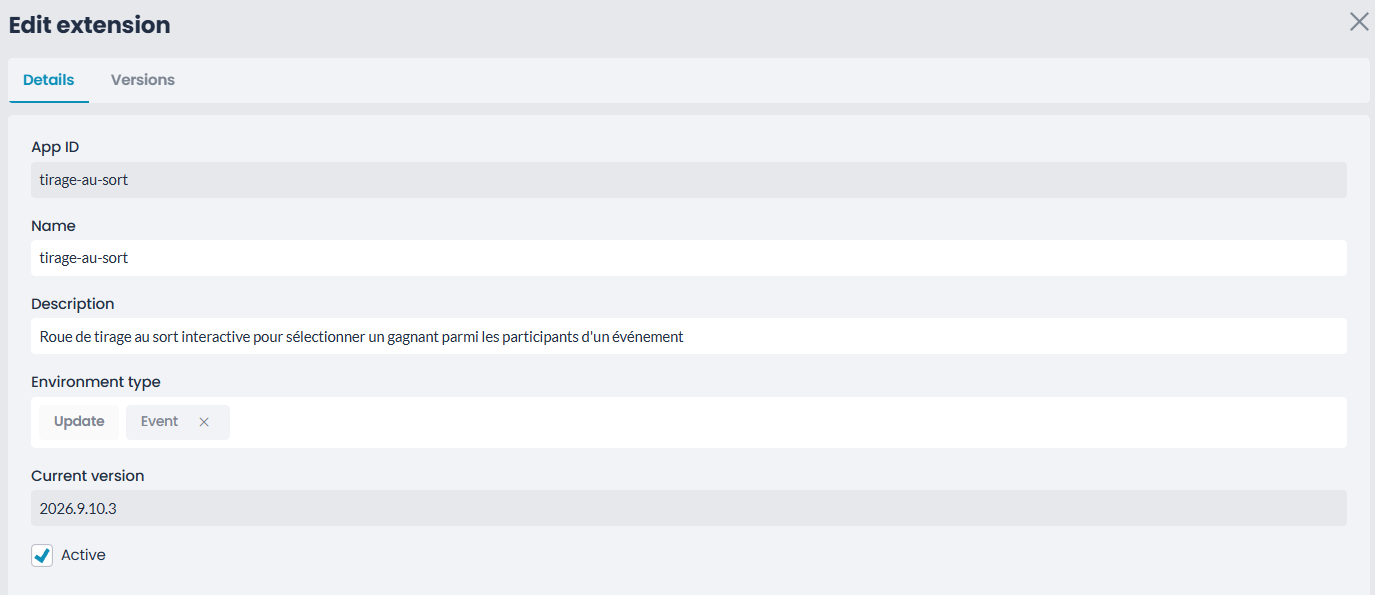
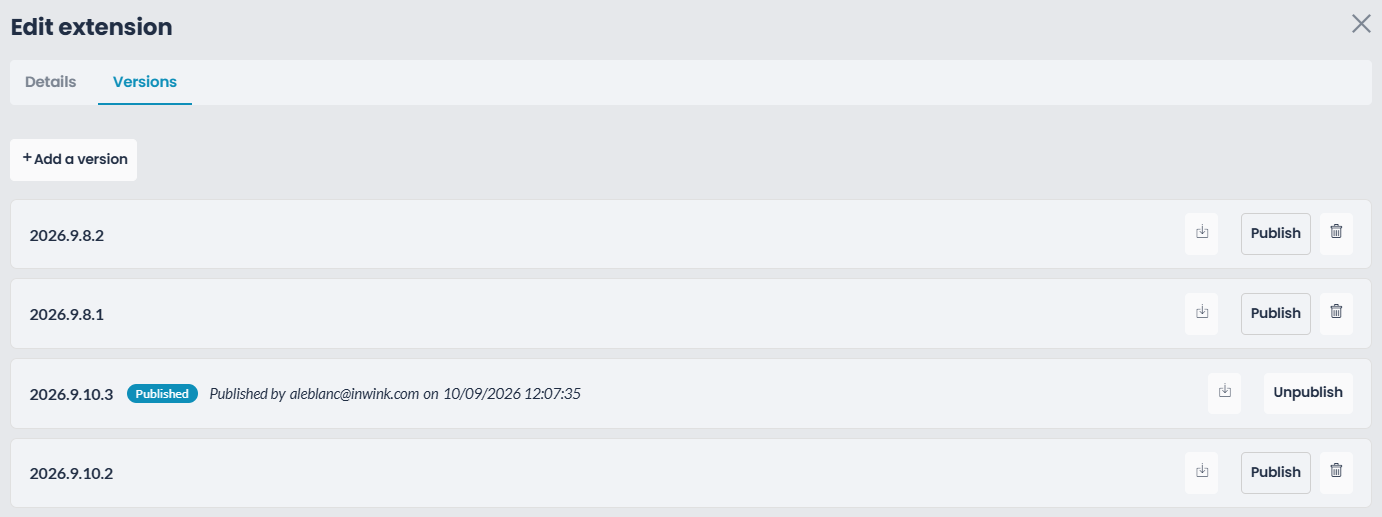
This means you remain in control of the version that is actually available in your inwink environment.
Before publishing a new version, always make sure it is the version you have just tested. Inwink
Step 10 — Update your extension
An extension is not fixed permanently.
If your needs change or you want to modify how it works, return to your conversation with ChatGPT or Codex and describe the changes you want.
For example, you can ask for:
- a new feature;
- an interface update;
- support for new data;
- a change to the operating rules;
- a behavior fix.
A new version of the ZIP file can then be generated.
Add it in the Versions tab of your extension, test it, and publish it once you are satisfied.
Always check which version is currently published to make sure it is the latest approved version.
A few best practices
- Start by describing your business need. Explain what you want to solve before specifying how the extension should be built.
- Always provide ChatGPT with the correct scope. In particular, check the URL of the relevant audience, event, or community.
- Work progressively. Start with a simple first version before adding new features.
- Answer ChatGPT’s questions. They often help clarify points that were not anticipated in the initial prompt.
- Review the proposed actions. When ChatGPT asks for permission to perform an action through an inwink plugin, check it before approving it.
- Always test your extension before publishing it.
- Keep your ZIP files. They make it easy to retrieve the different versions of your extension.
- Check which version is published in inwink. The latest version added is not necessarily the one currently available to users.
- Continue in the same conversation when updating the extension. This allows ChatGPT to retain the context of the initial need and the changes already made.